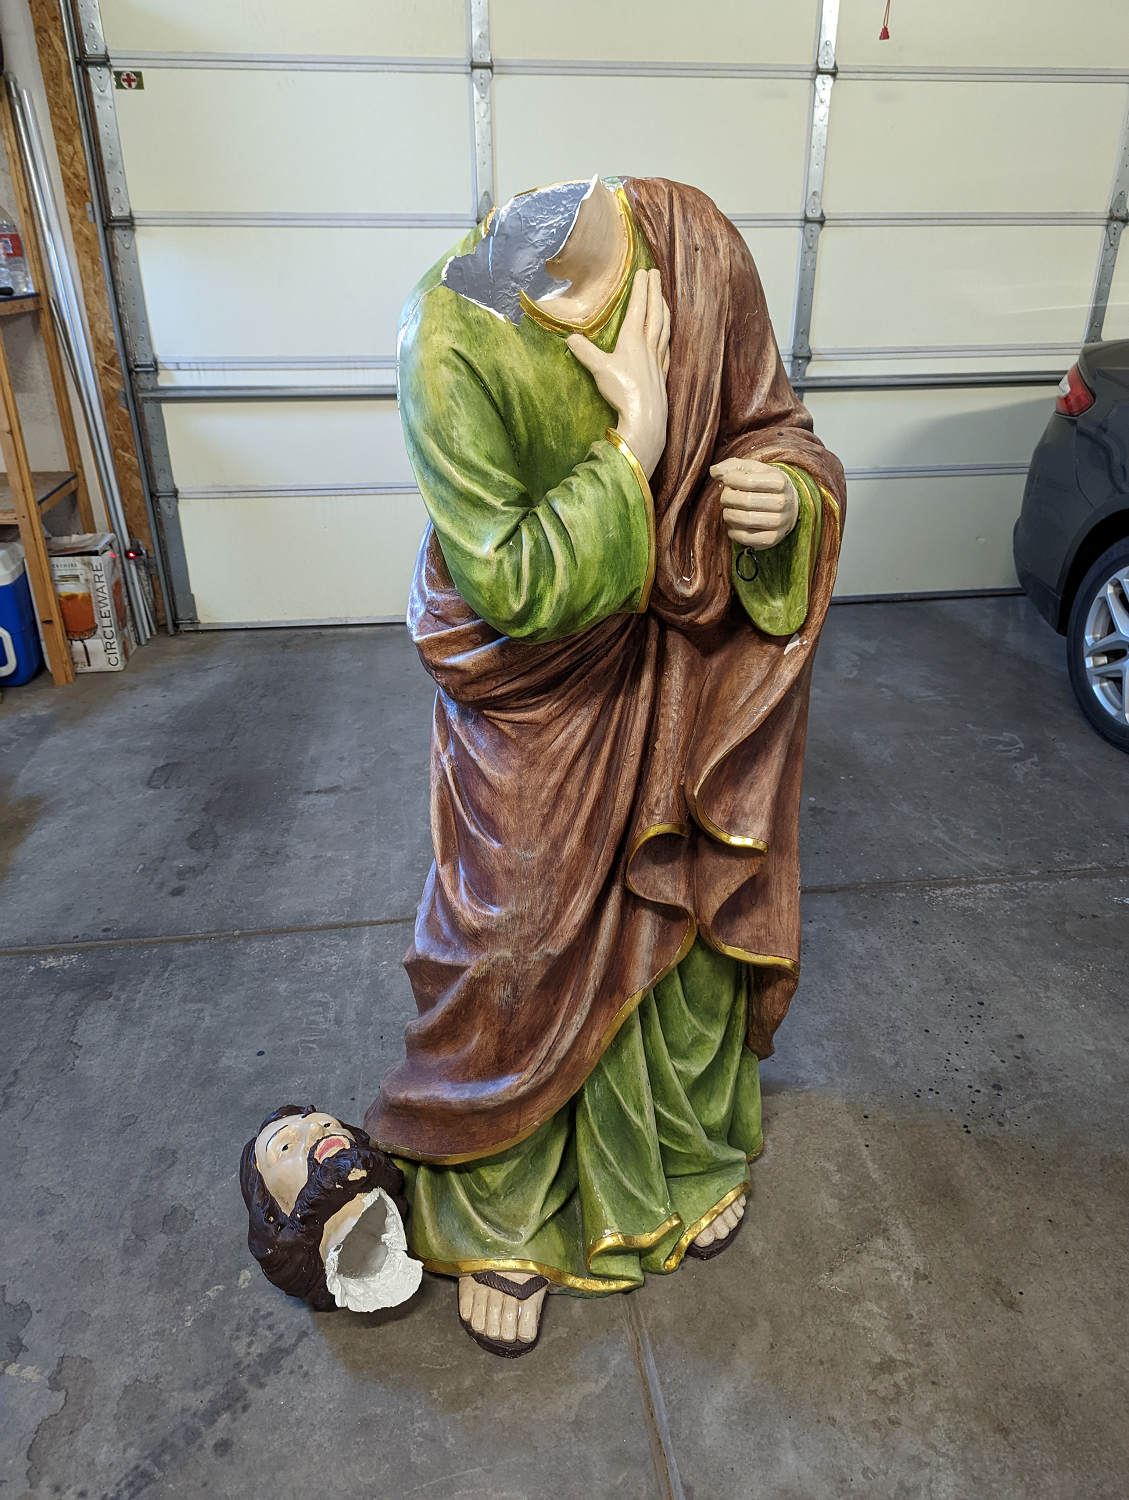
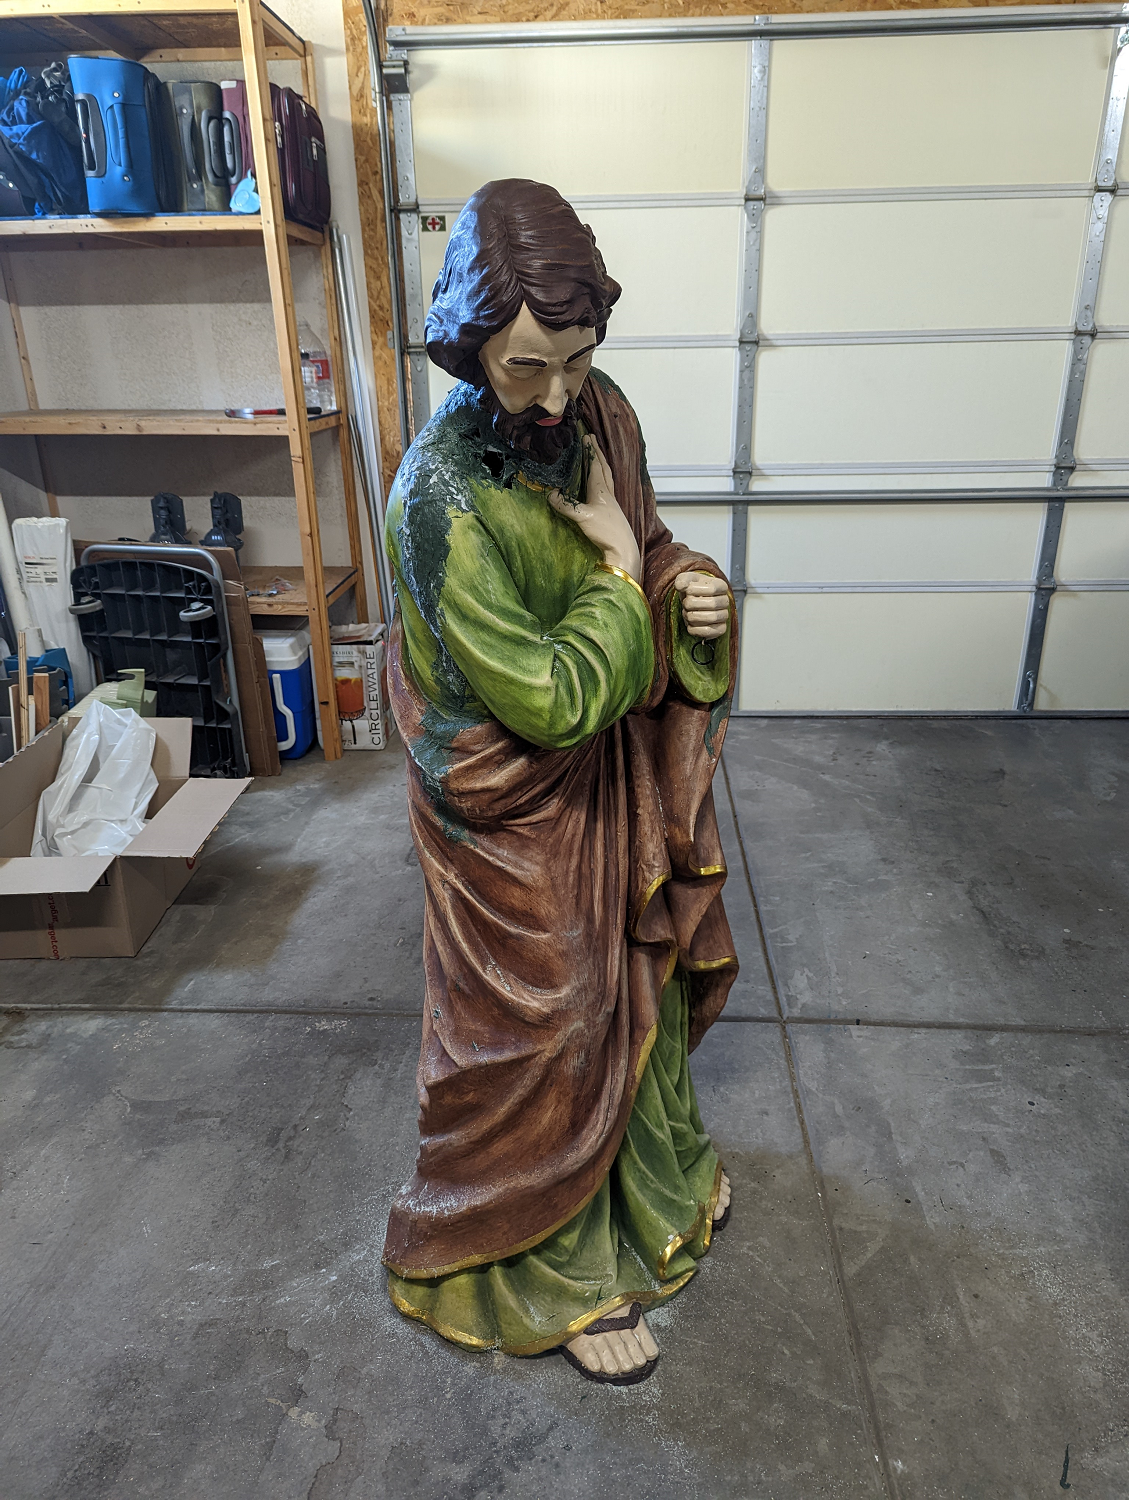
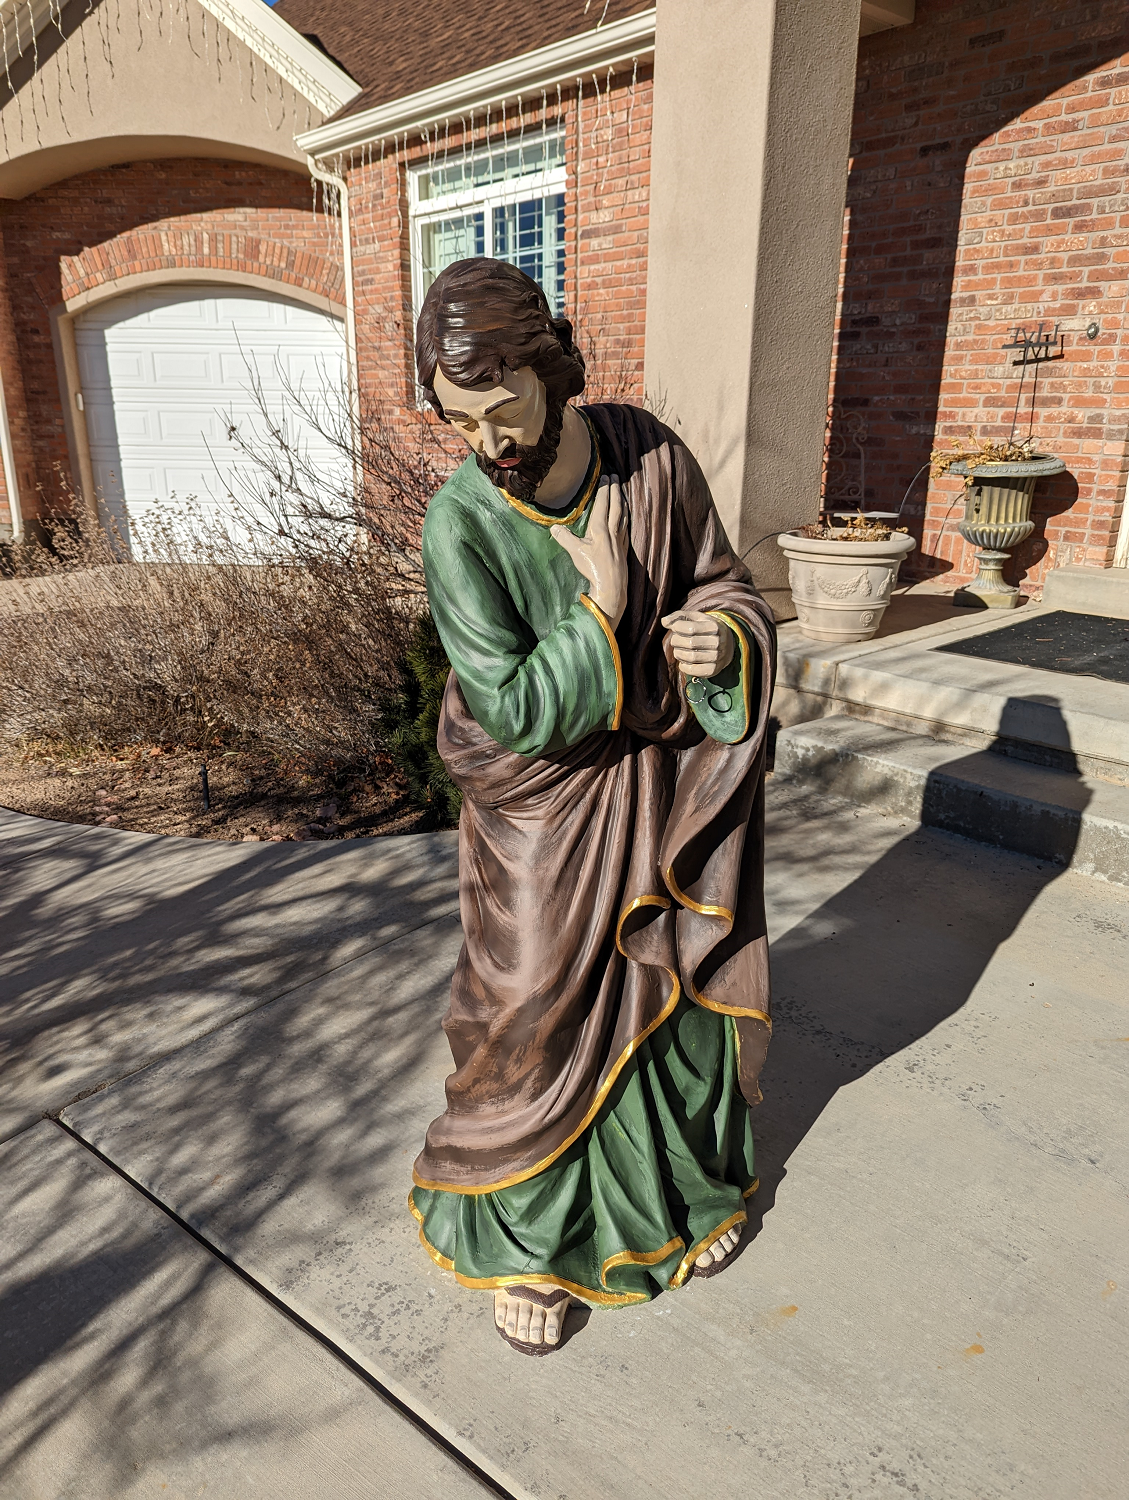
Joseph had lost his head.
That’s what my friend Sue told me after a freak winter storm last year. Joseph, the patriarch of Sue’s life-sized nativity display, had been blown over by high winds, snapping his neck and leaving him headless. I have no idea how much these statues cost, but I’m assuming they aren’t cheap. And of course, they’re irreplaceable.
But fixable? Yeah, probably.
Sue had helped me out by sewing the jacket for my Guinness World Record run in June, so I owed her a favor. I’ve never tried repairing a plaster statue before, but wanted to give it a try. She delivered Joseph and his head in the middle of the summer, but I didn’t really get started fixing him until early fall. I had originally planned to fix him with fiberglass, but when I really took a deep dive into the damage, I realized that wasn’t the best option.
Here’s an “autopsy video” of the decapitated figure:
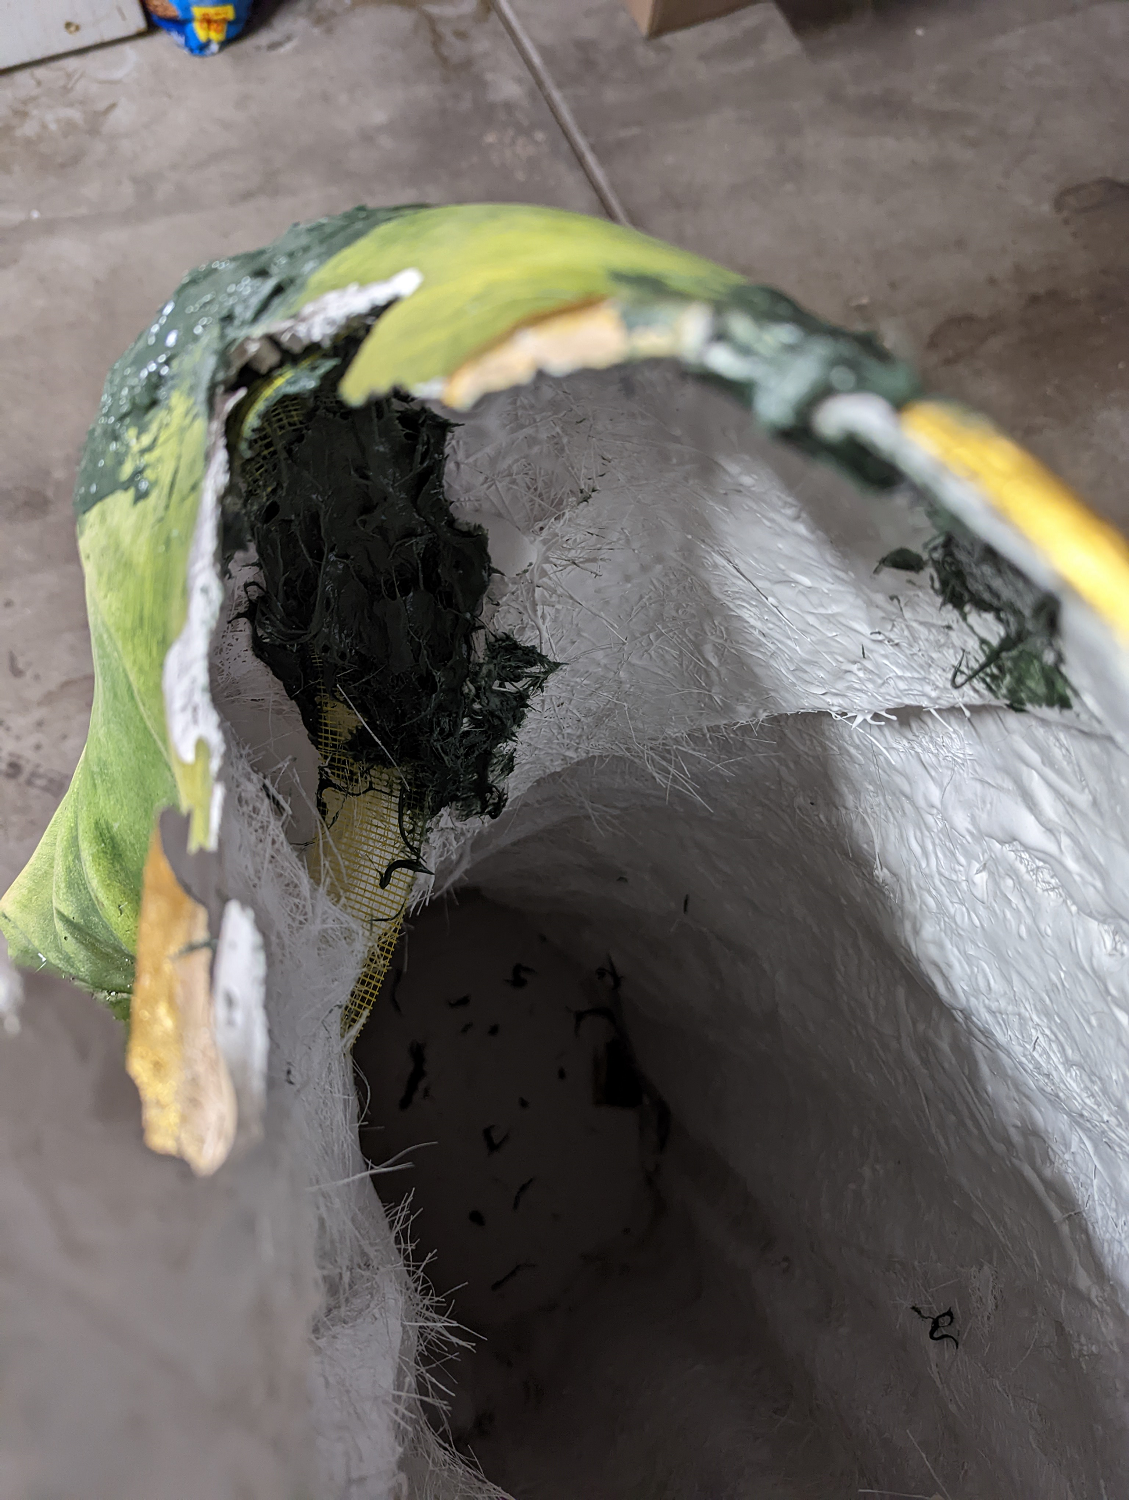
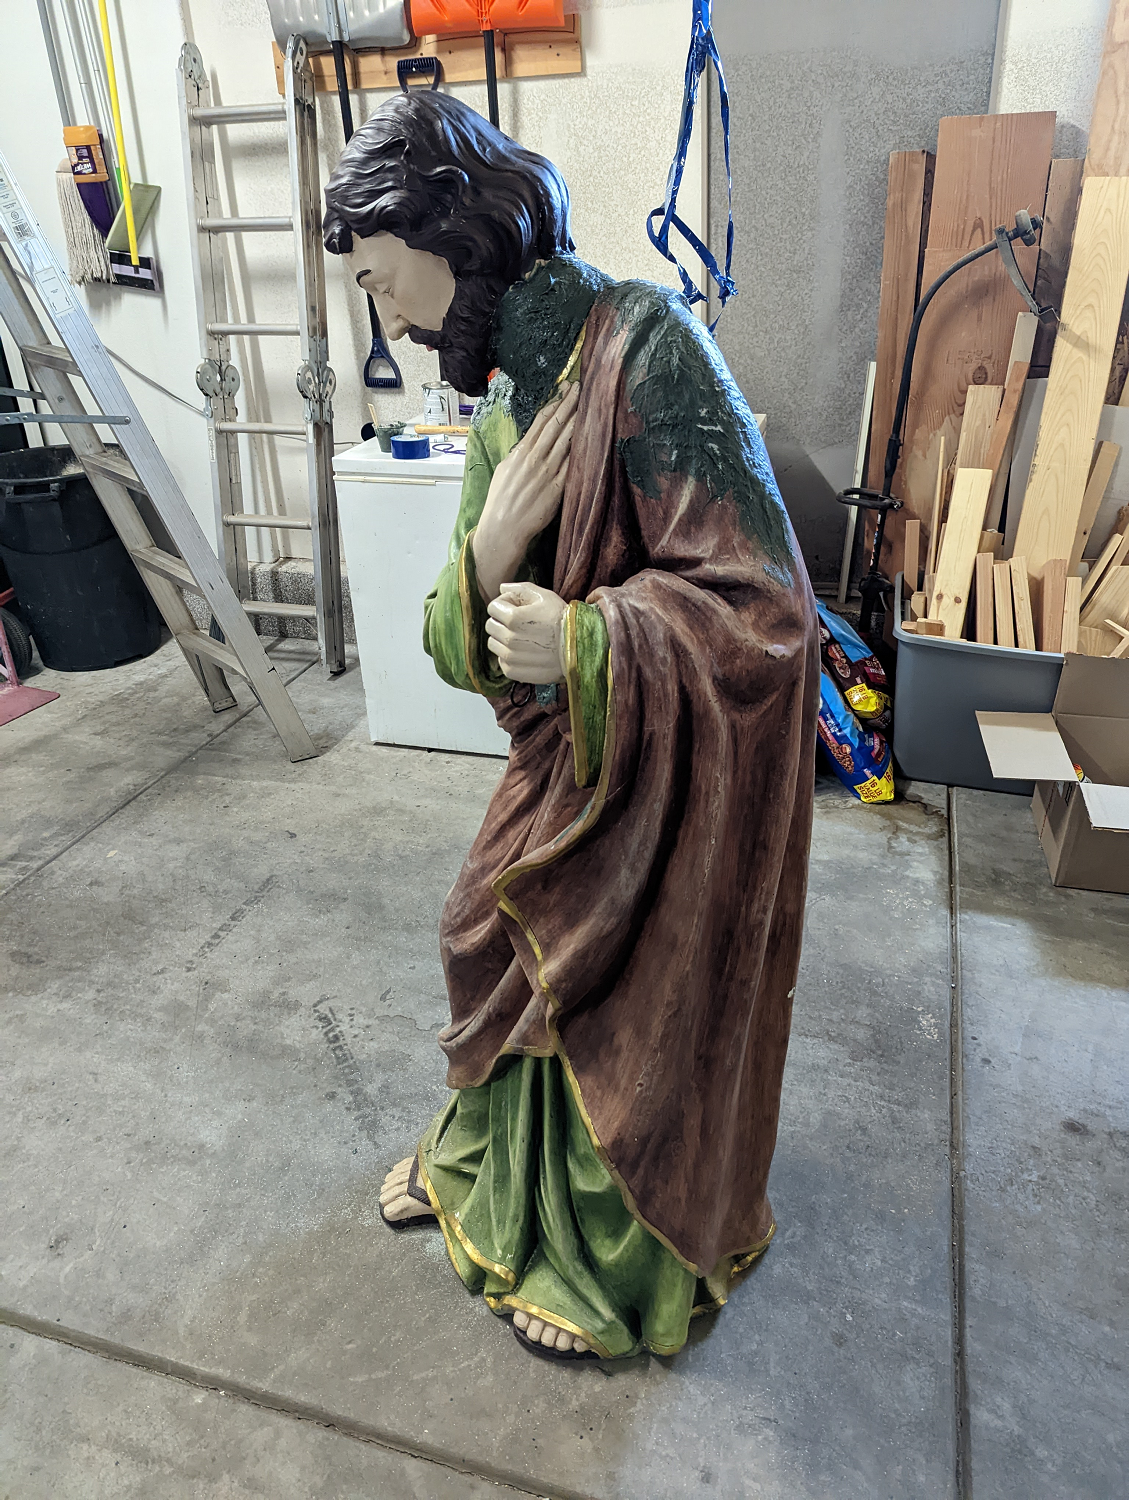
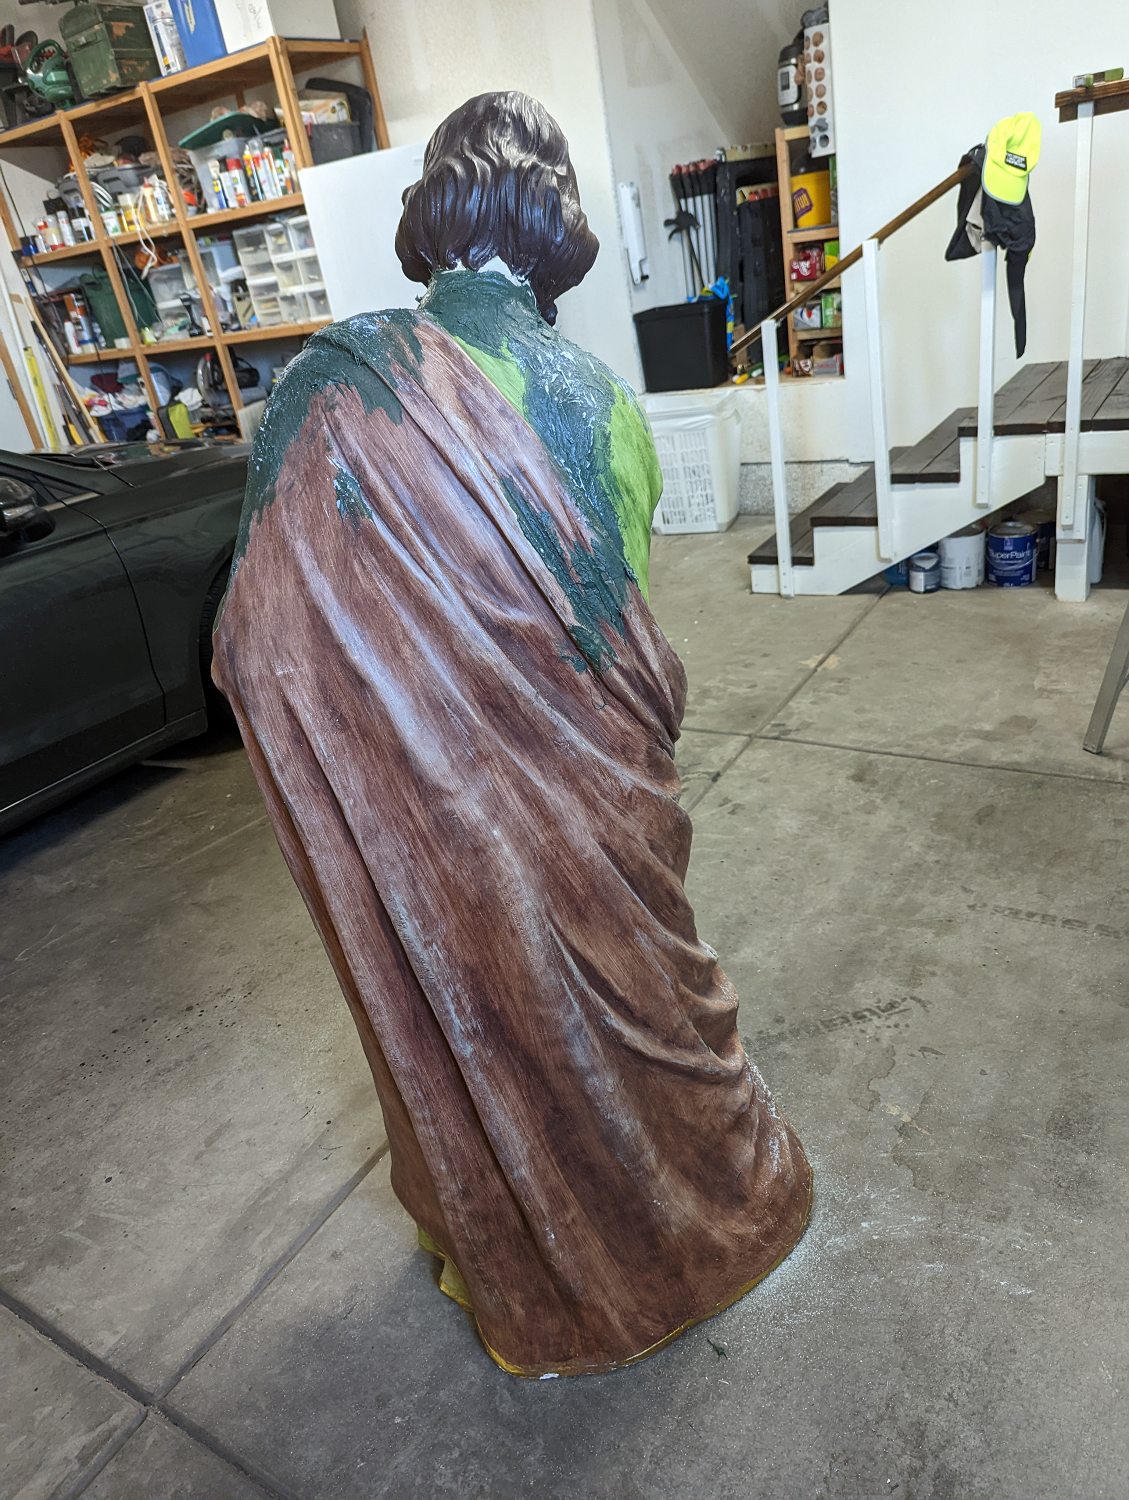
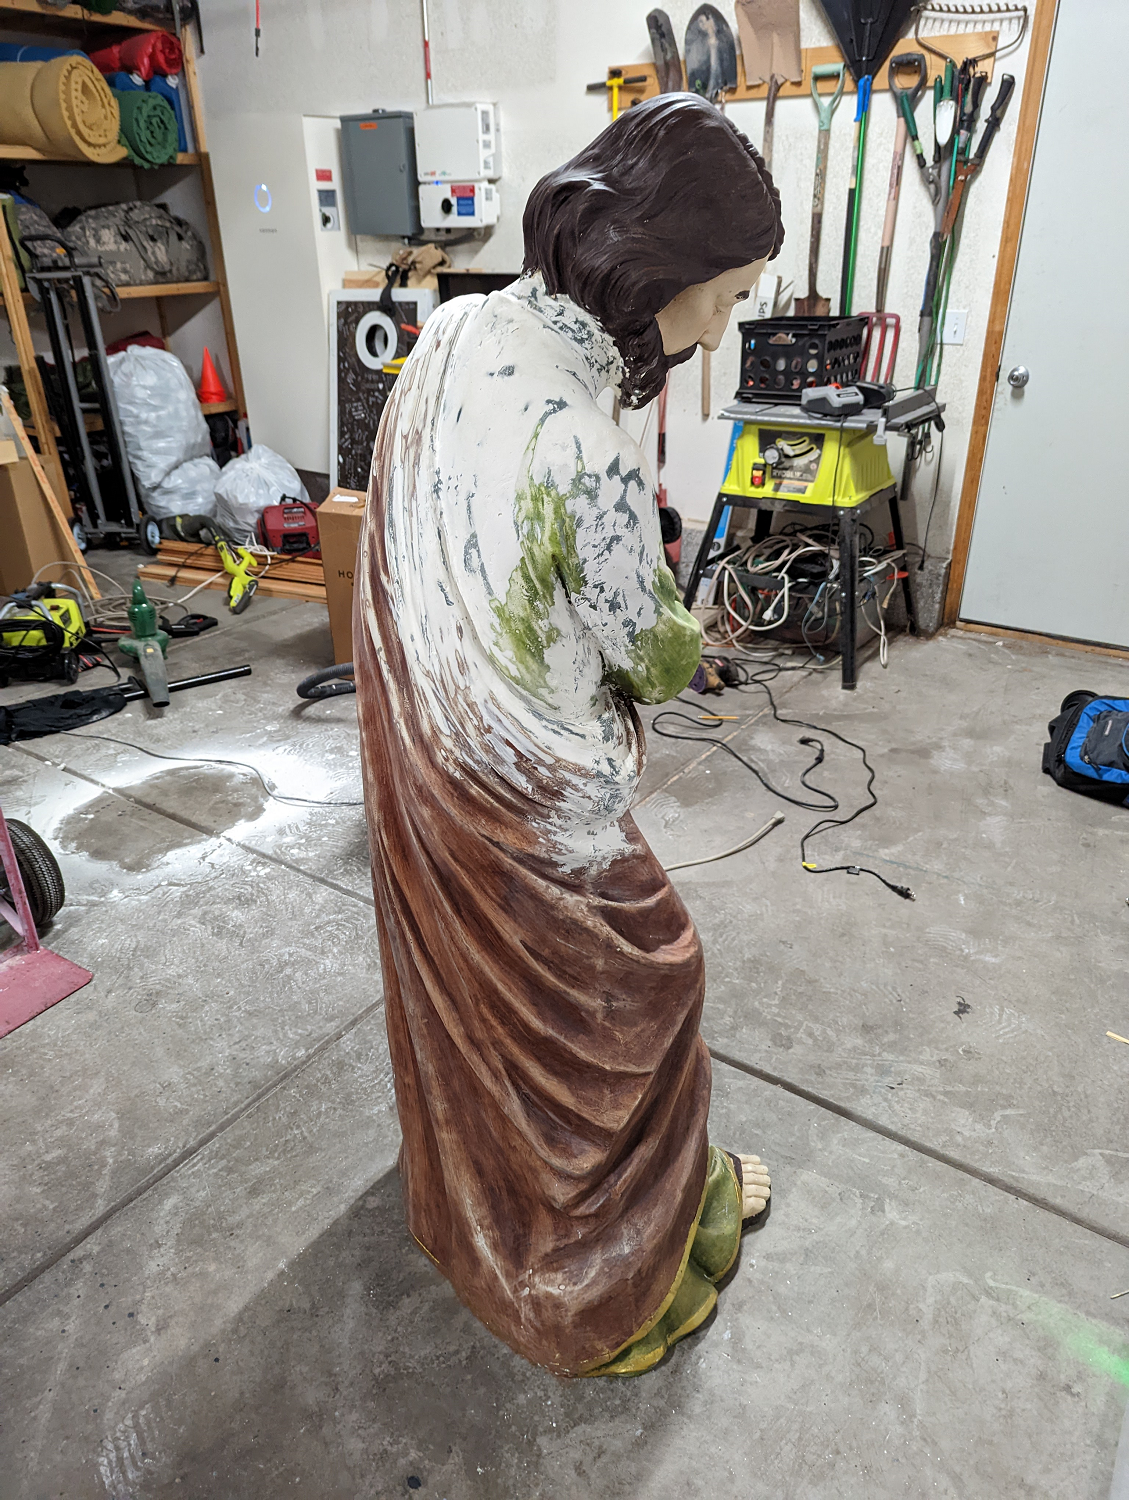
In terms of construction, he’s made of plaster and gauze. Basically, he’s built a lot like the cast my family doctor put on my left arm when I broke it in kindergarten.
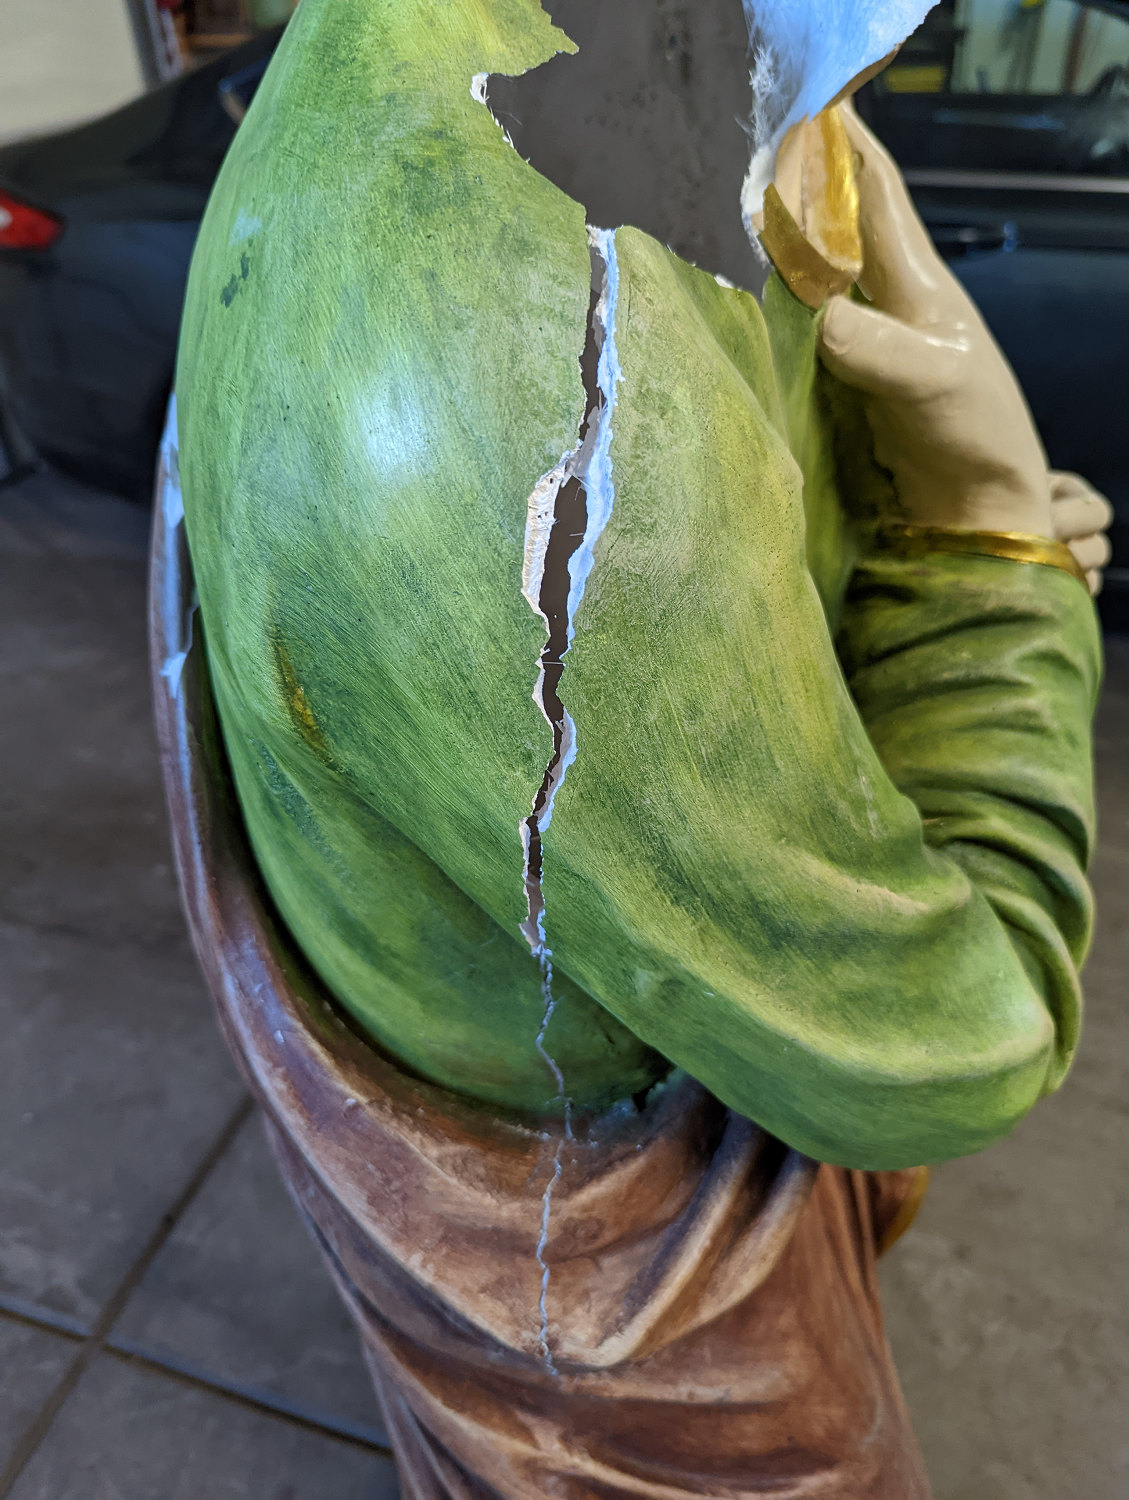
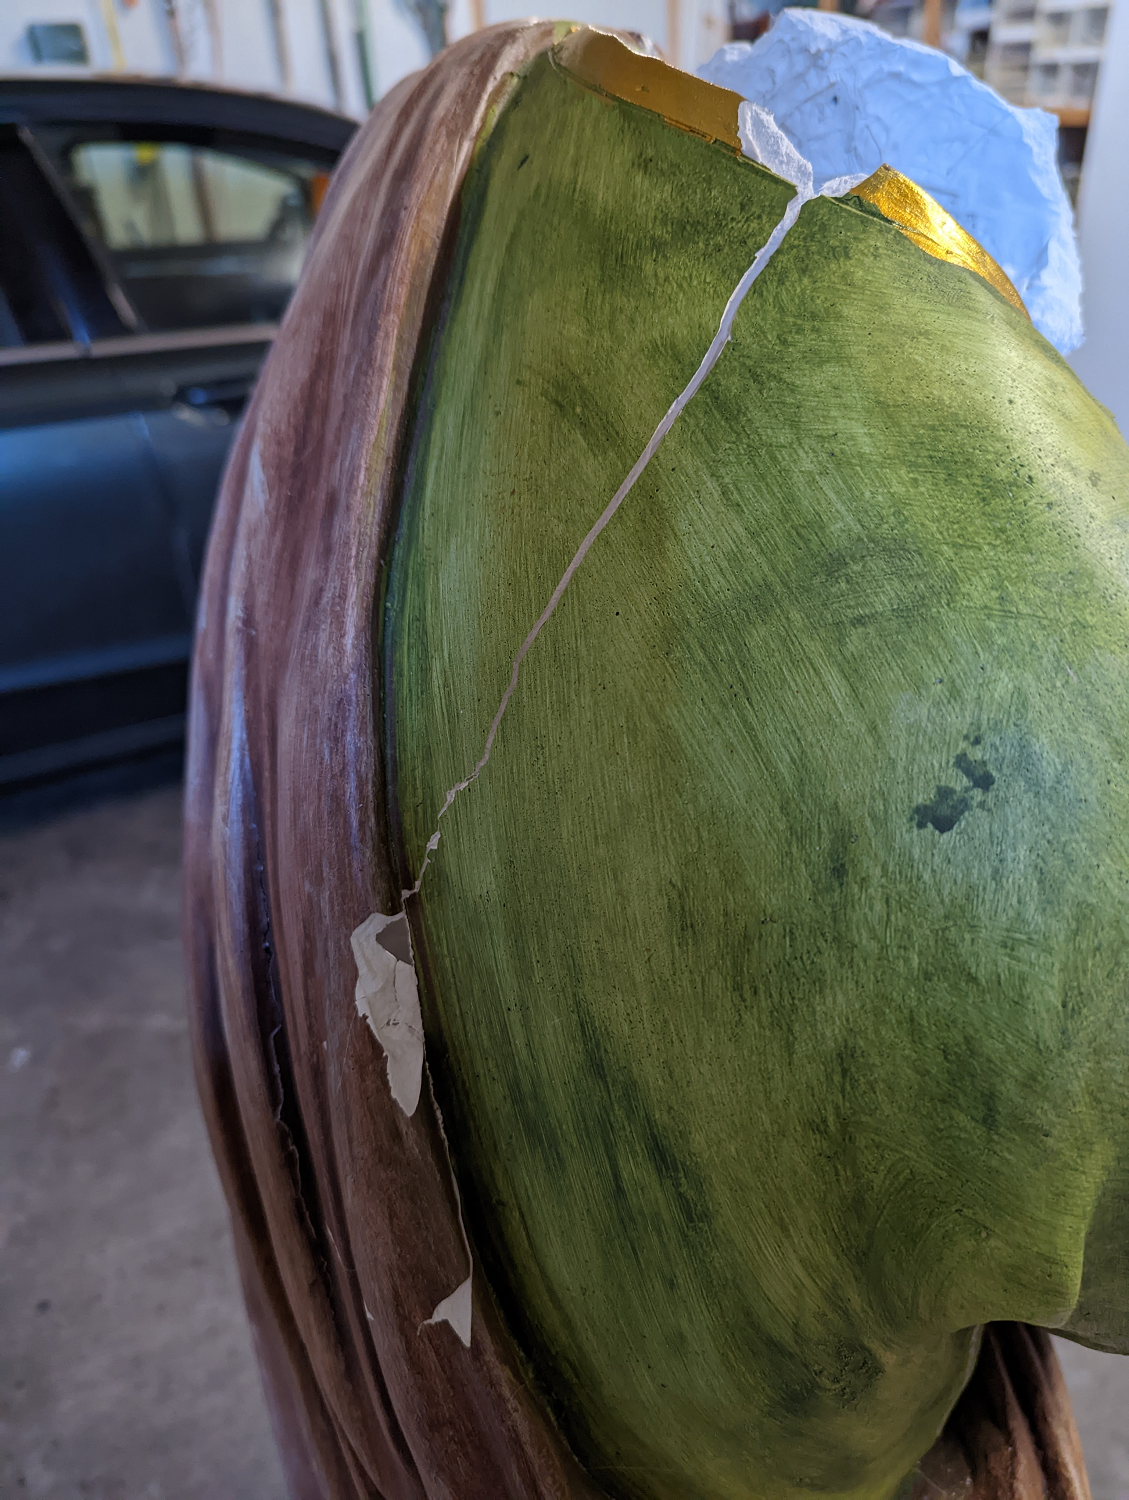
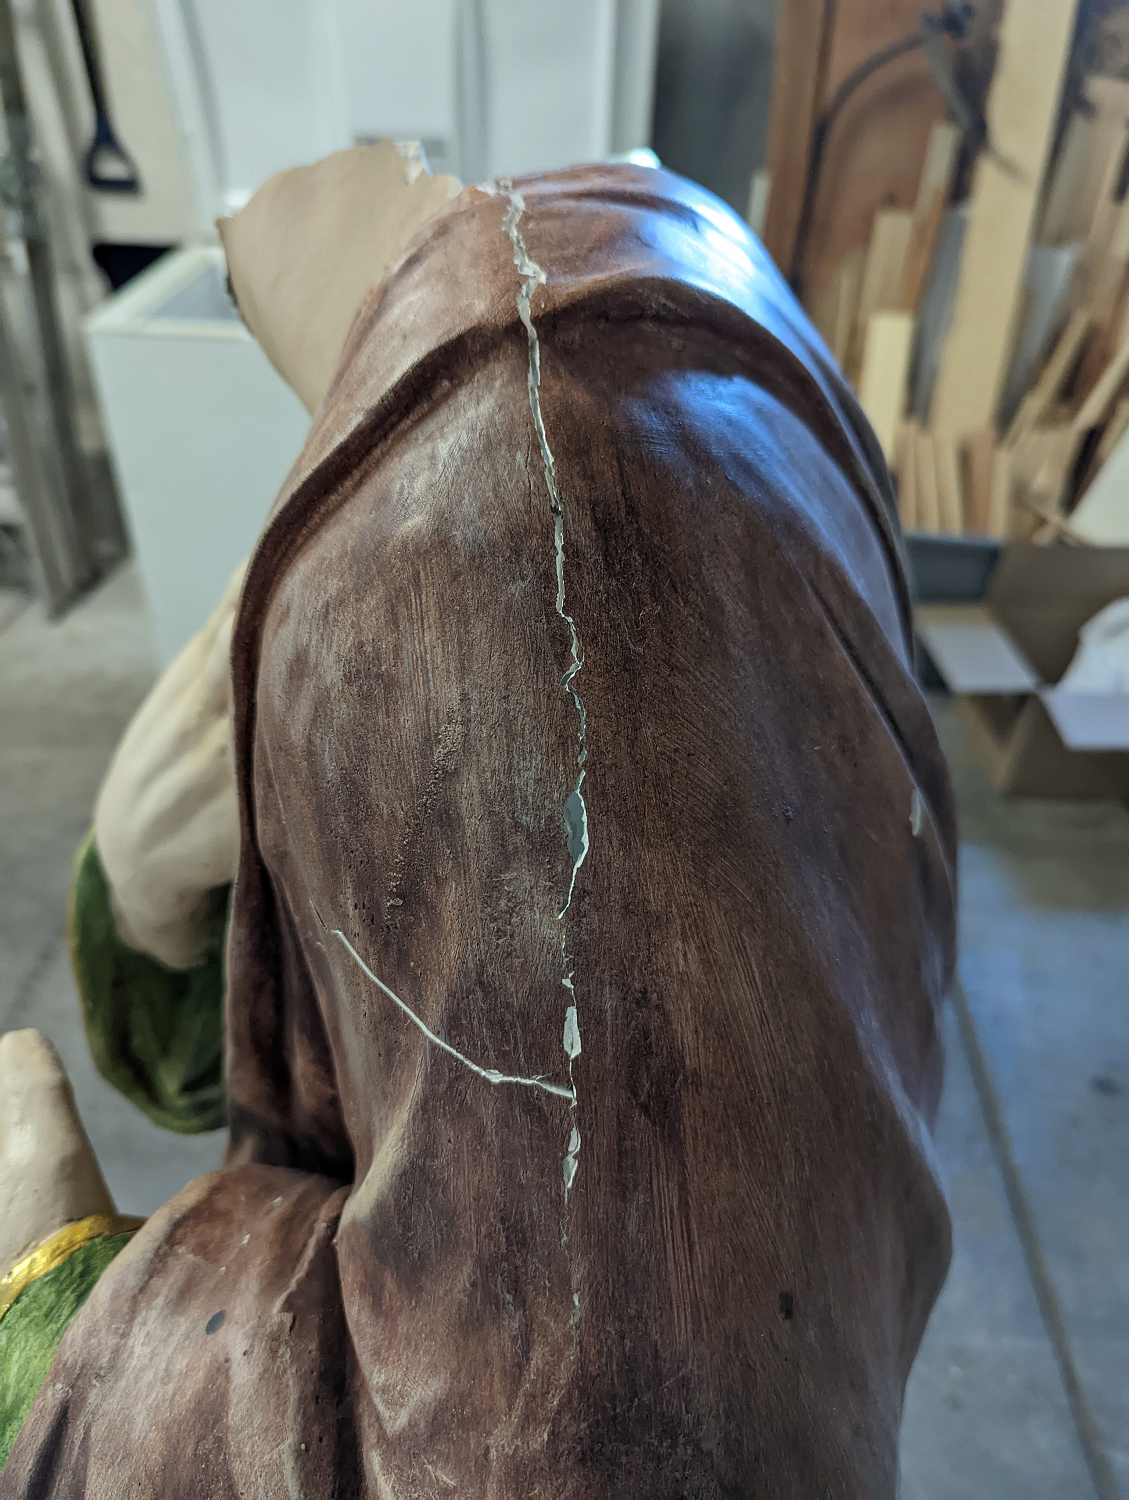
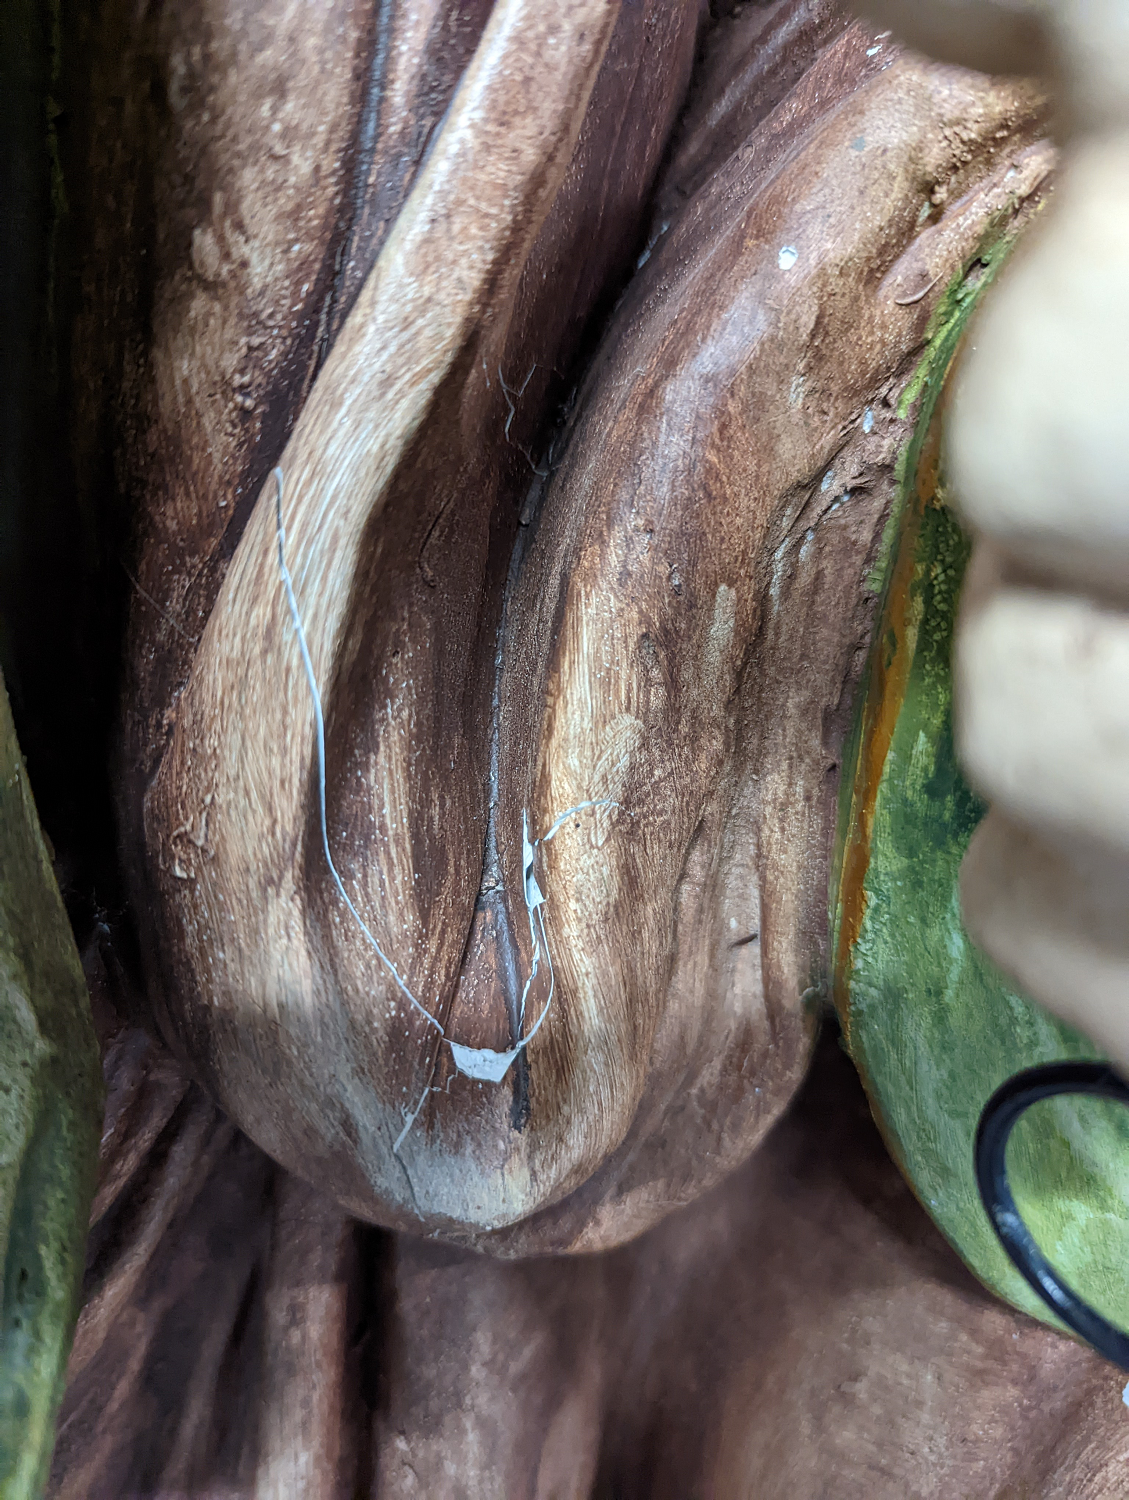
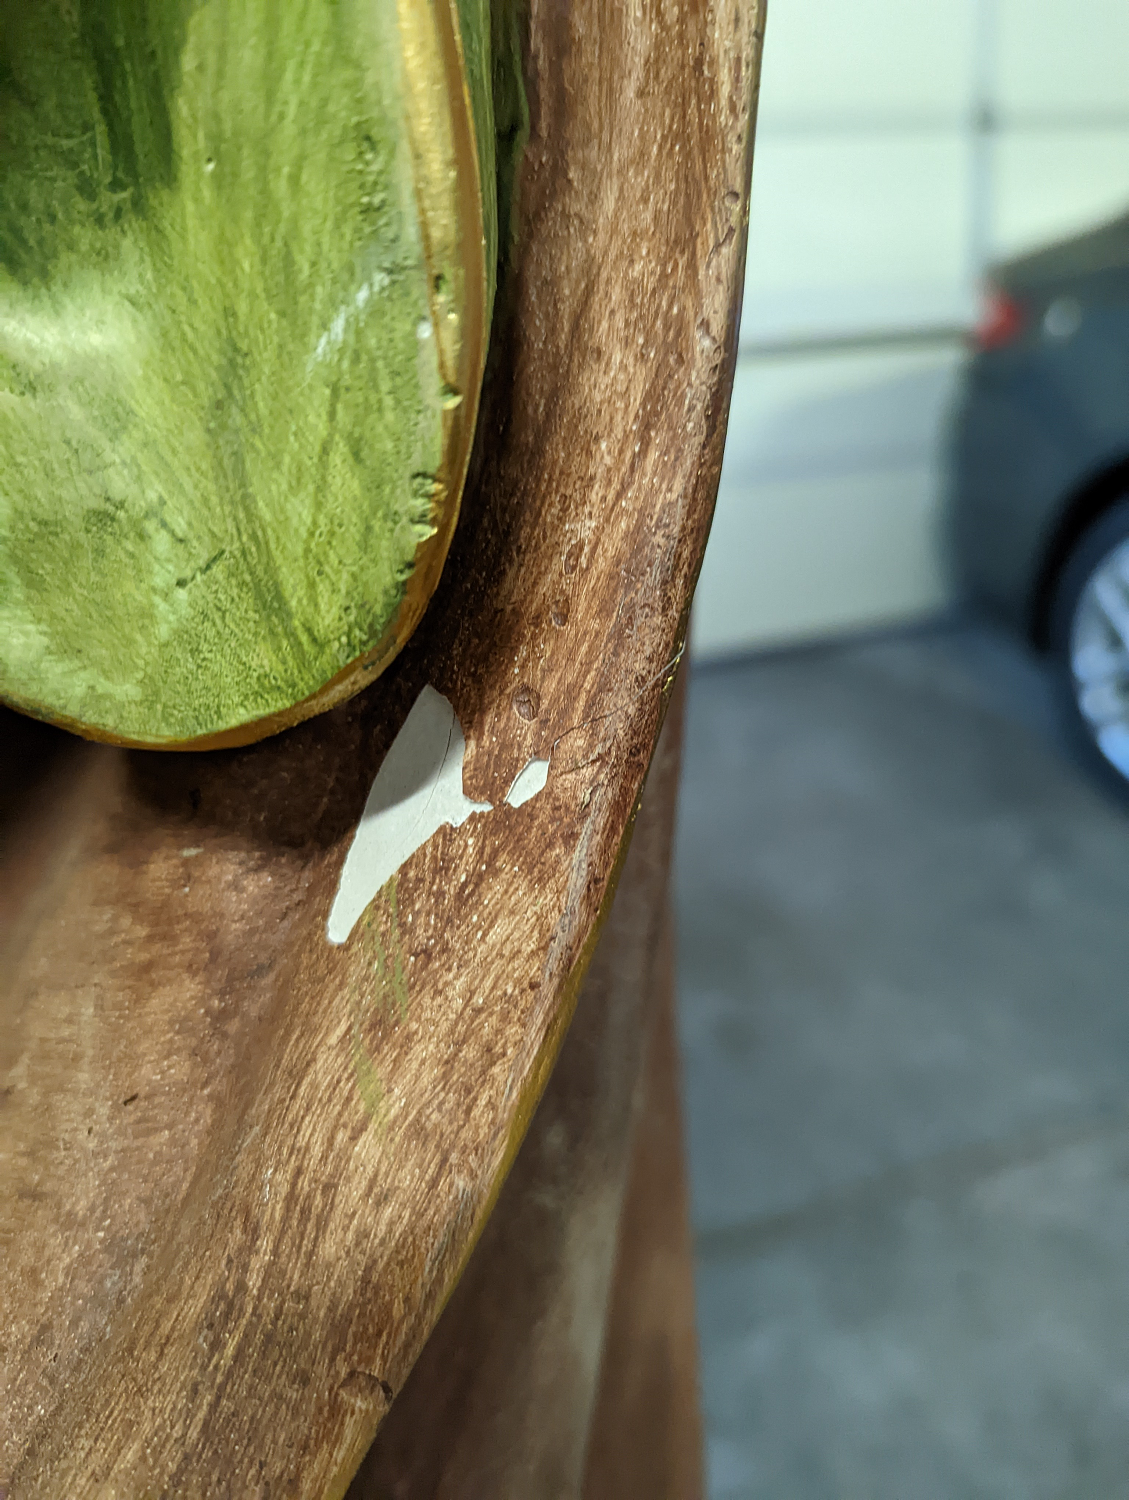
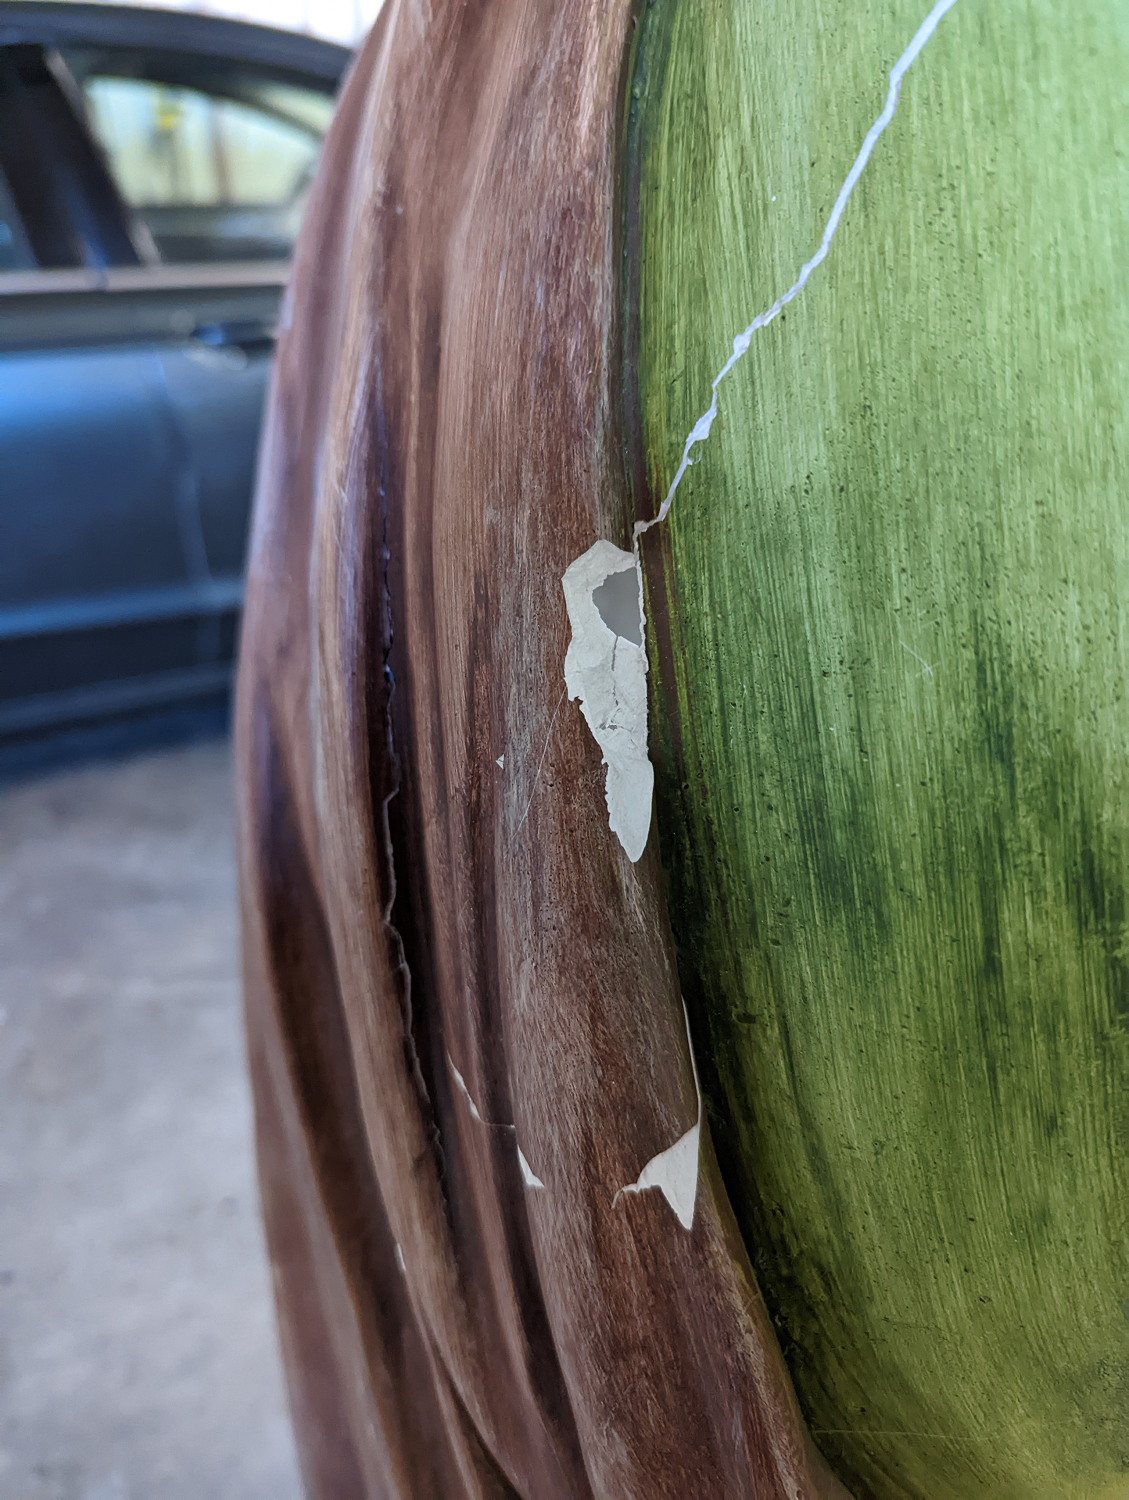
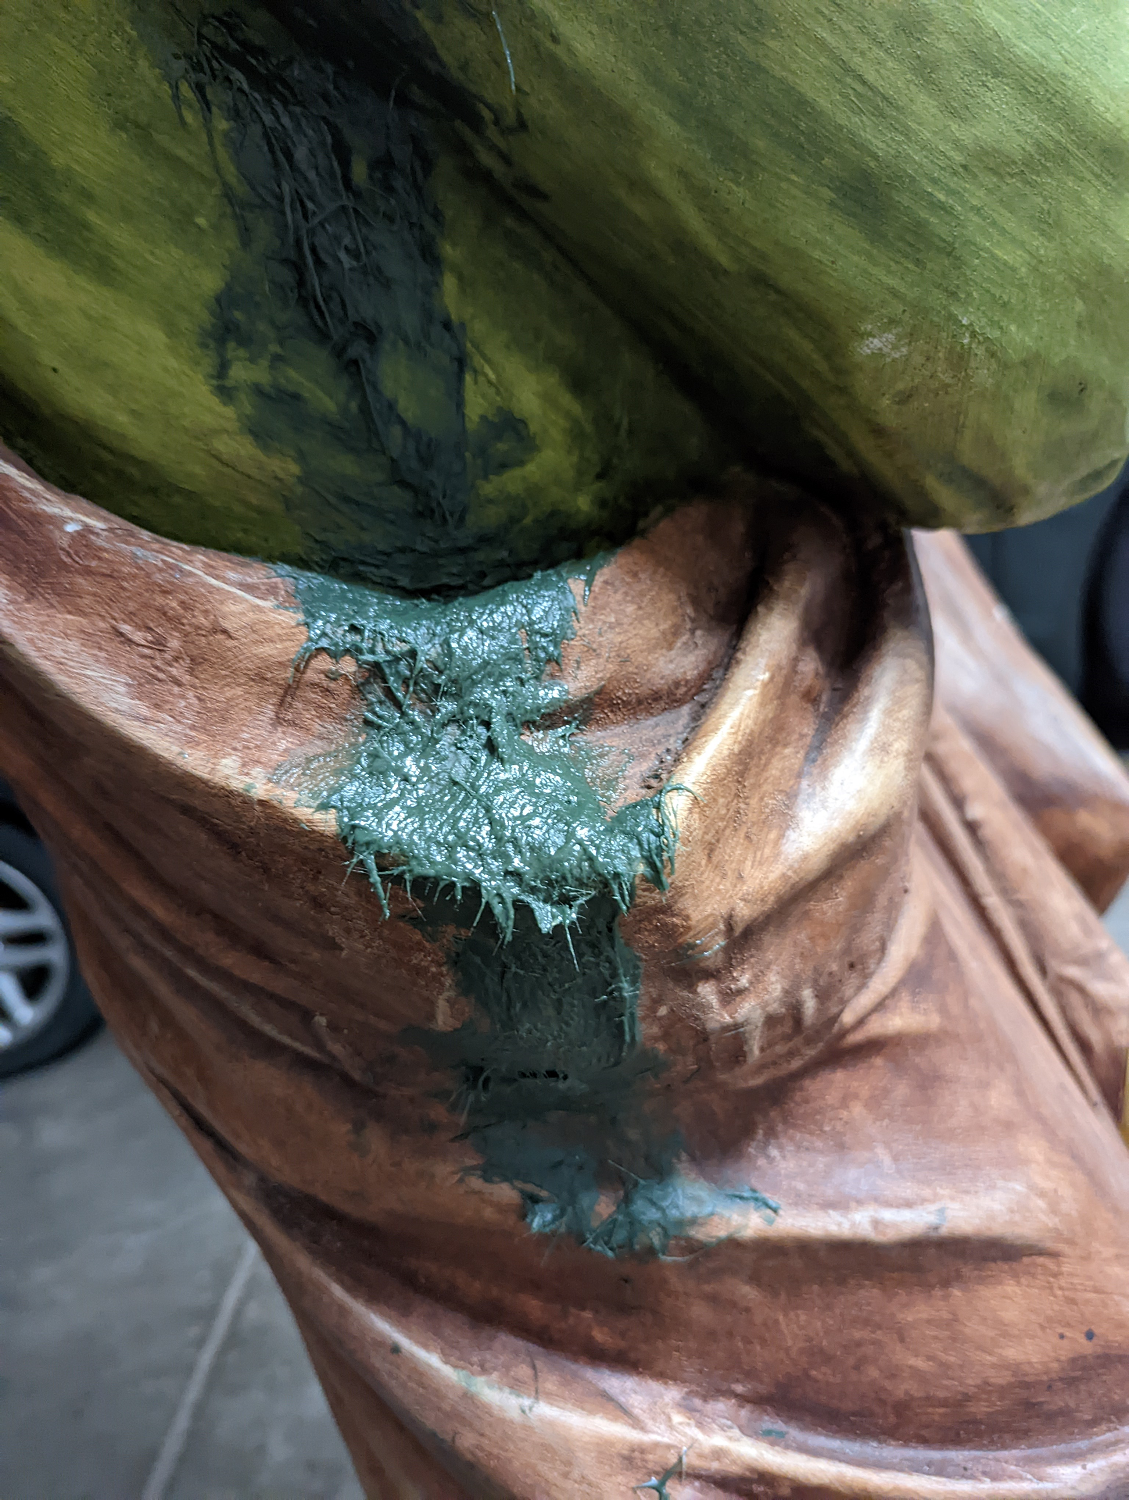
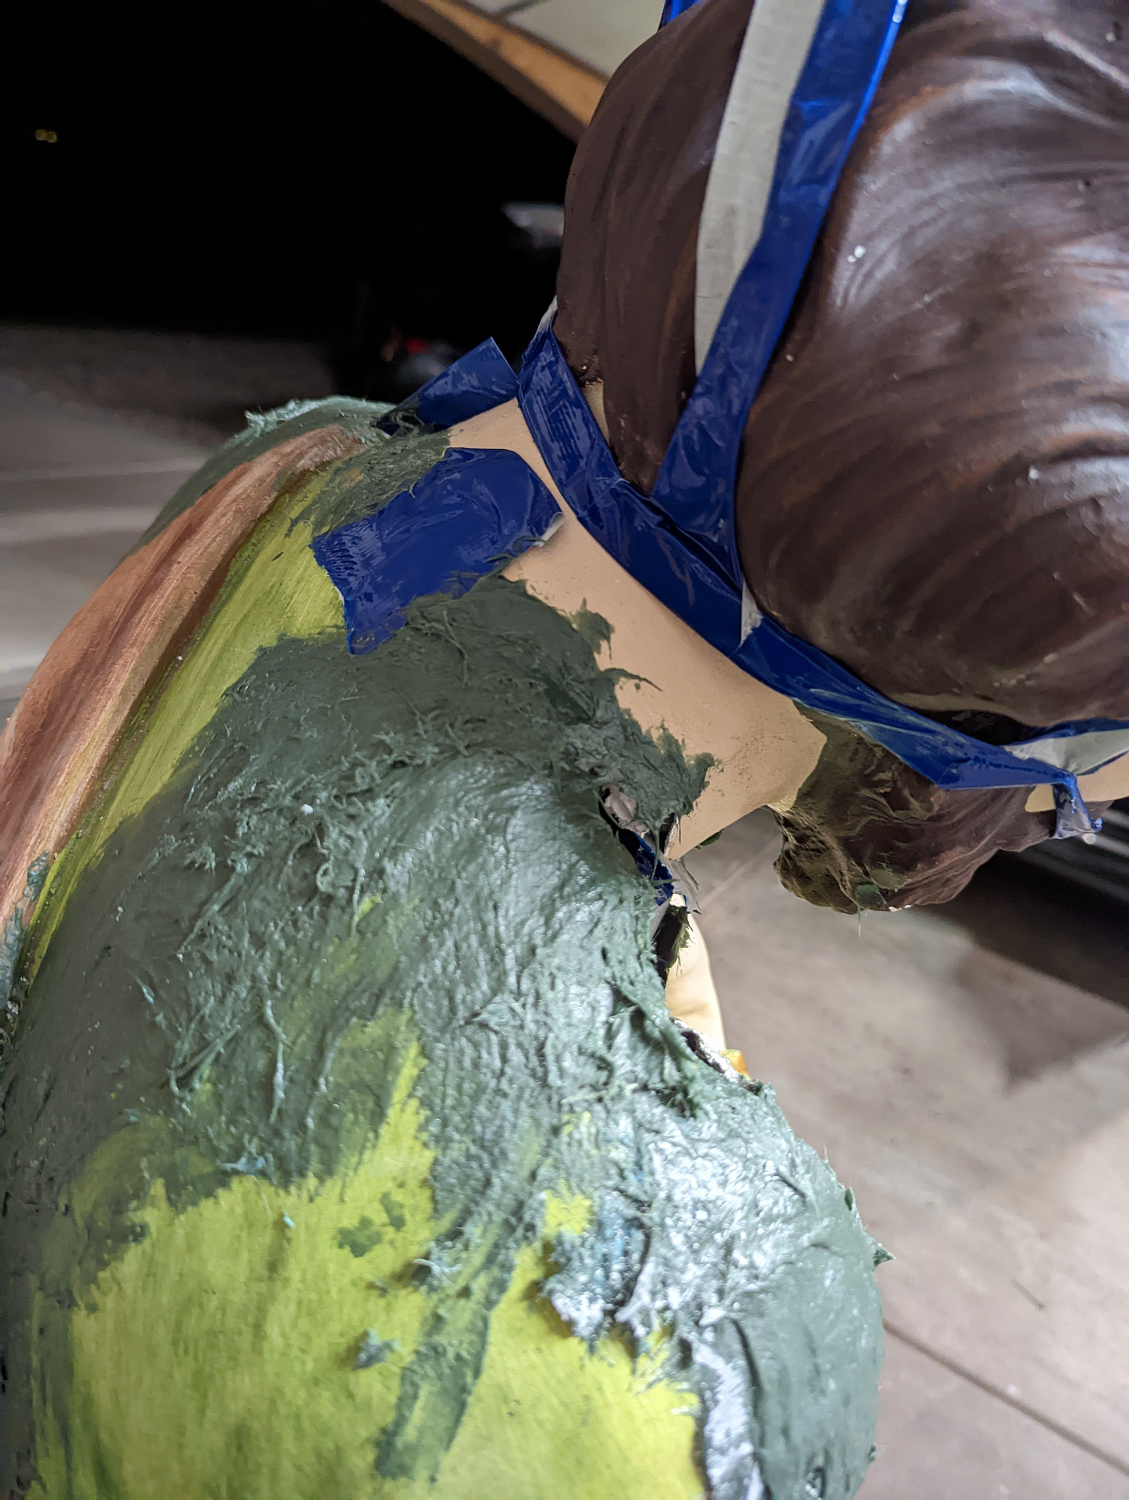
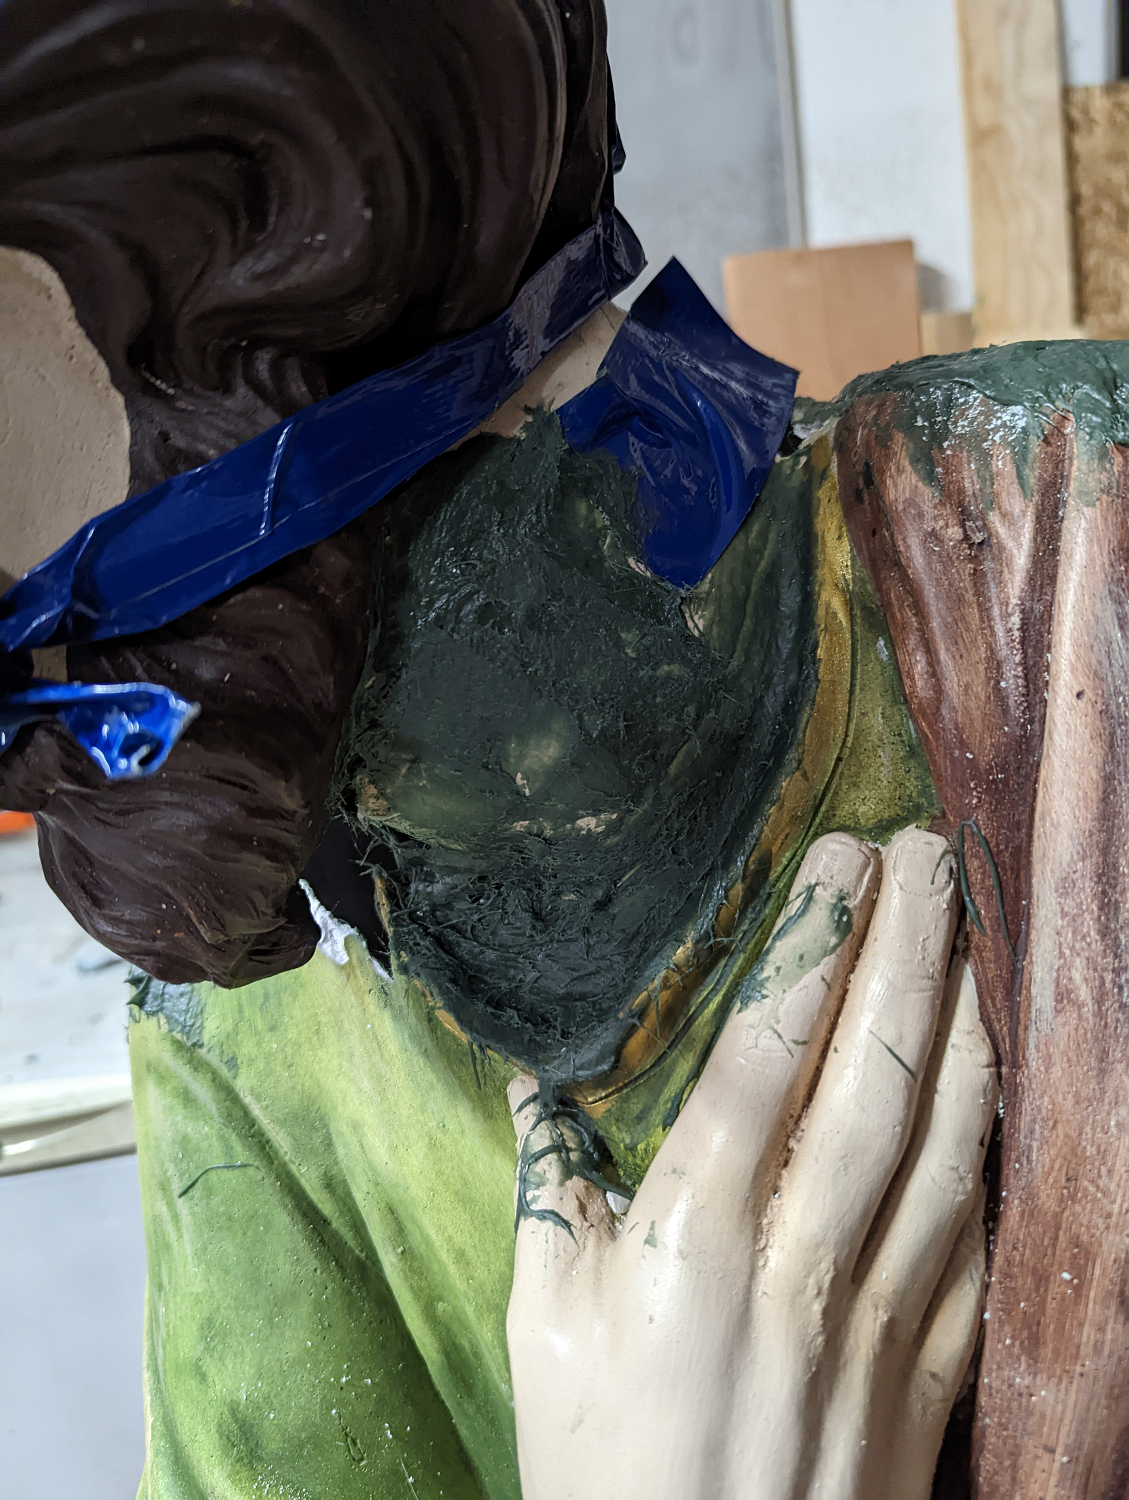
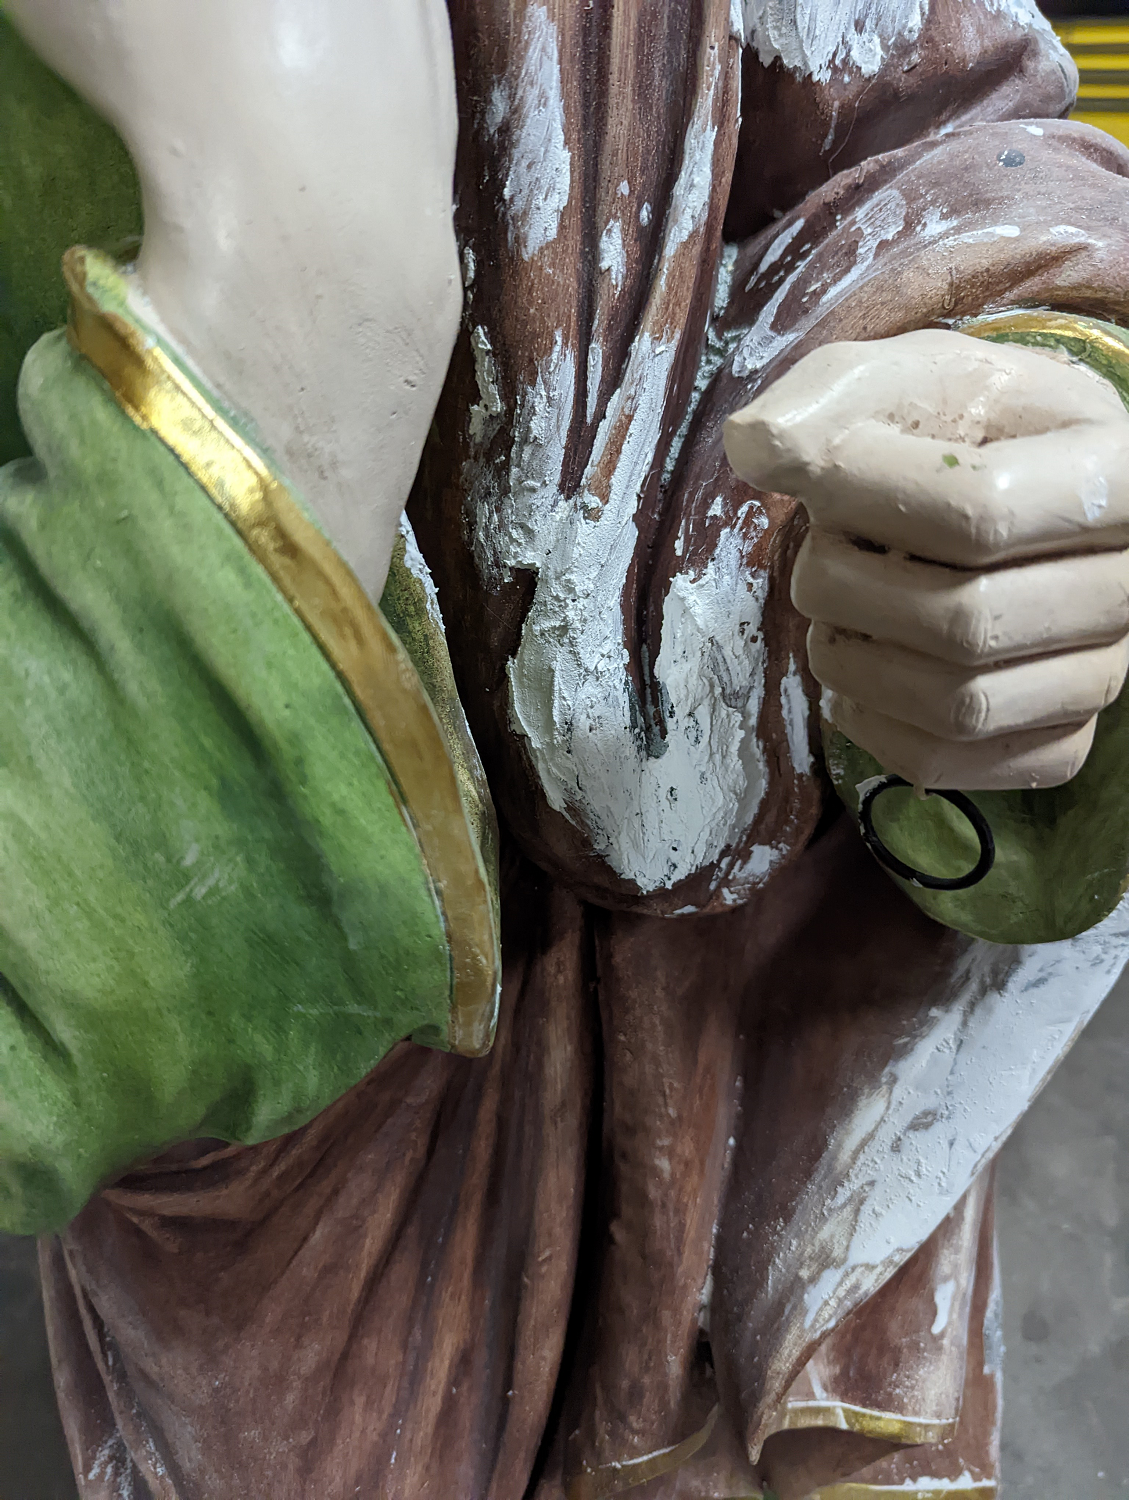
Also, the damage wasn’t just to the head and neck. The torso was cracked along both shoulders. (I assume that’s where the two halves of the mold came together.) There were also hairline fractures in other parts of the body and robe, plus little chips missing here and there. This was going to be a bigger project than I imagined.
A Bondo-ing Experience
After doing some research online, I decided to use Bondo for the main repairs to the plaster statue. Bondo is usually used for automotive bodywork. It’s an epoxy-like substance that contains fiberglass fibers, making it stronger than just about anything else I could’ve used.
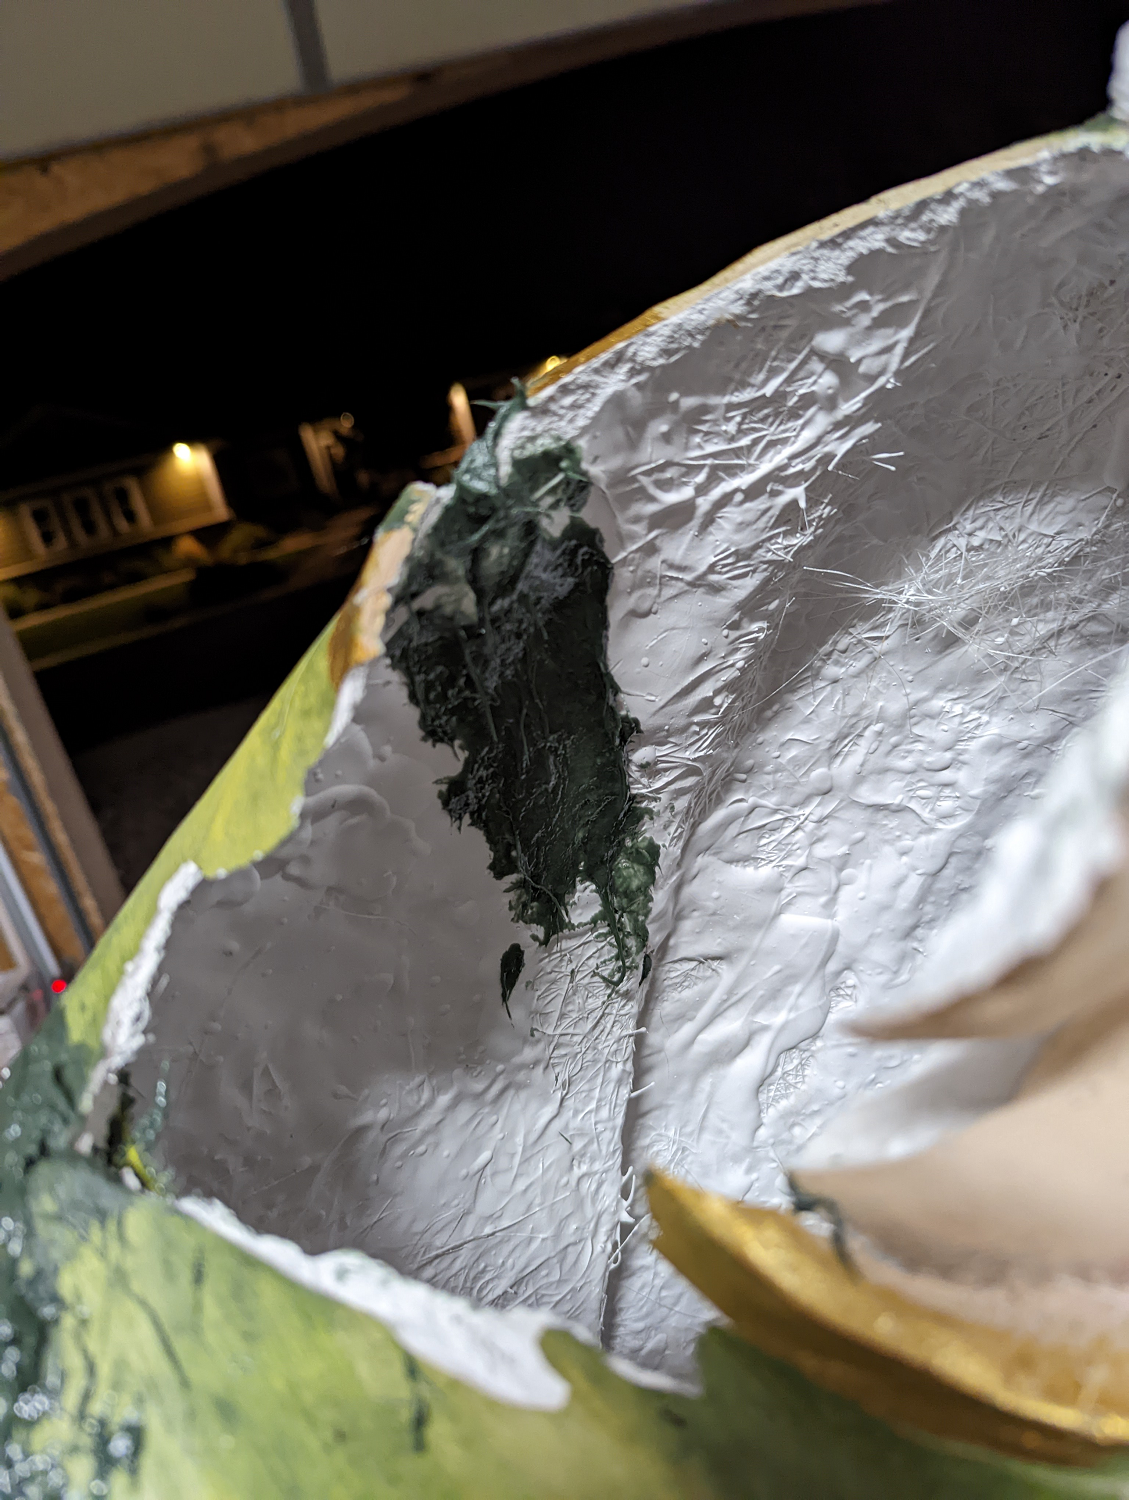
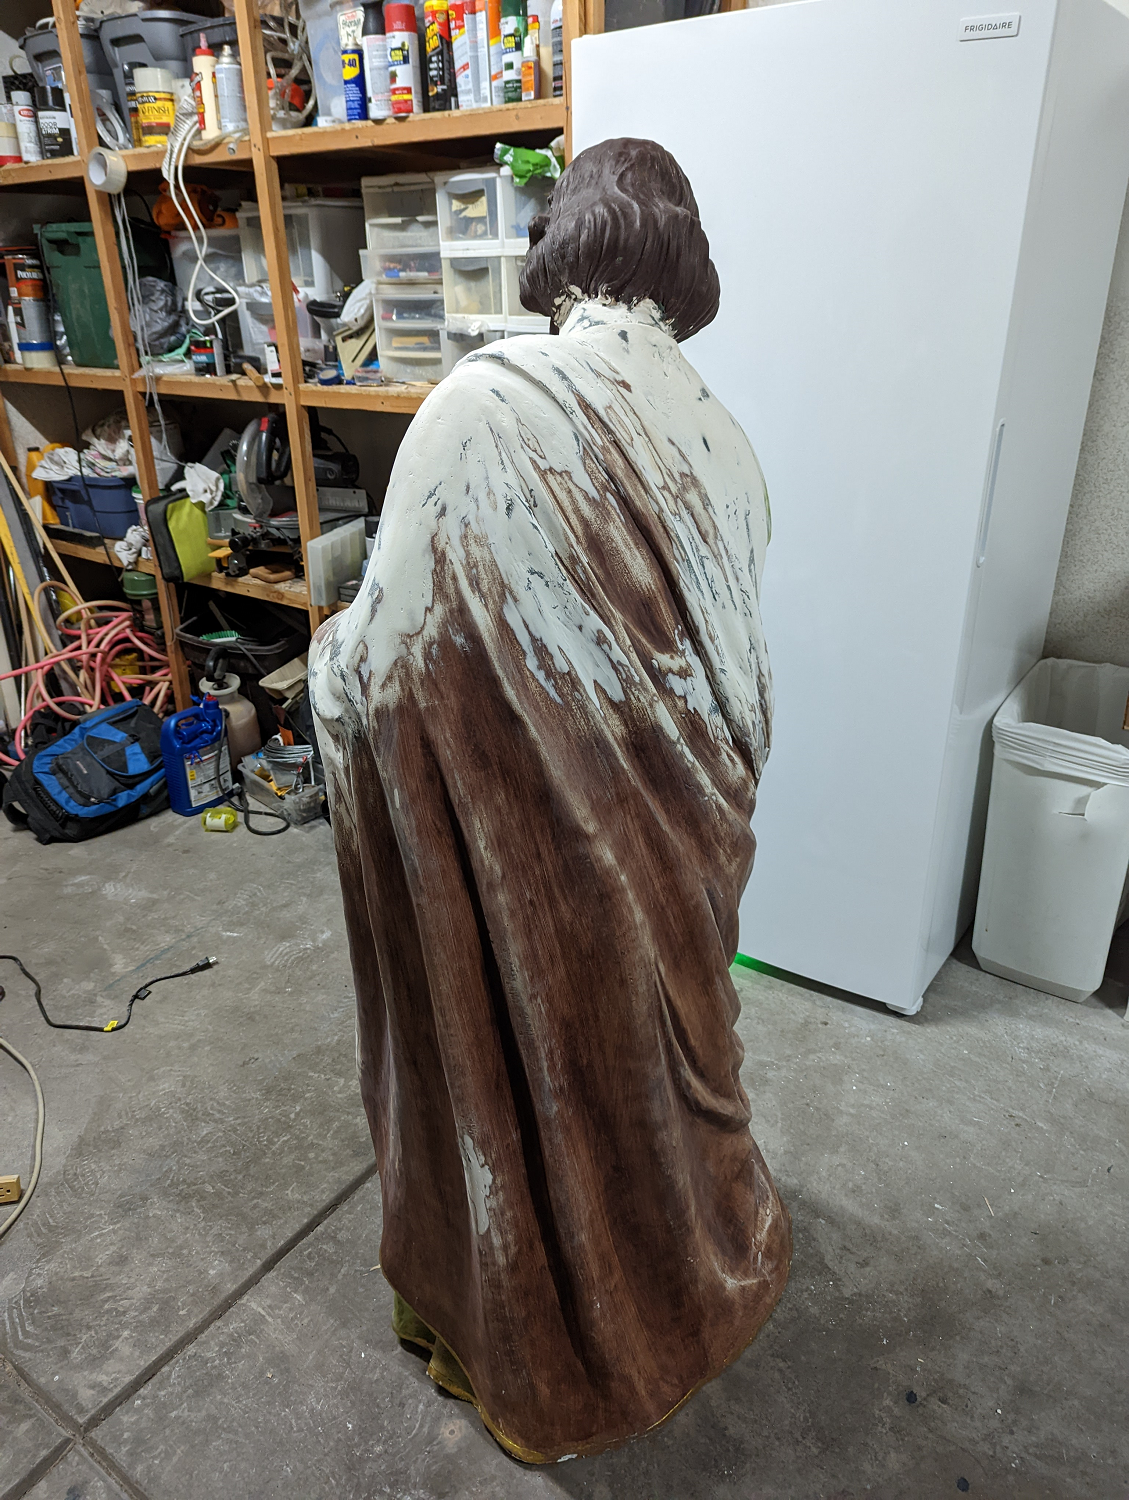
Since Joseph’s head was off, I began the repair by patching the major cracks from the inside. I taped the gaps from the outside, mixed up the Bondo, put on a double layer of plastic gloves and slopped on the bondo with my fingers. It took three layers to get the interior repairs good and solid. The jagged surface of the dried Bondo compound and the rough interior tended to rip open the gloves, so I had to wash my hands a lot.
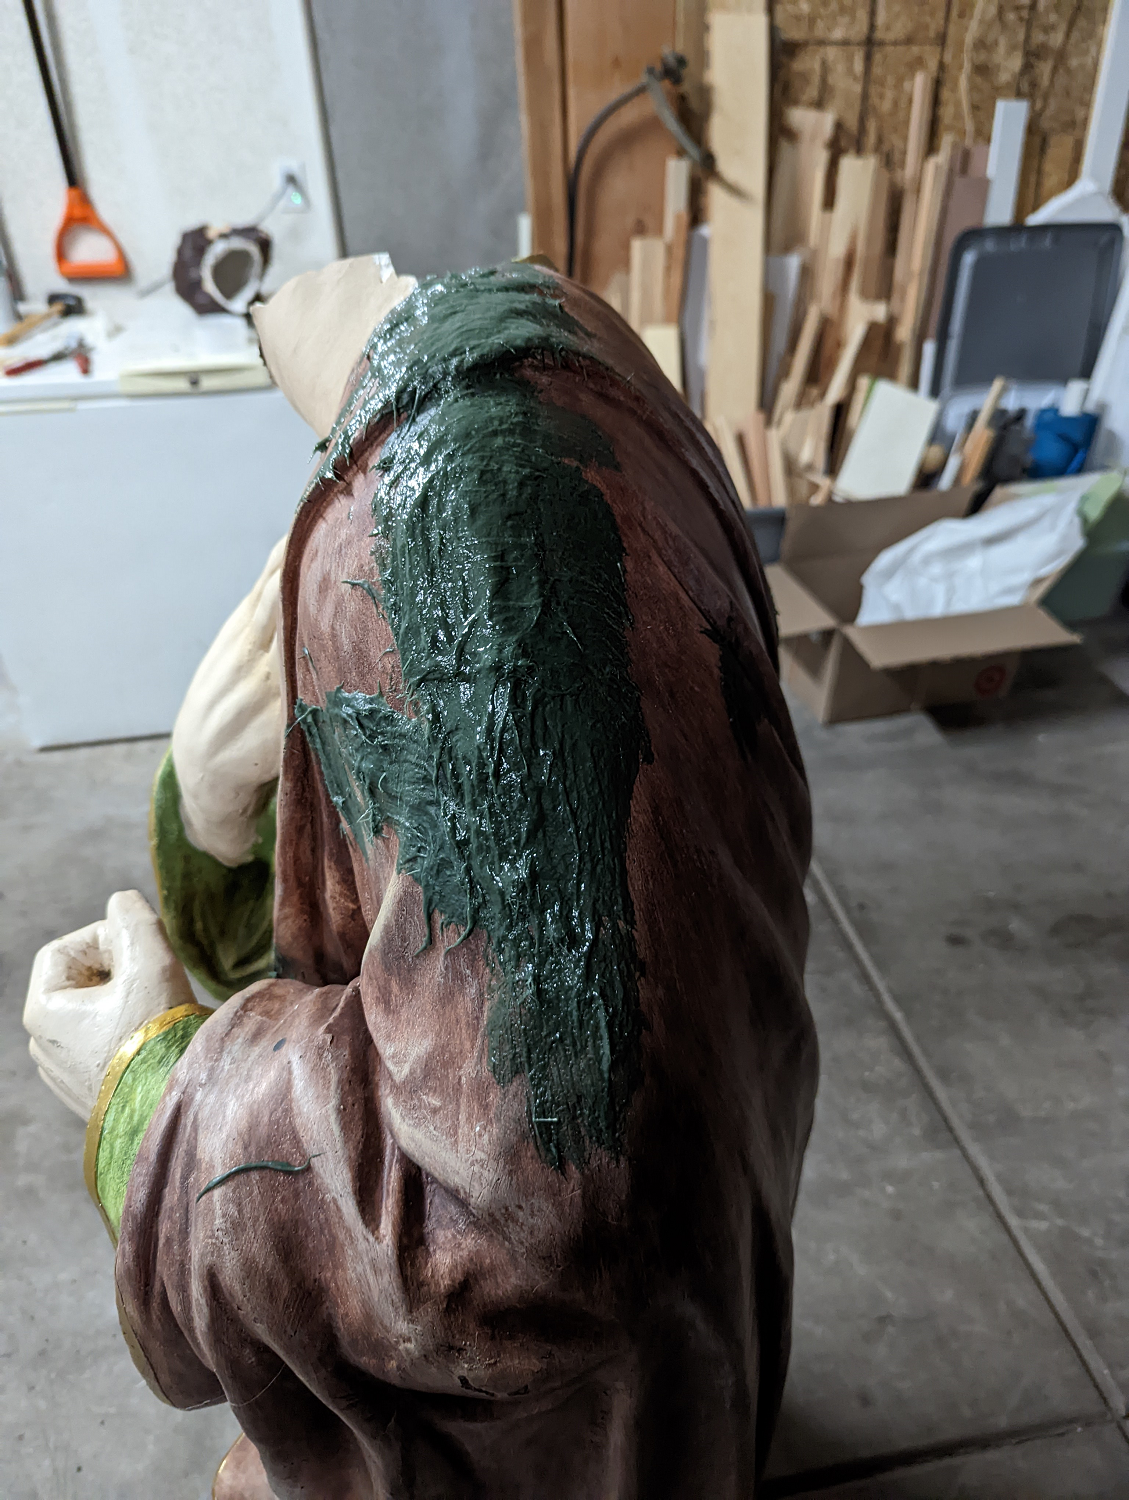
After the cracks were patched from the inside, I started the repairs to the outside. Again, this took multiple applications. Bondo cures quite quickly, so I would slap on a coat, let it sit for a couple of hours, then smooth out the jaggies with my shoe rasp before applying another layer. It took me about a week to get the torso to the point where the statue’s base was solid enough to reattach the head.
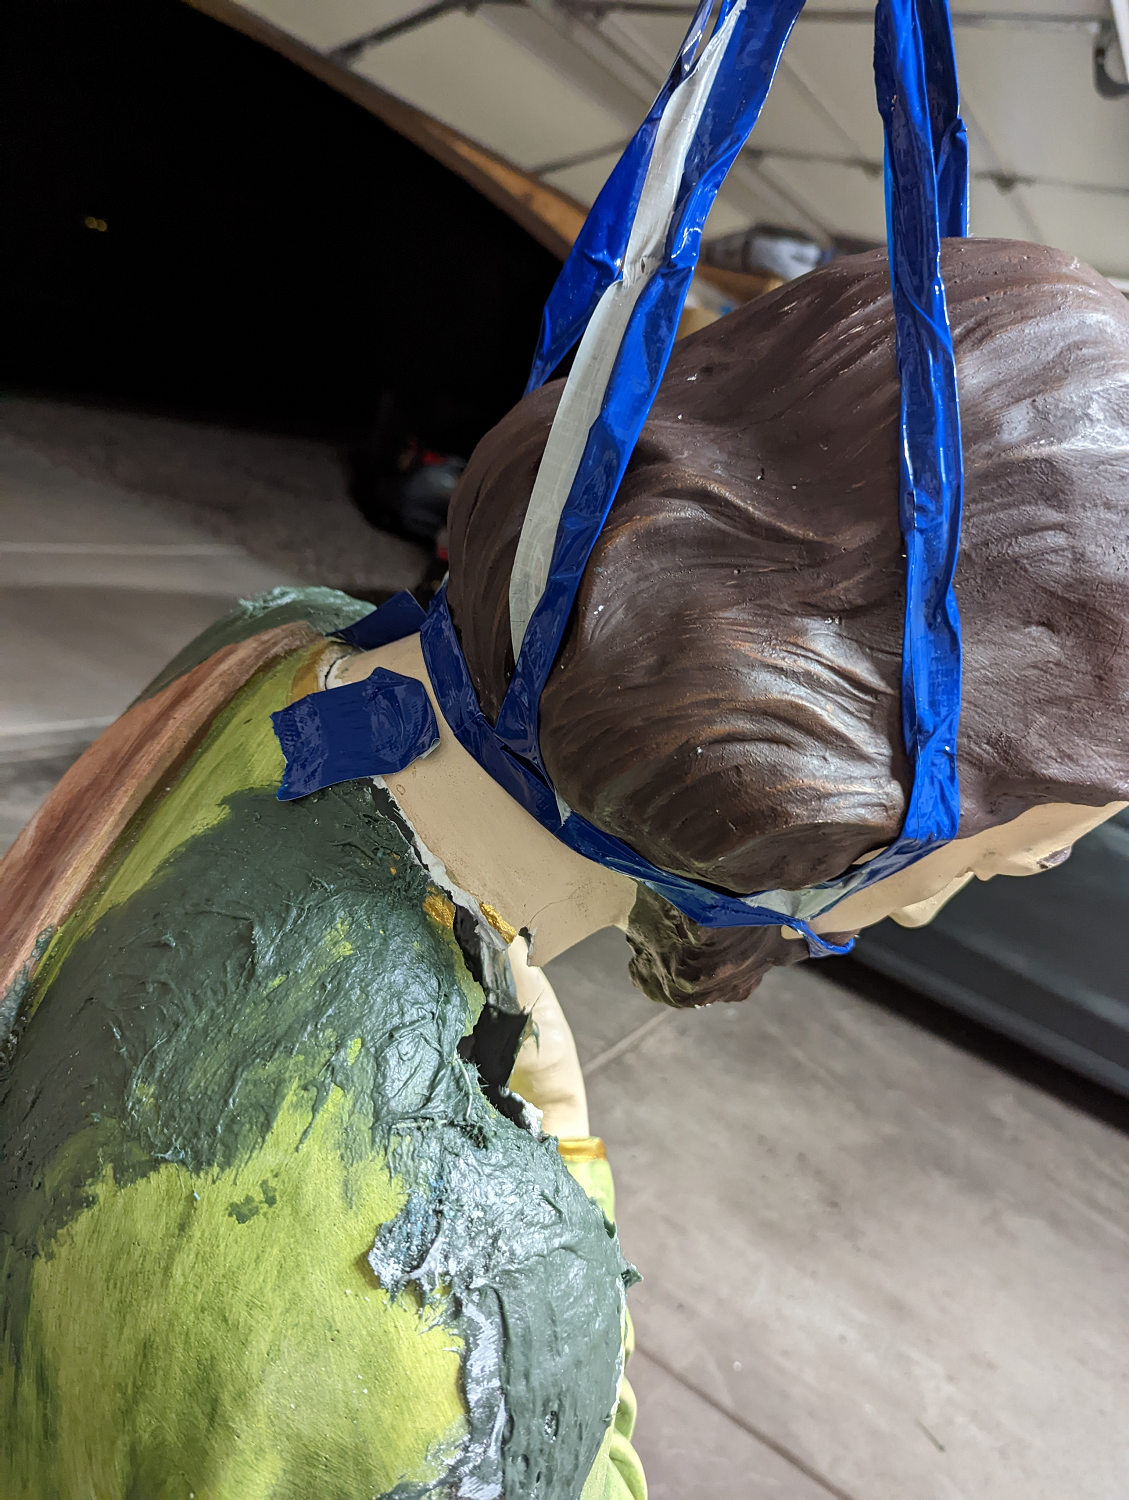
Crane-ing His Neck
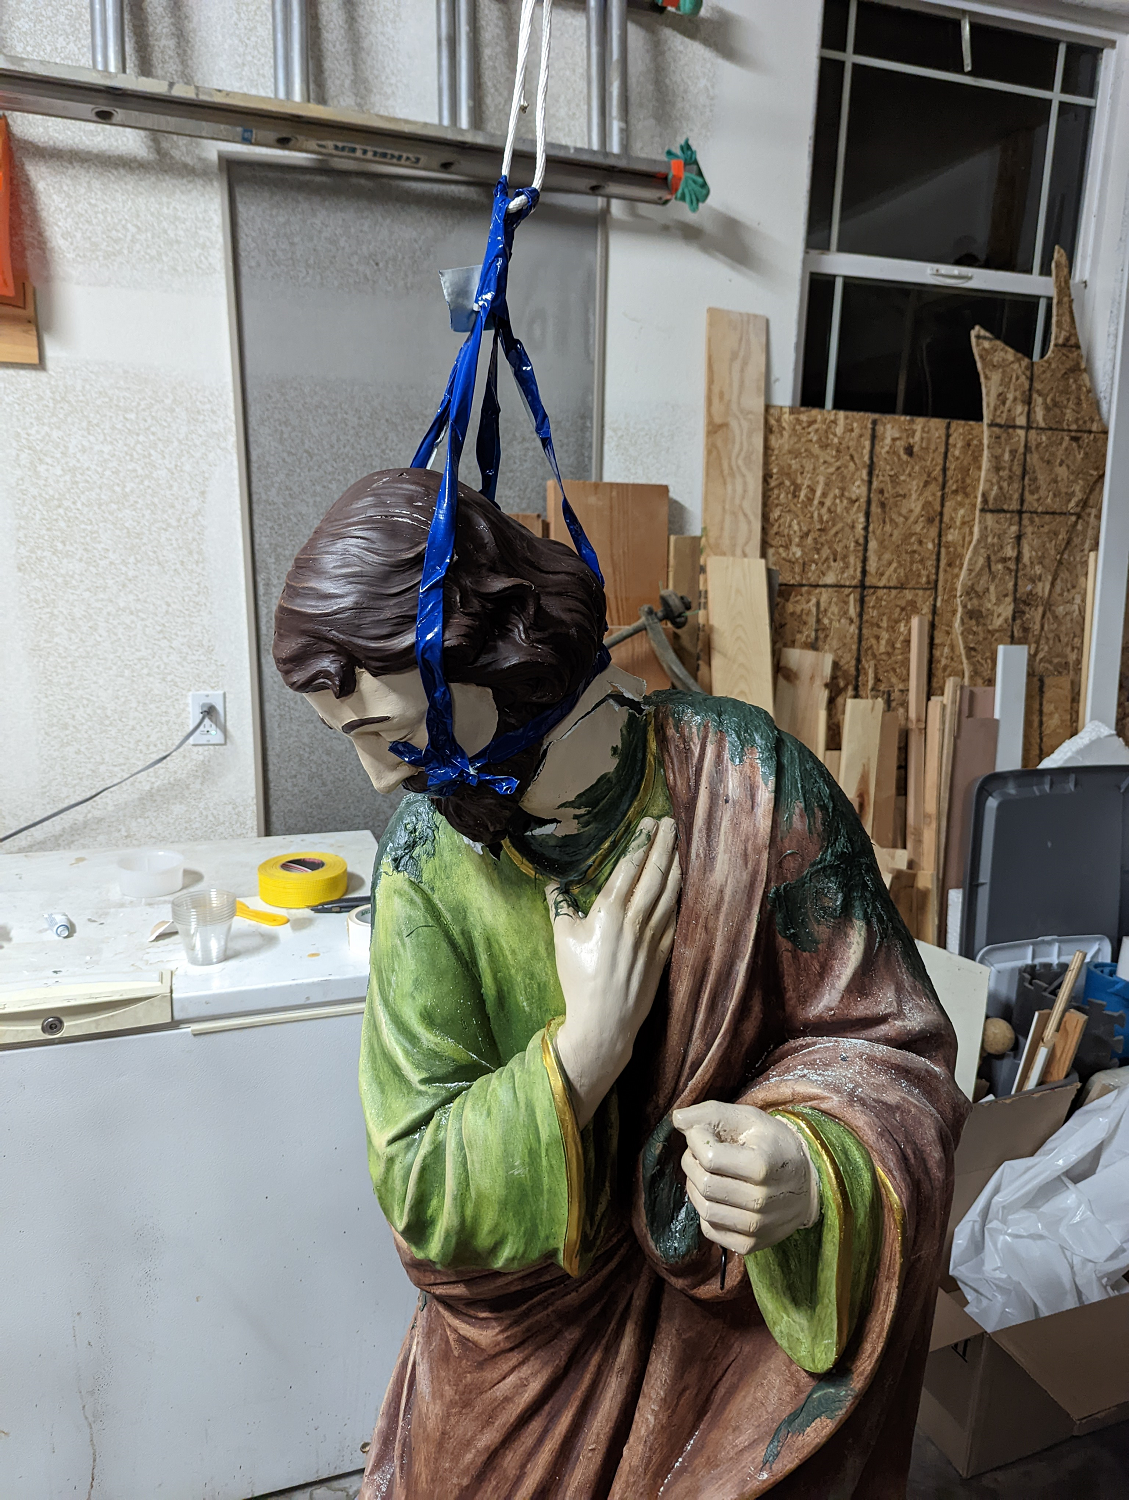
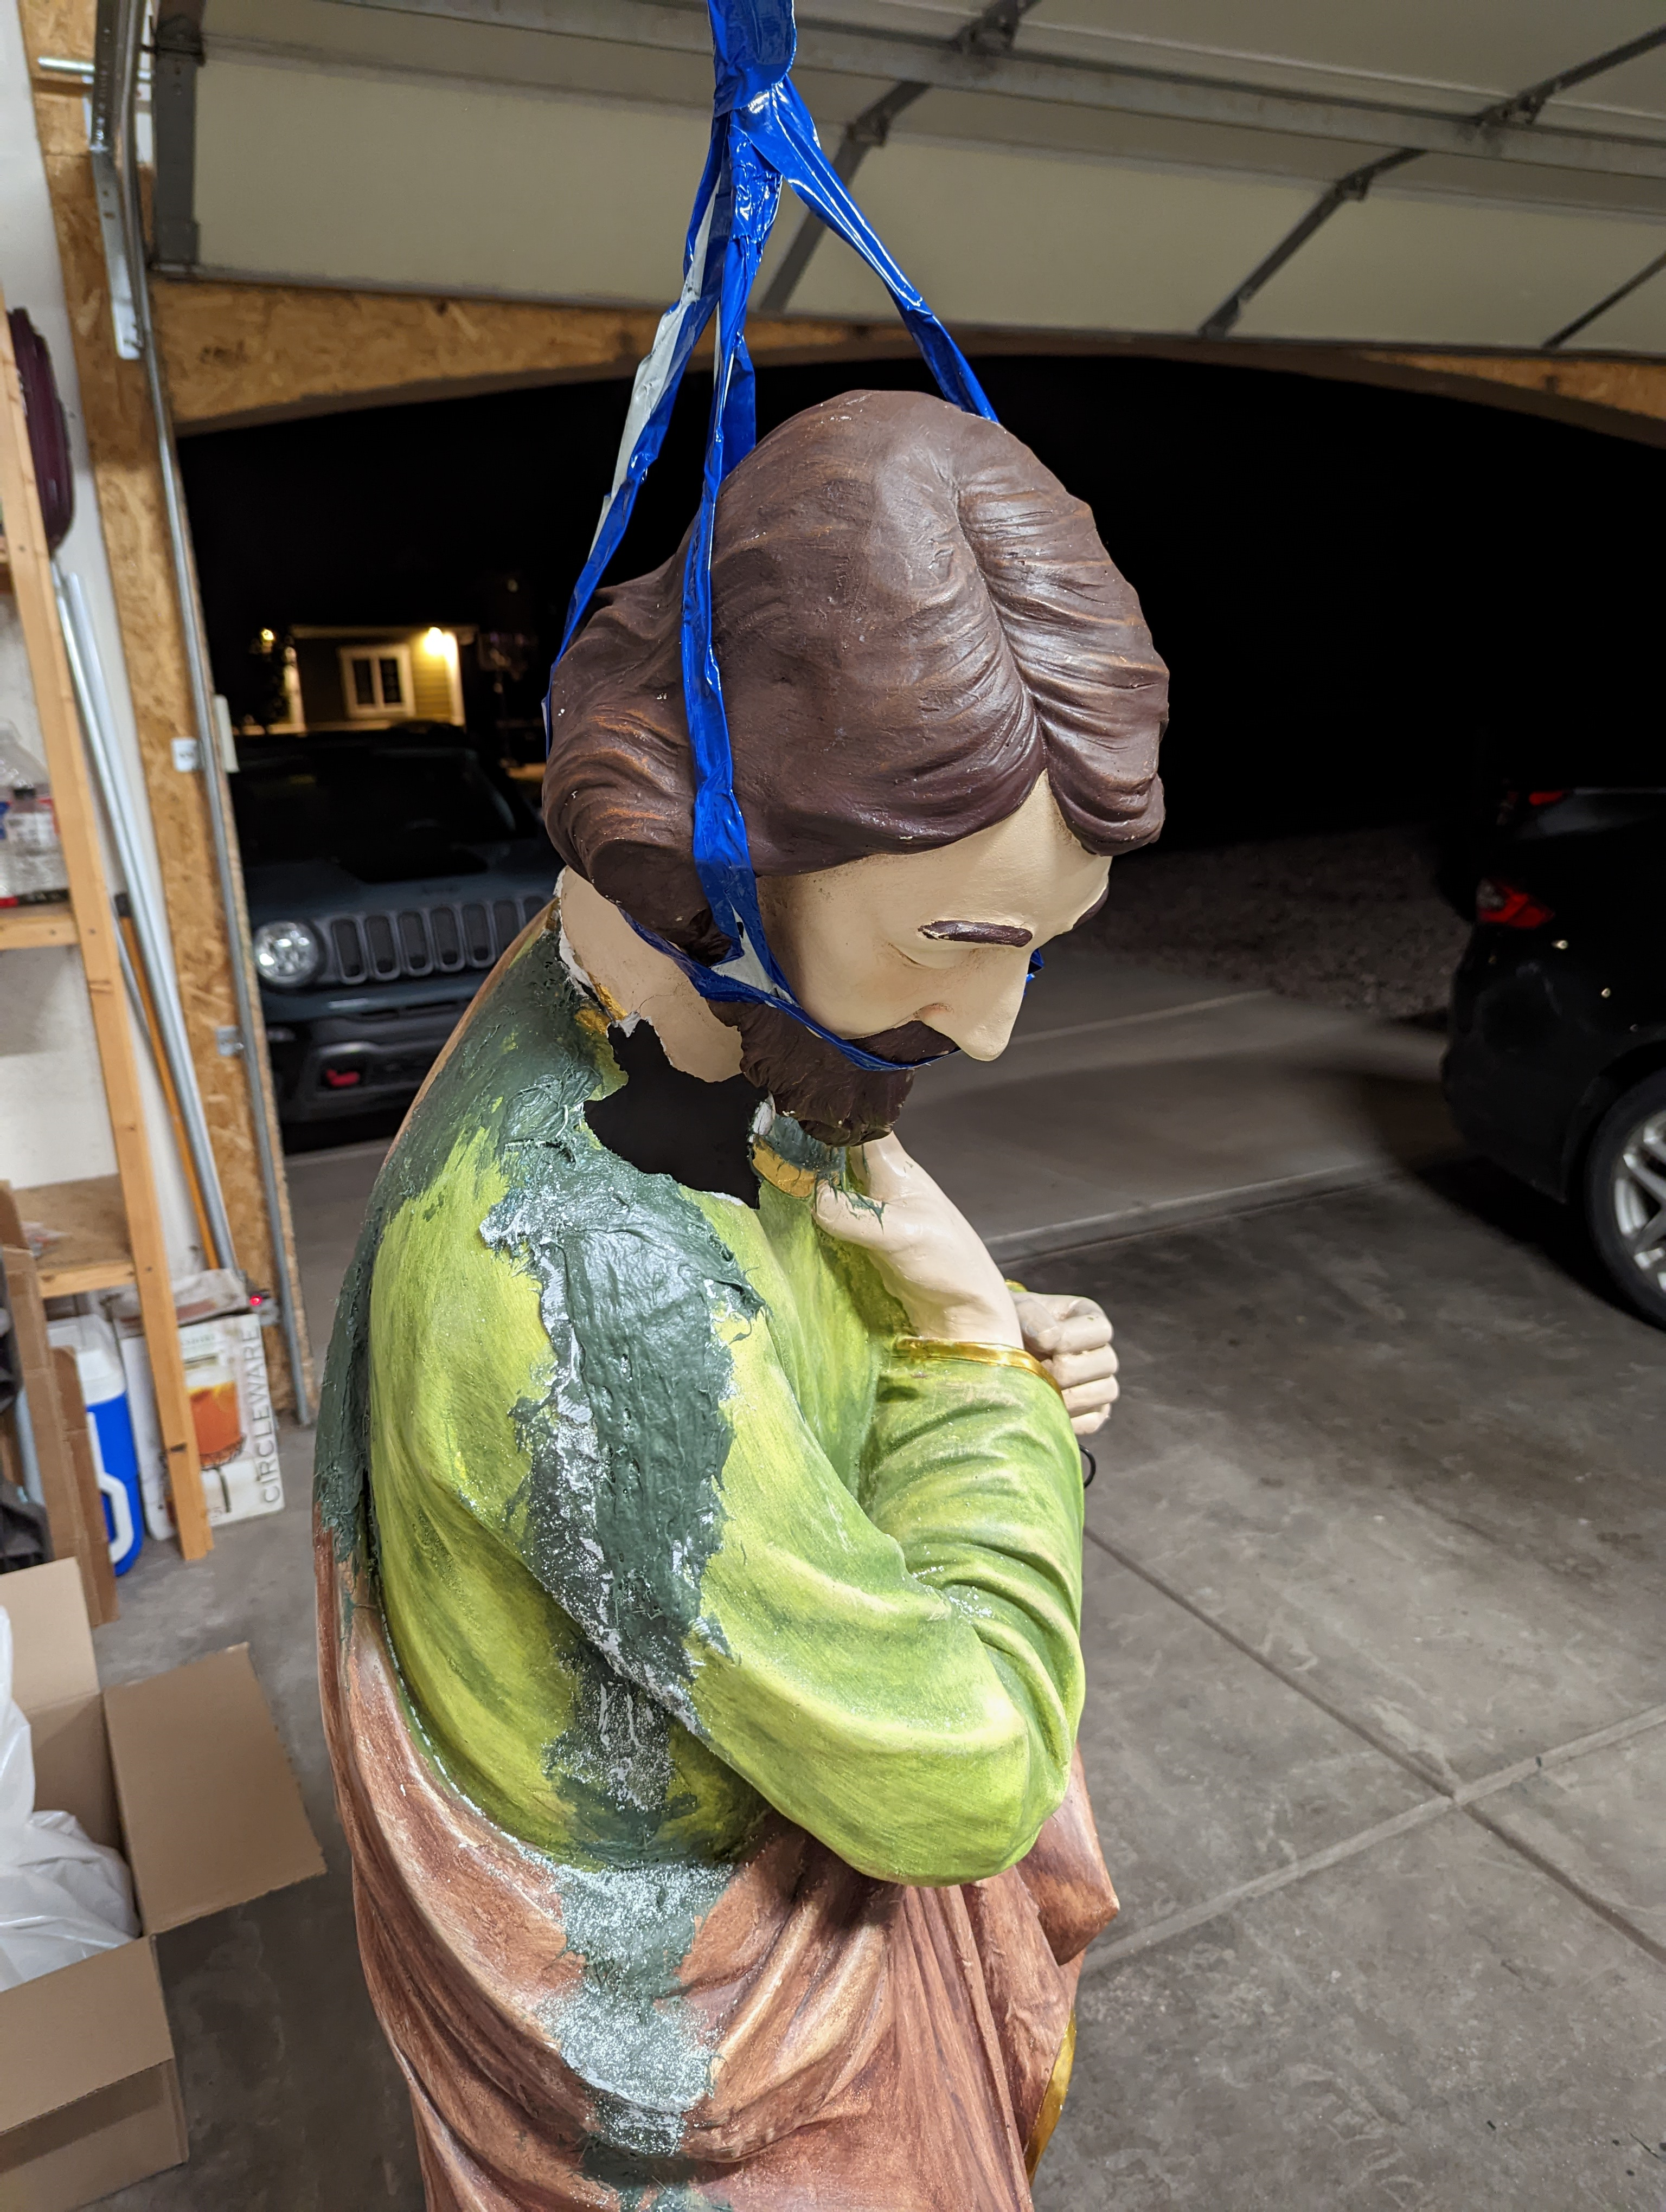
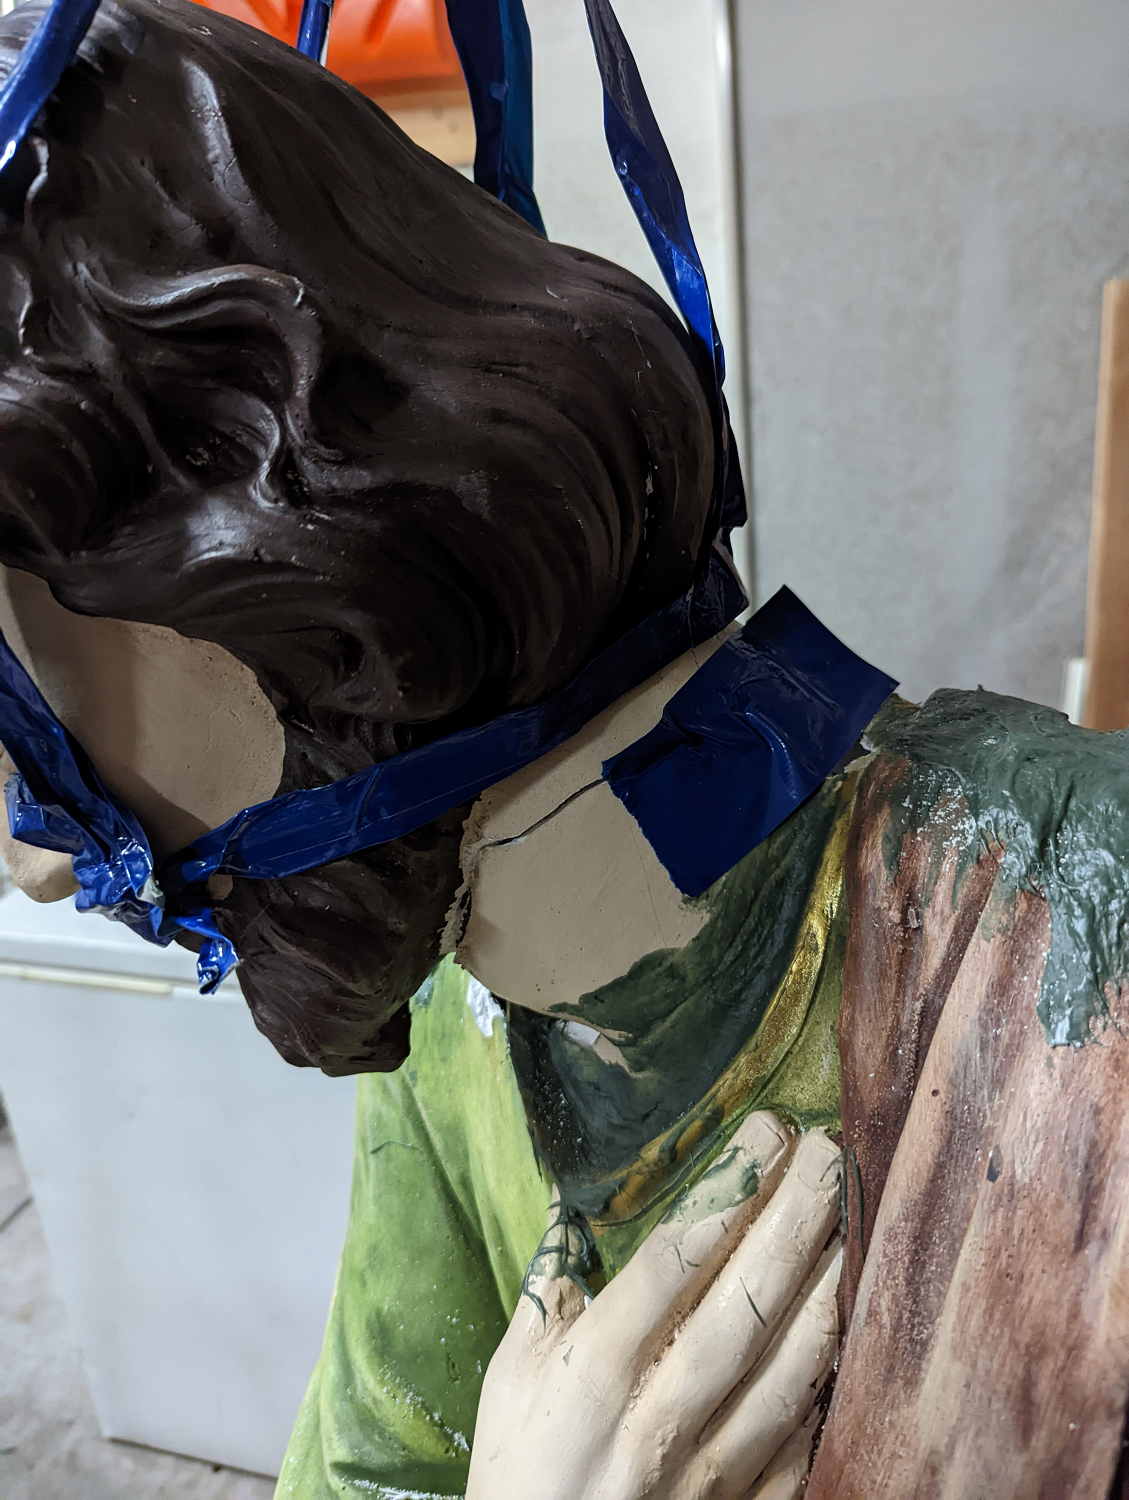
The trick with the head is that I needed a way to “float” it above the body while my next round of repairs firmed up. To make this work, I devised a makeshift crane out of rope and duct tape, which I attached to the track supporting my garage door. It took some jimmying into place, but I eventually maneuvered the head into place and taped it to the body.
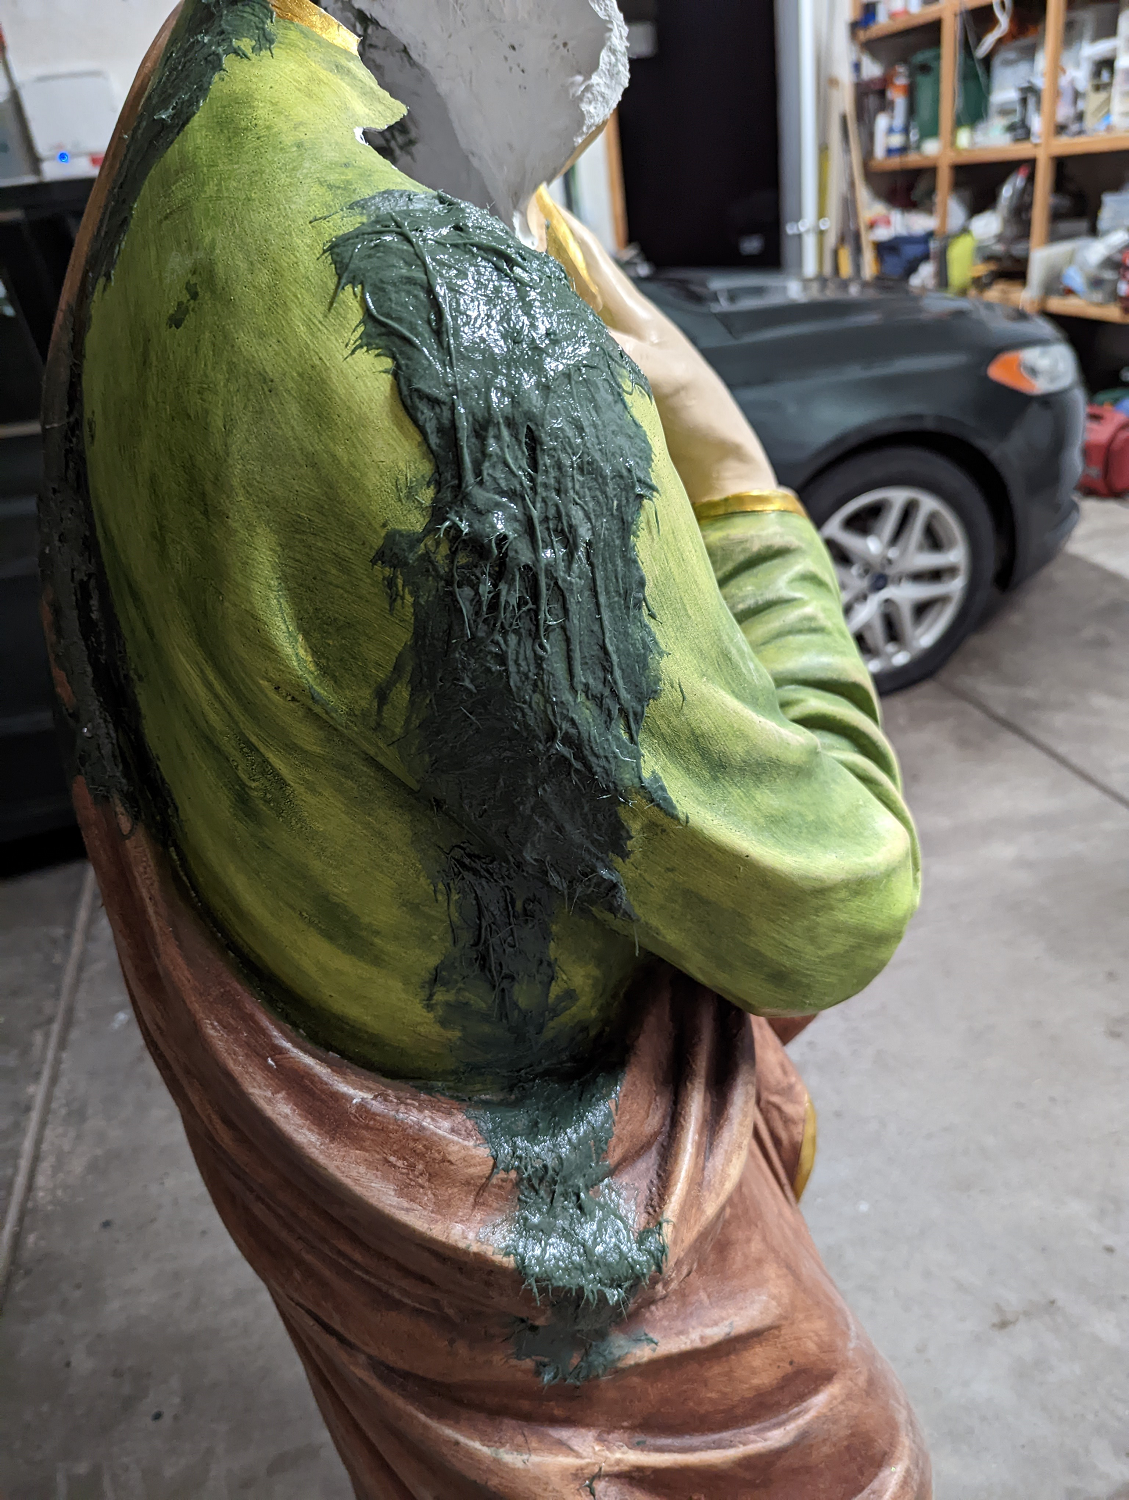
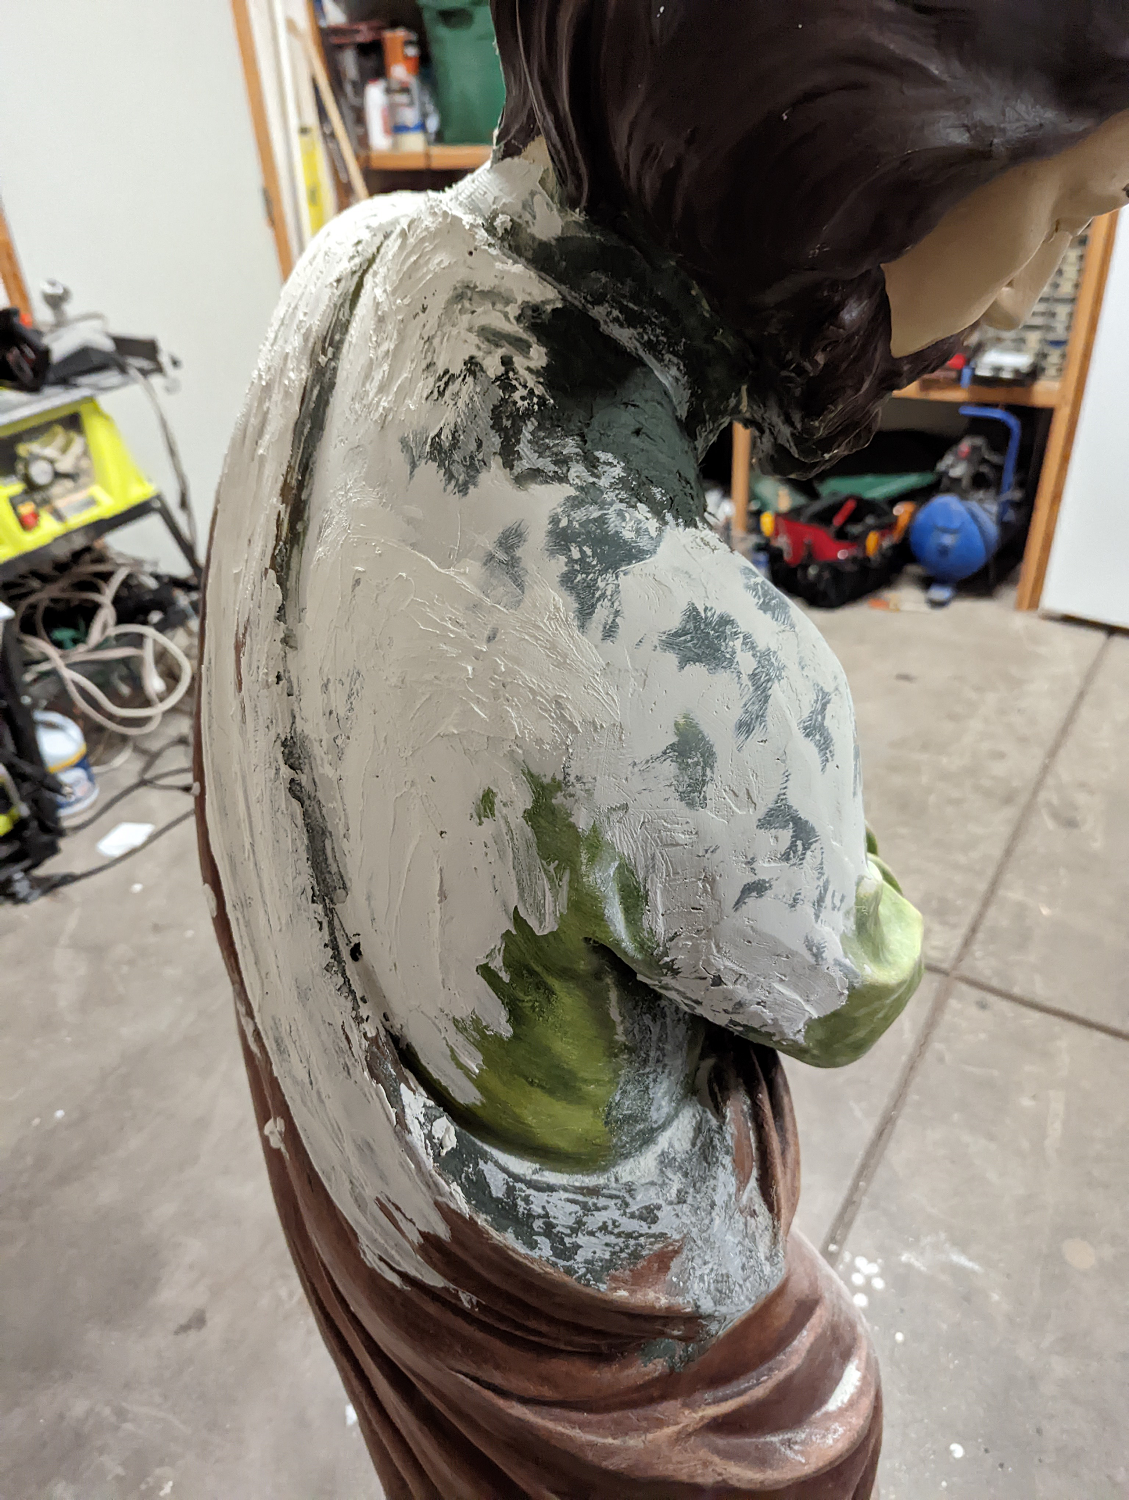
With double-gloved hands, I applied Bondo to the untaped area of the seam. Then, after letting the Bondo cure overnight, I removed the tape strips and finished the first layer of compound all the way around.
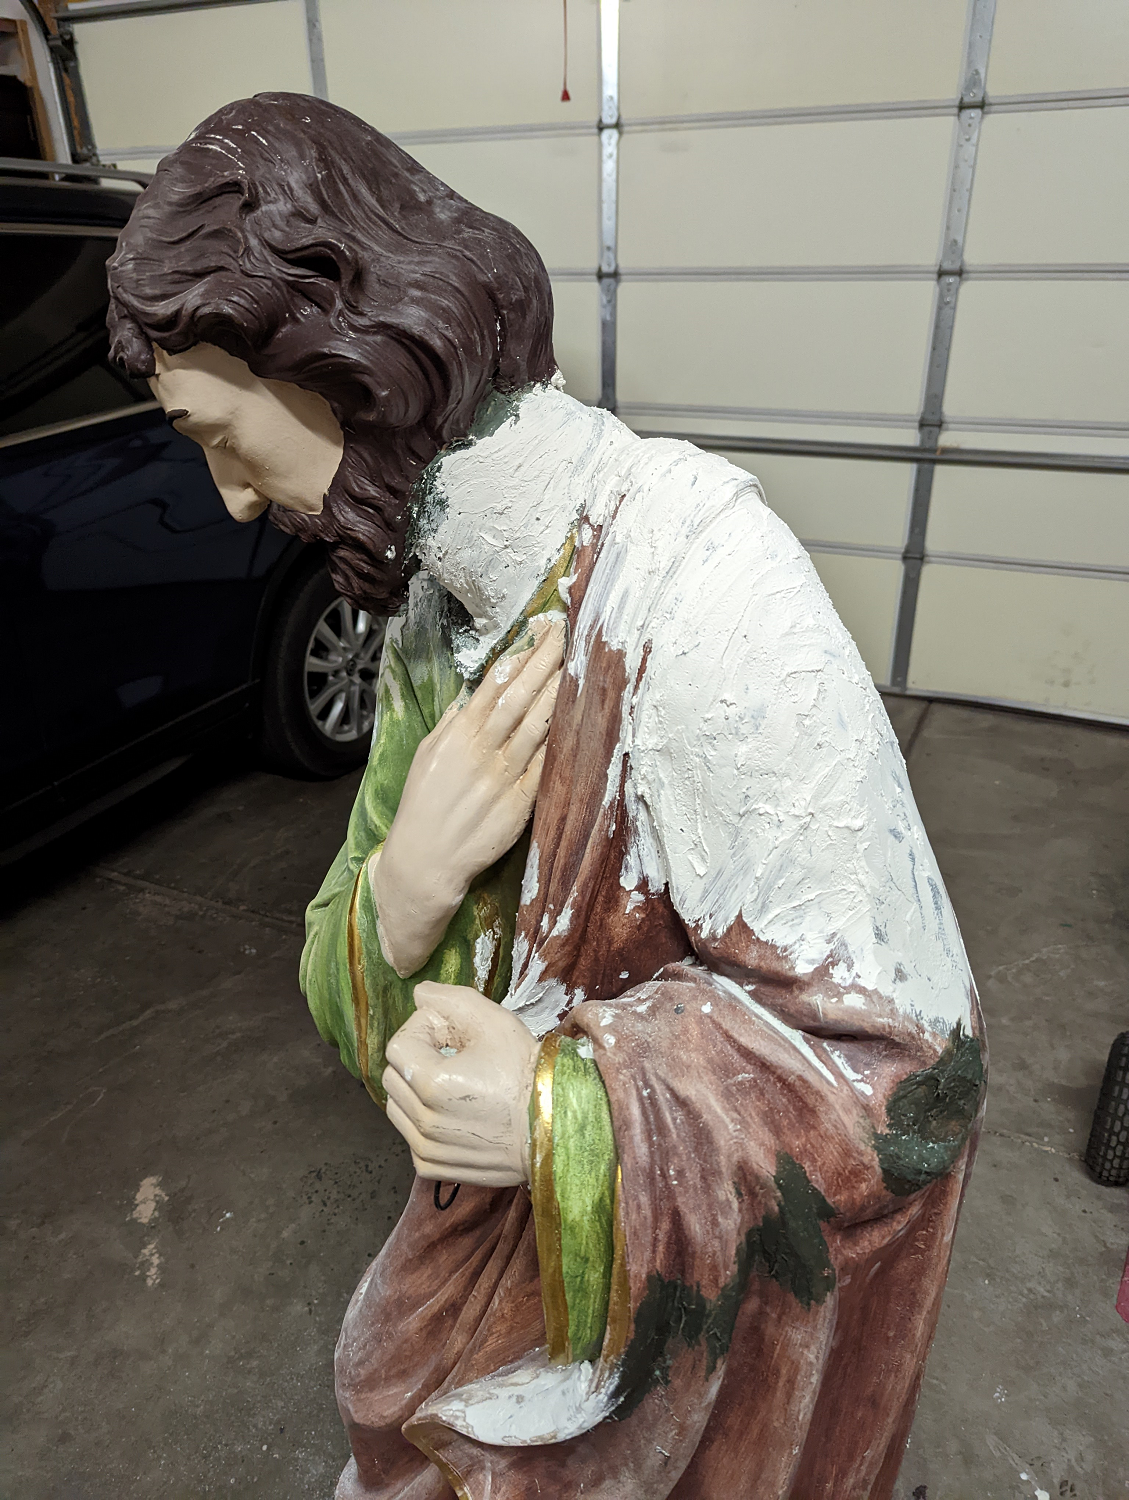
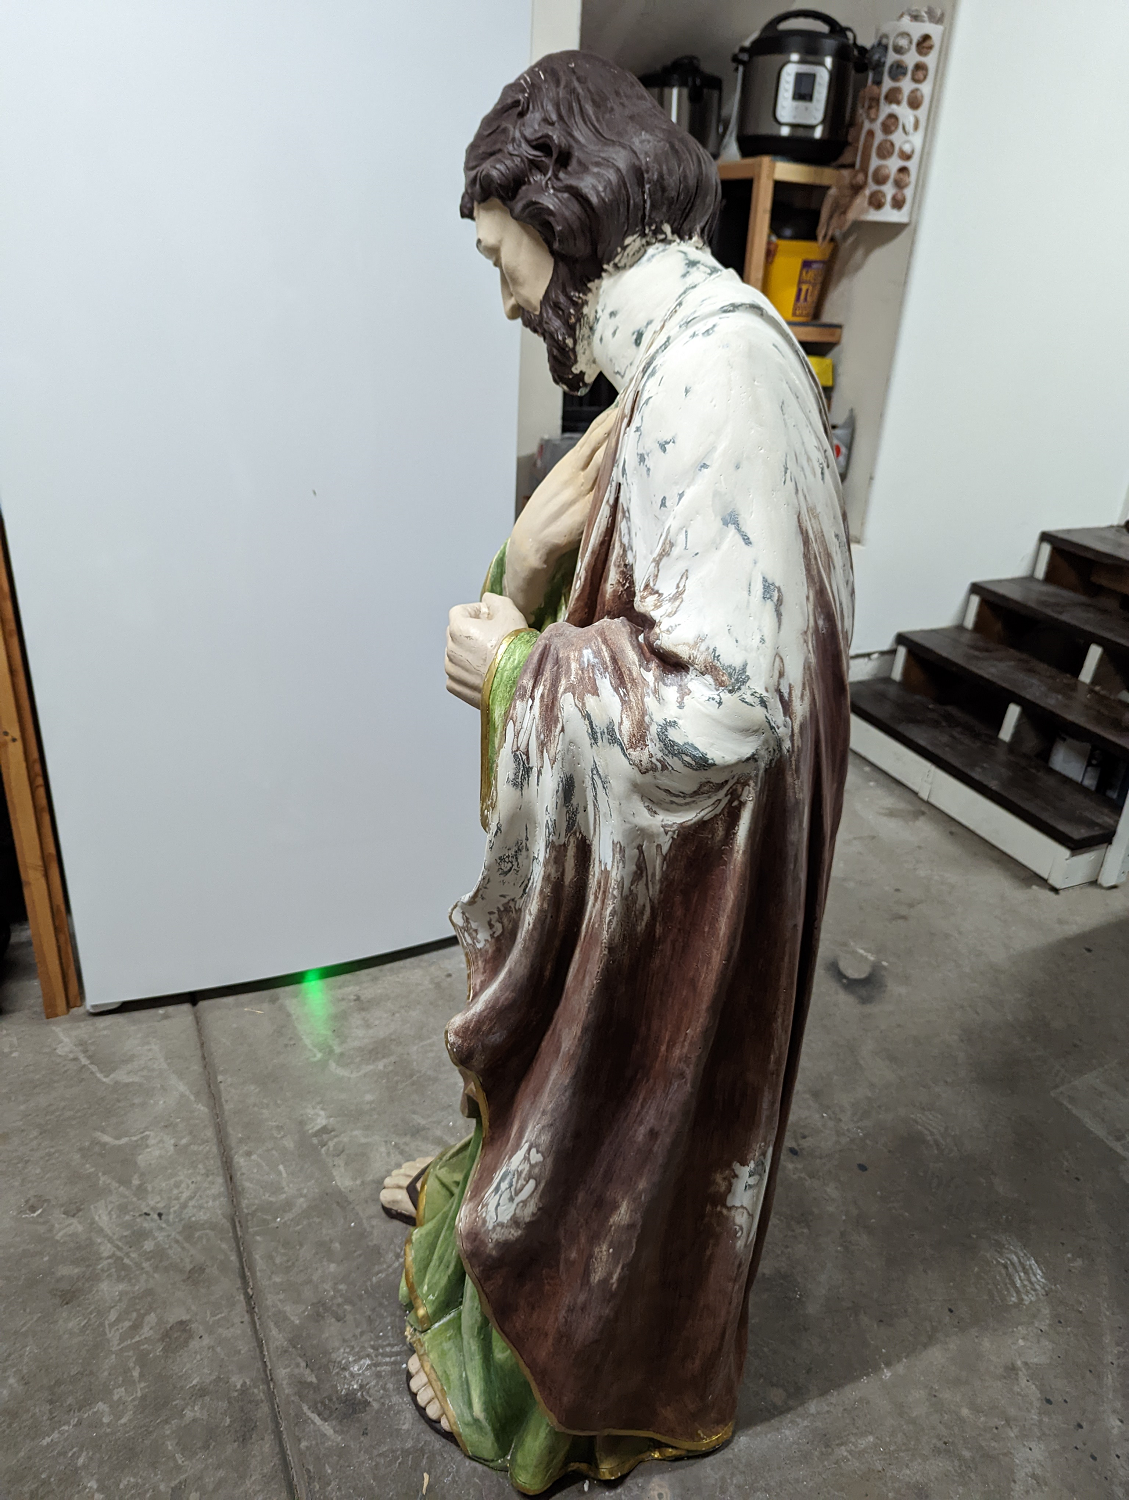
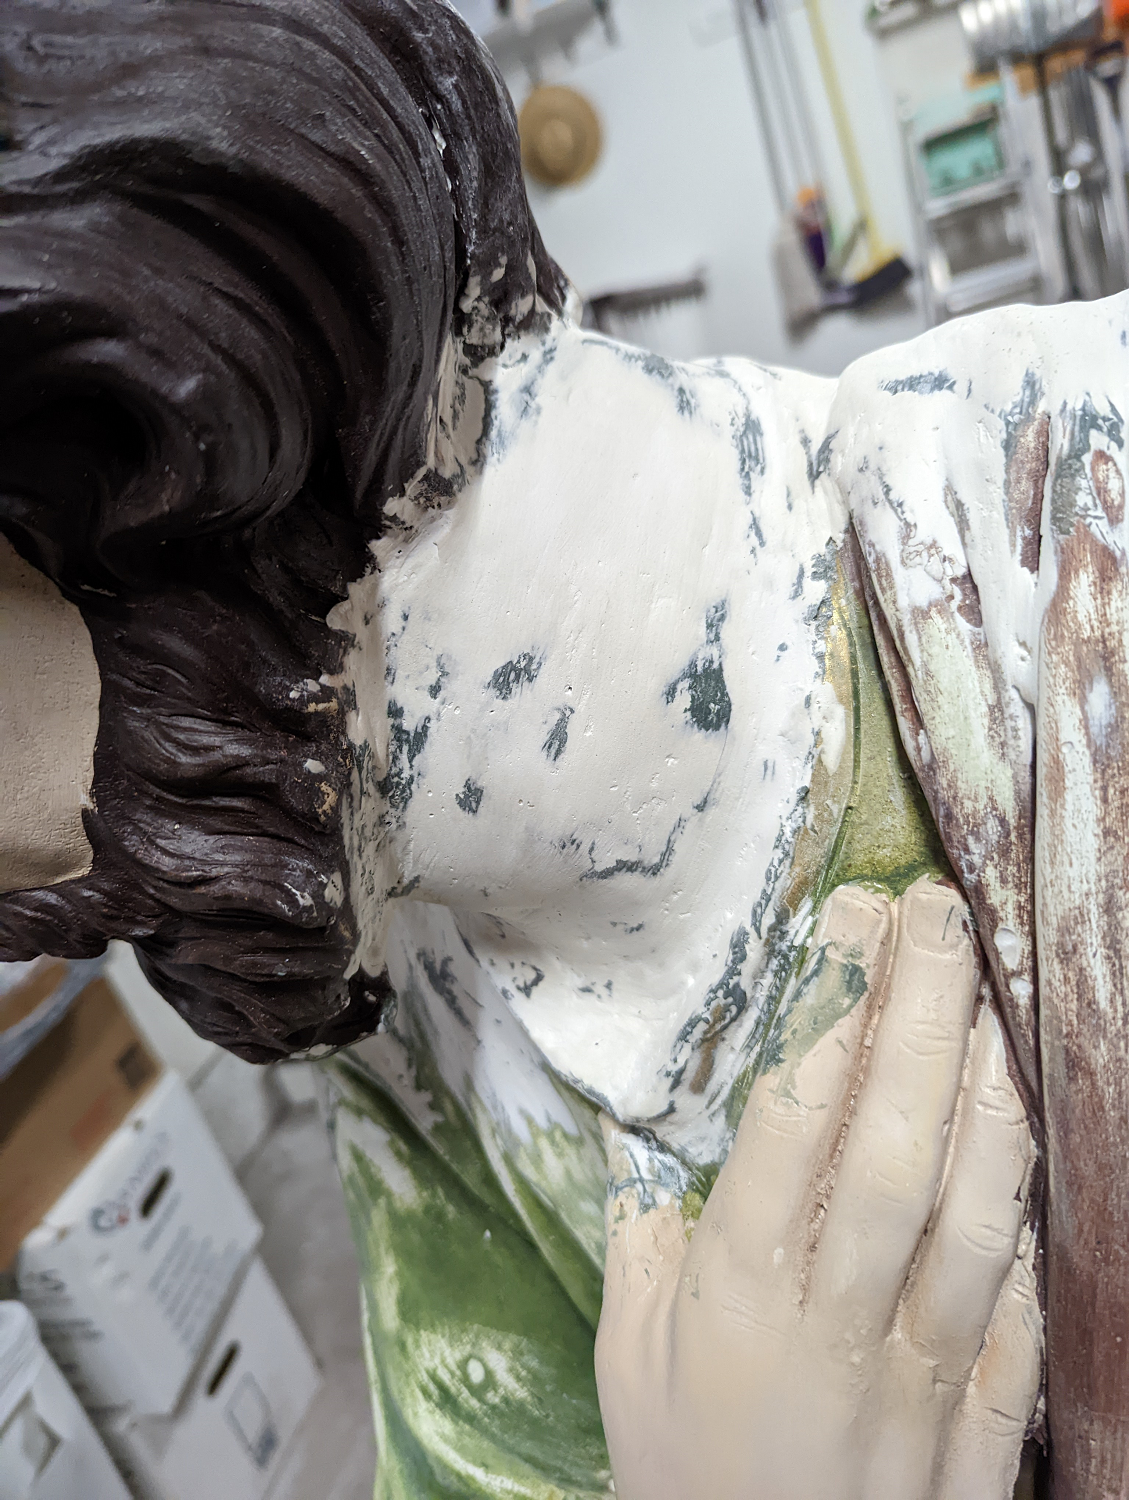
There was one section of Joseph’s neck that was missing, and a few shards I had wouldn’t quite fit. To fix this, I stuffed wadded-up newspaper into the neck and built up a whole new section out of Bondo. As before, I took several layers to do the trick. After the new section cured, I used the remaining Bondo to re-create the neckline of Joseph’s tunic, which had been covered up with layers of compound.
Here’s the funny thing. When Joseph was still headless, my dog Roxy walked right past him a bunch of times and didn’t even notice him. Once the head was reattached, though, she suddenly saw the statue as a person, which means he was a threat and needed barking at…
Smoothing It Out
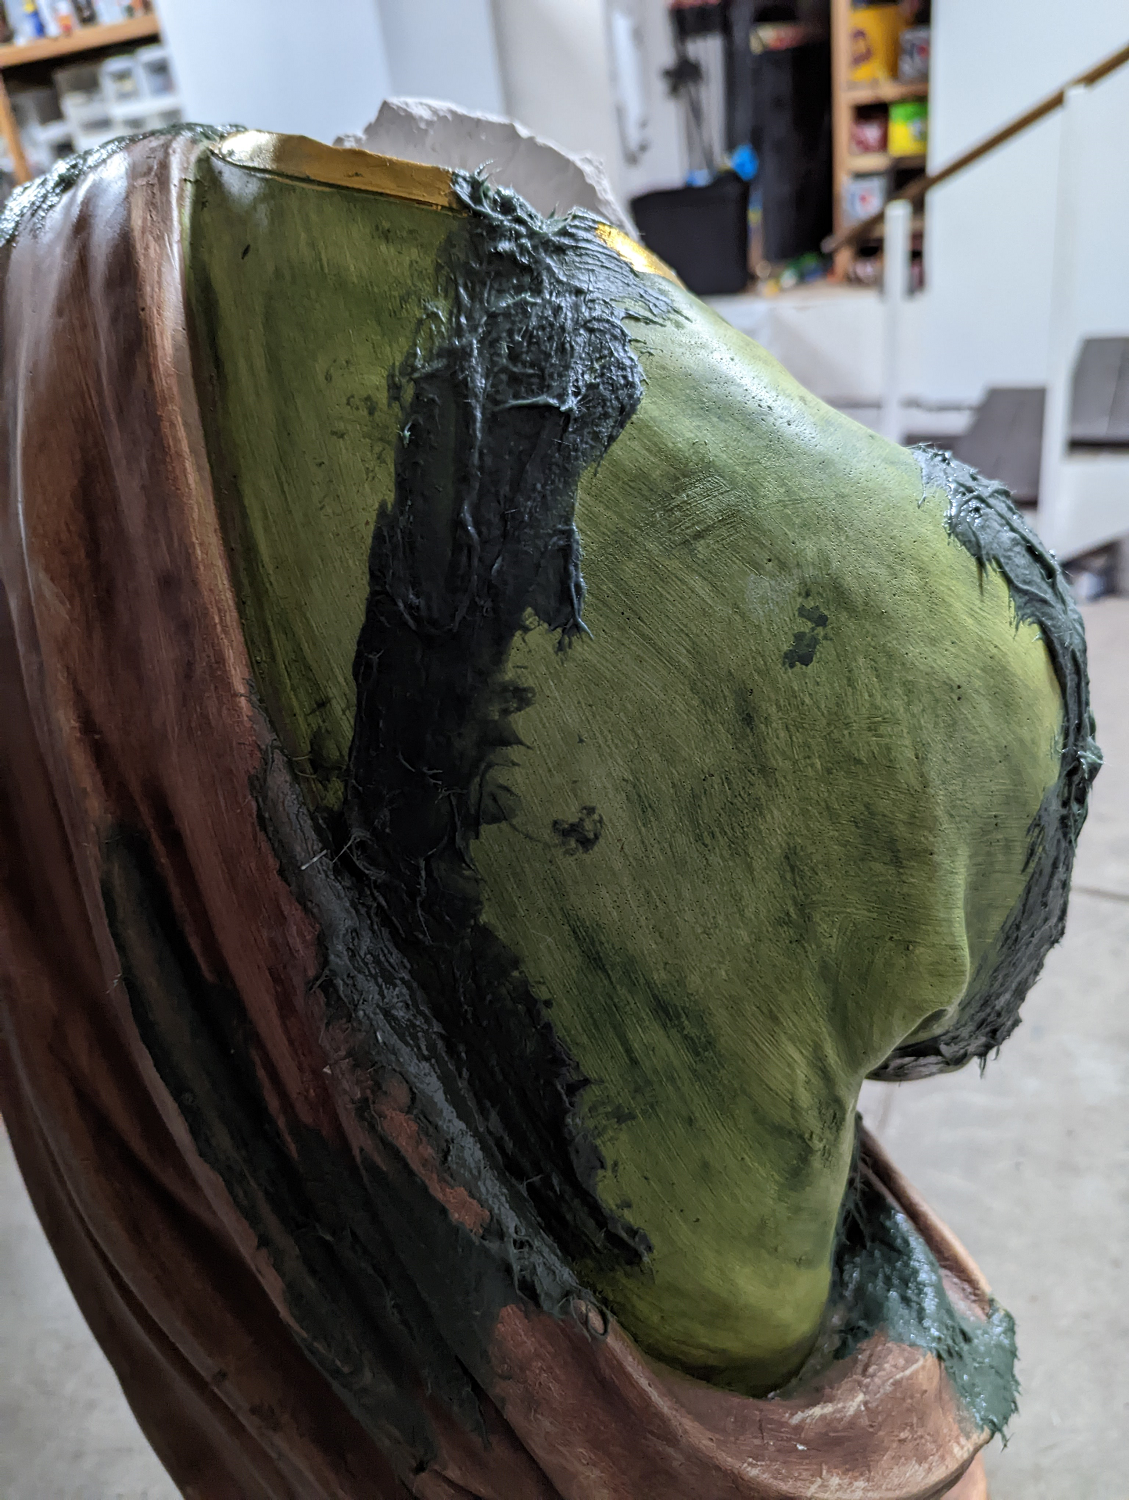
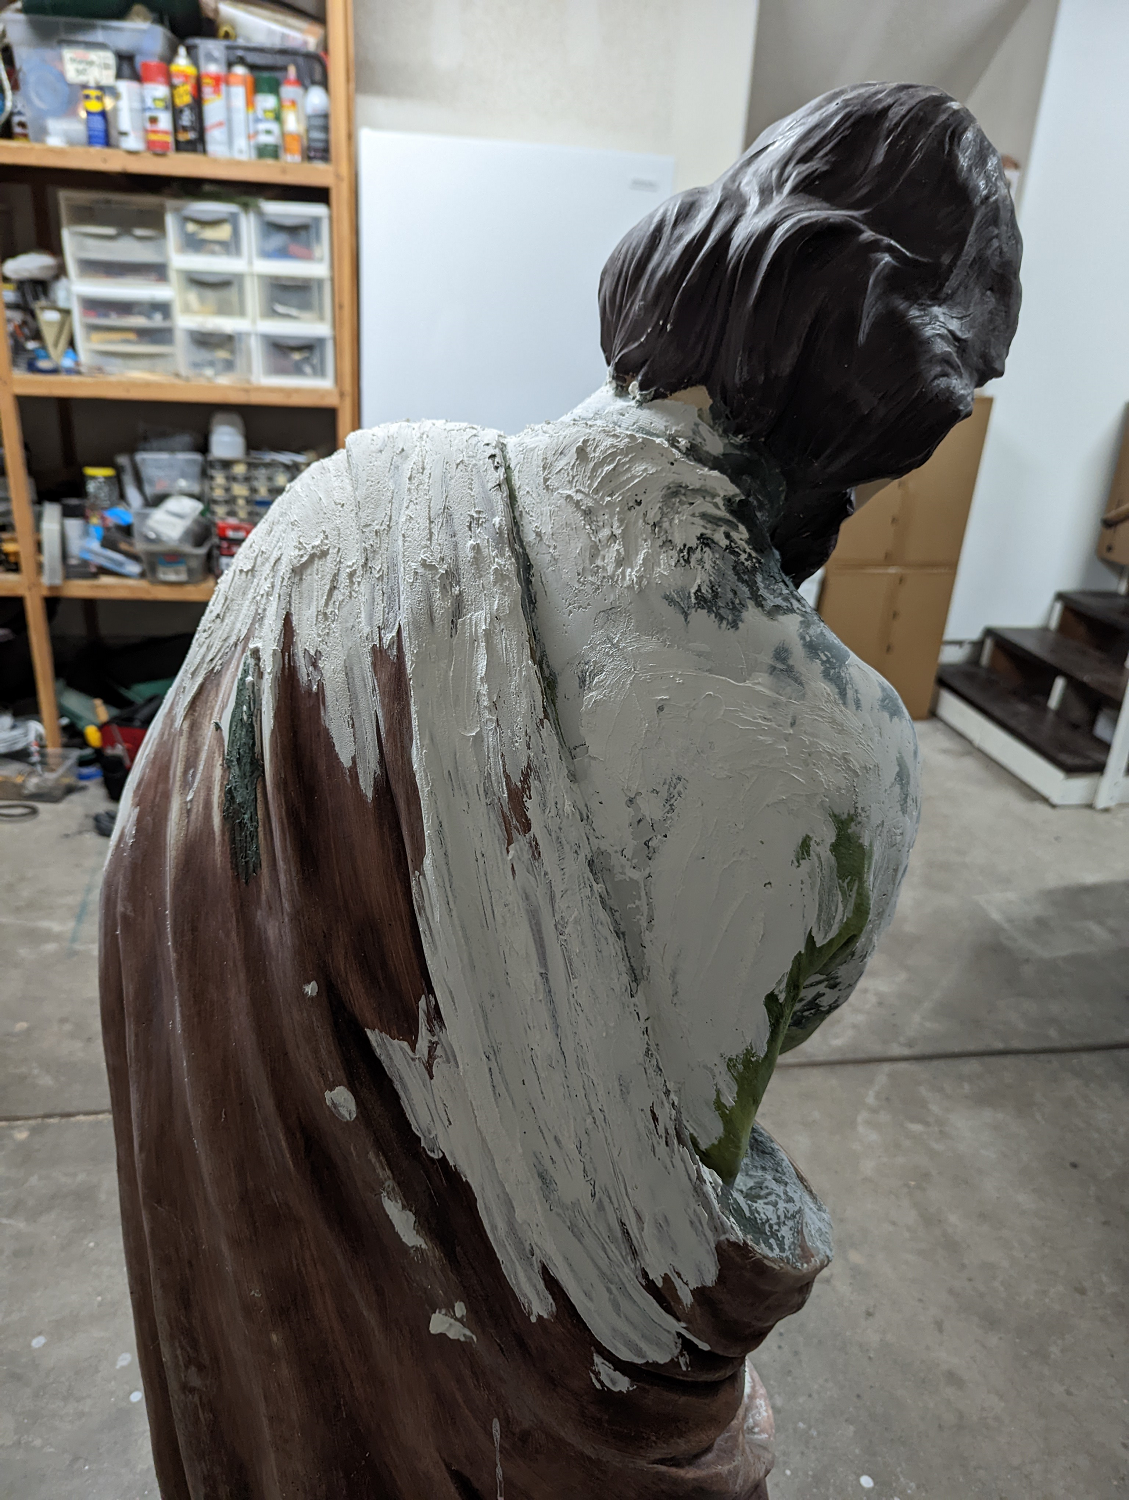
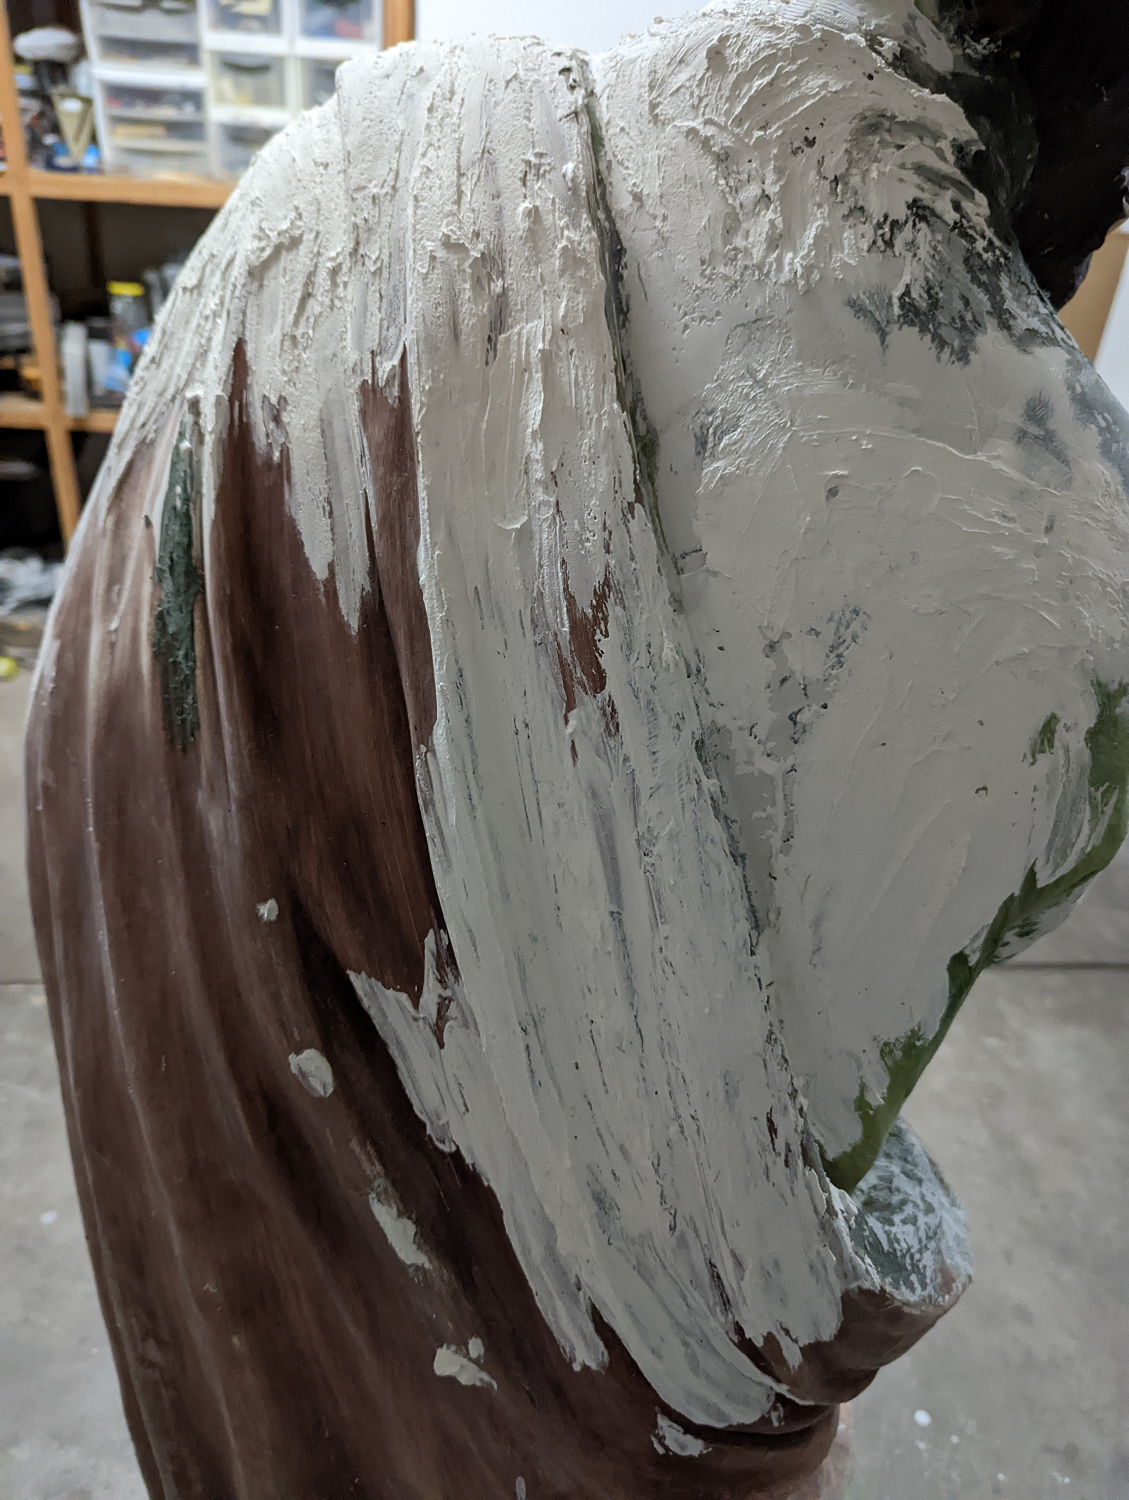
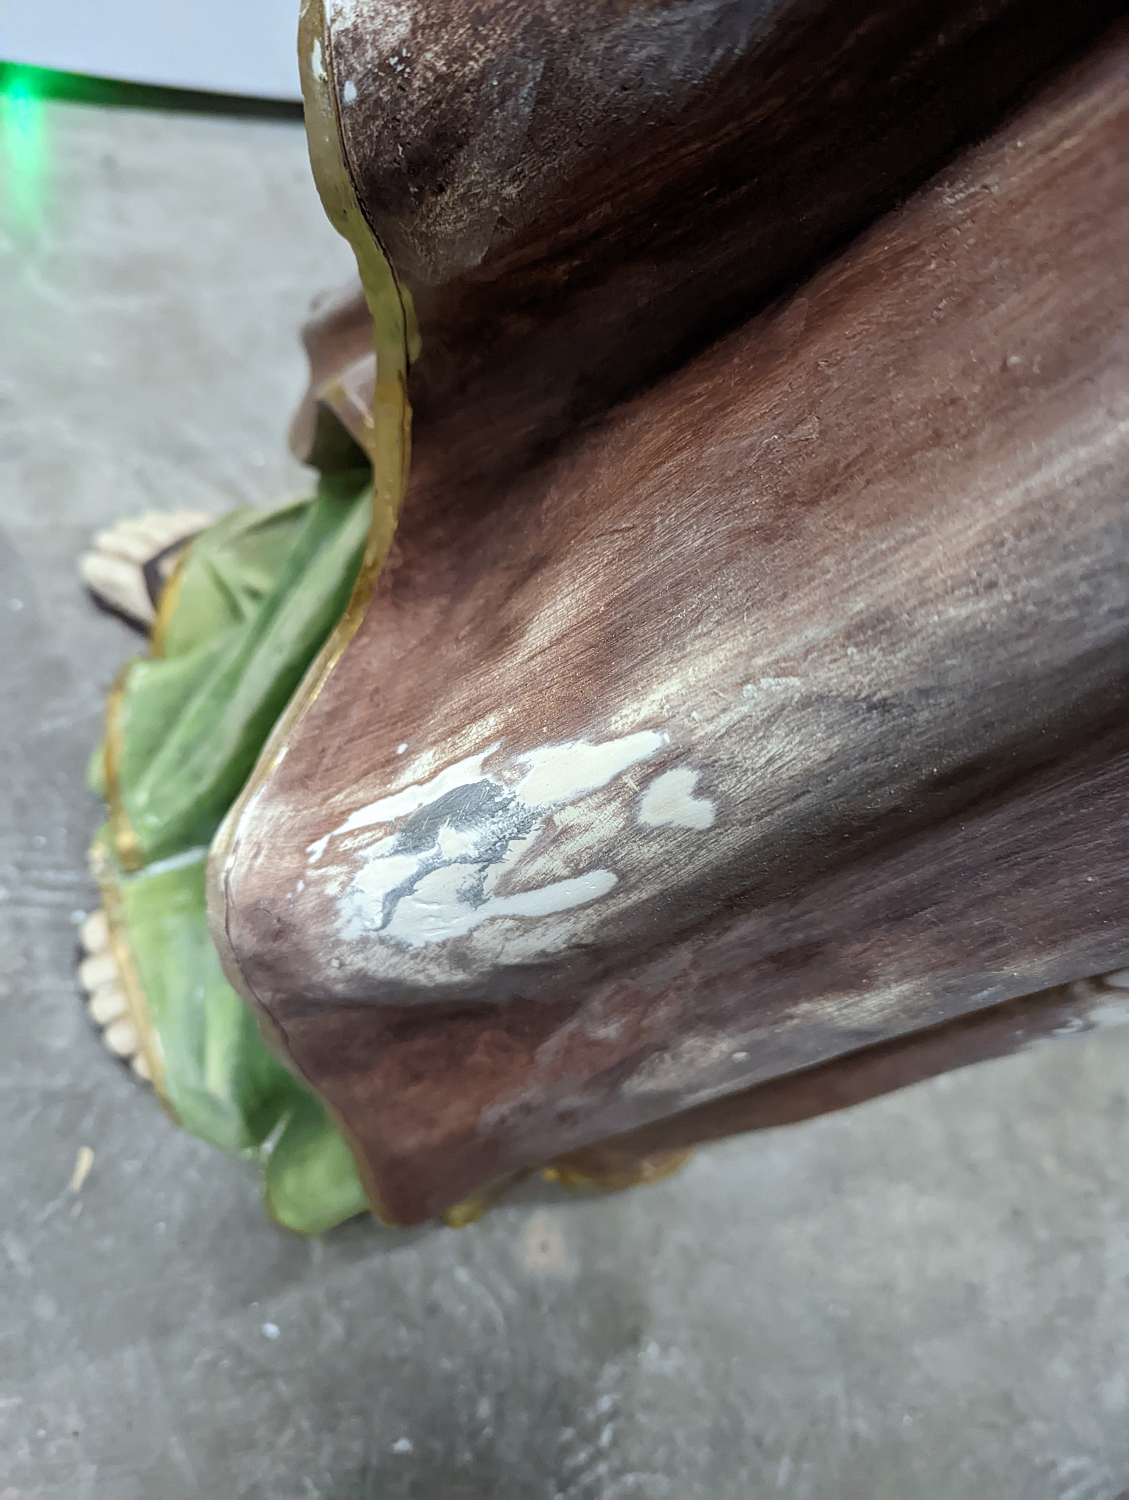
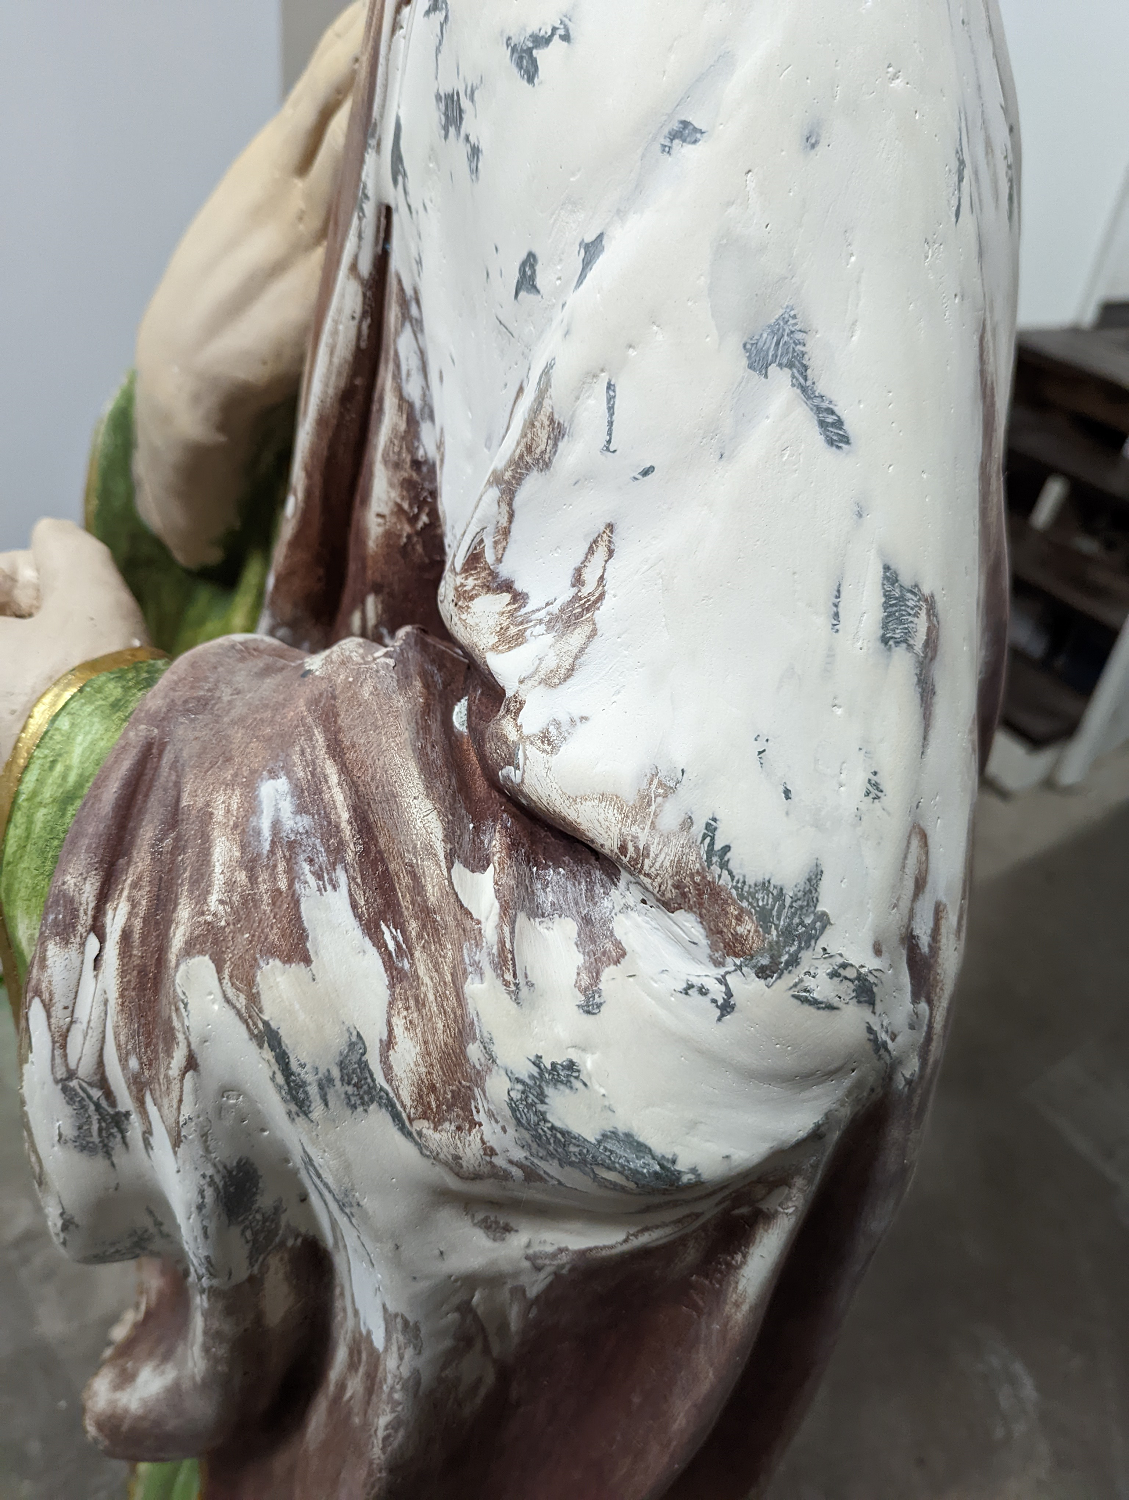
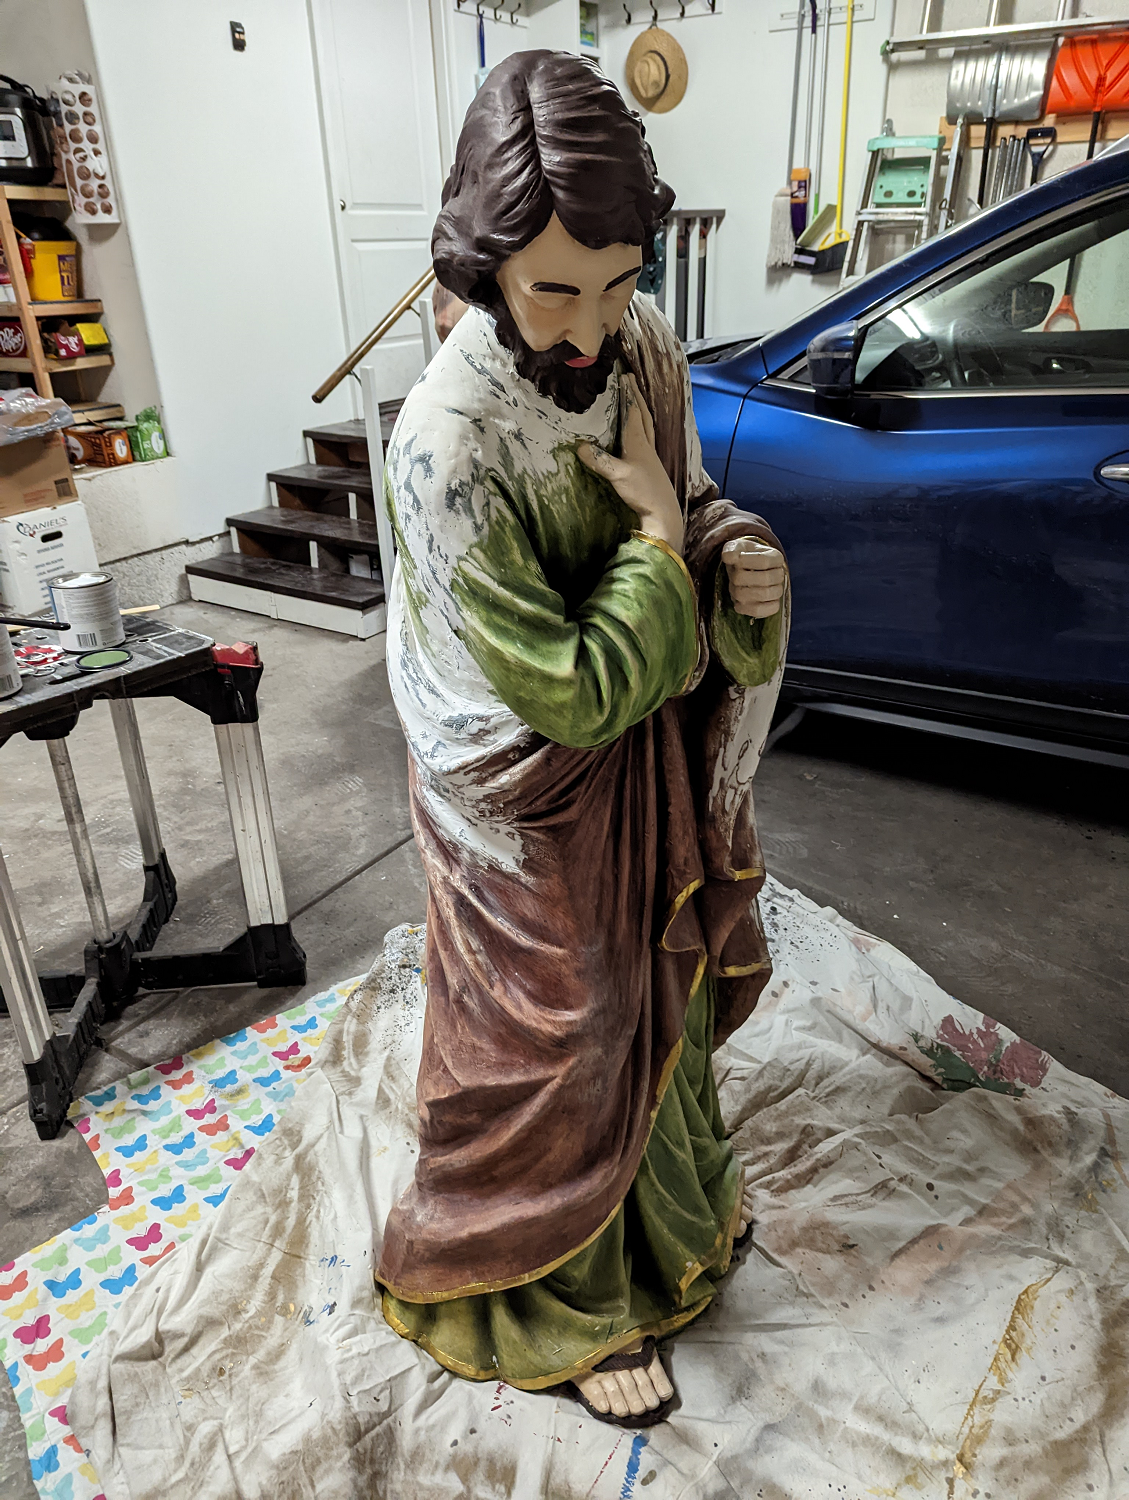
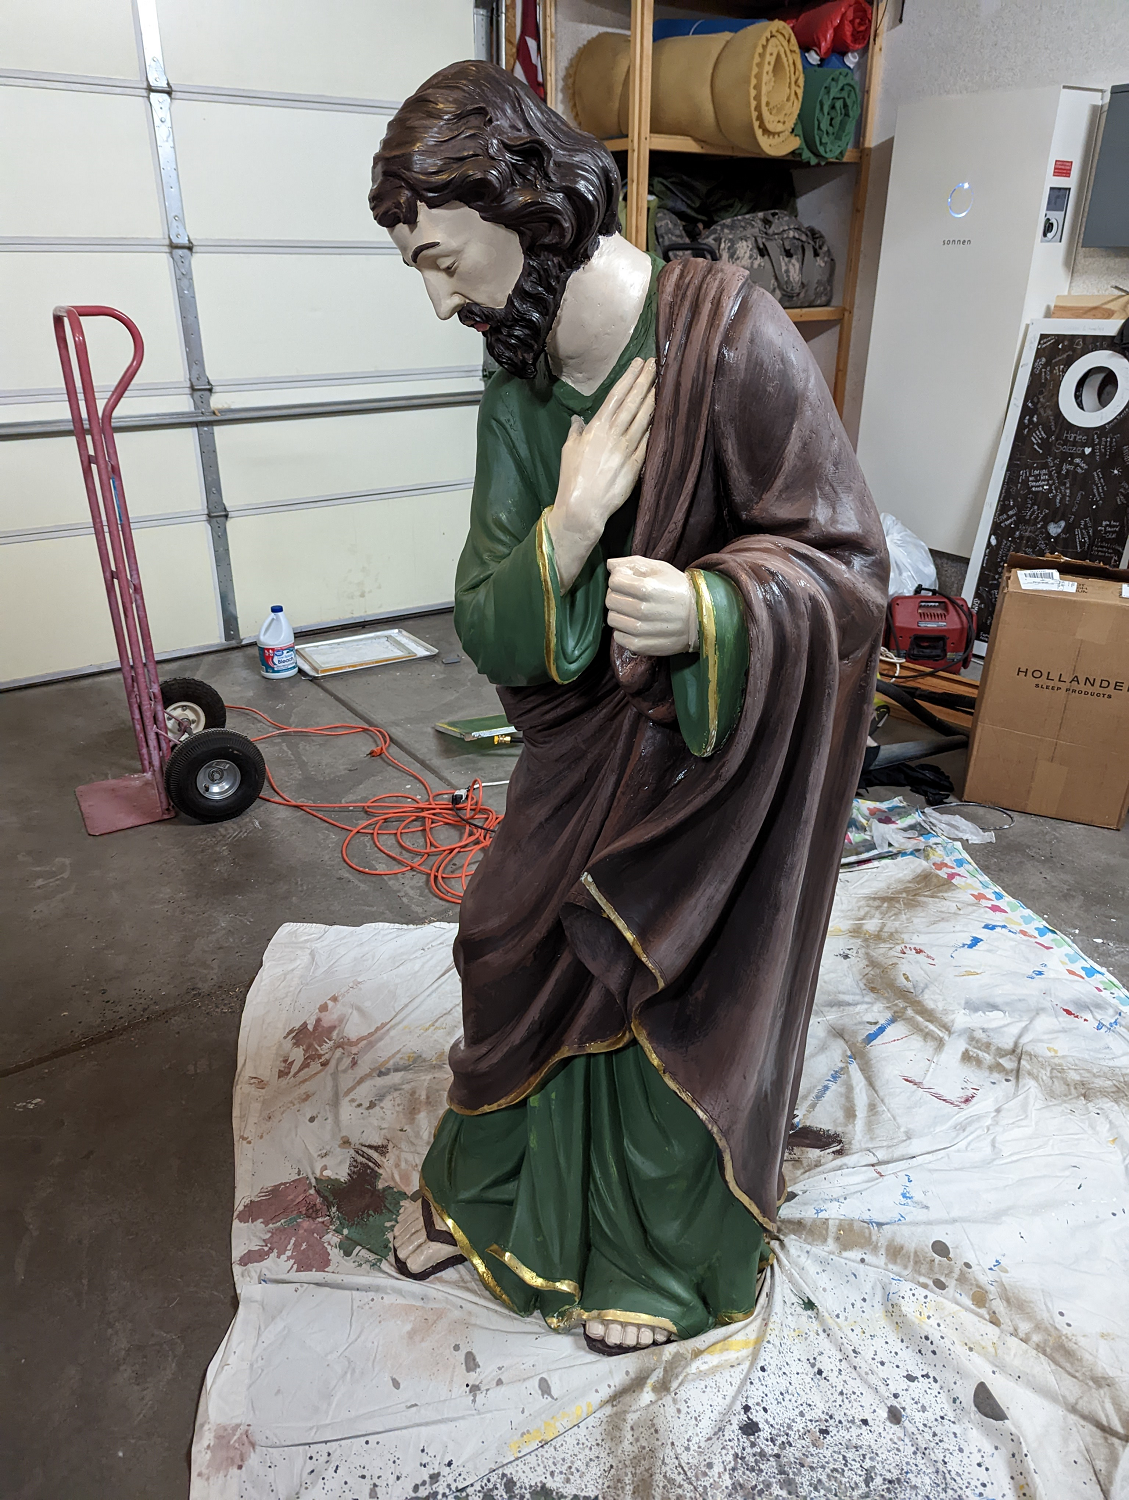
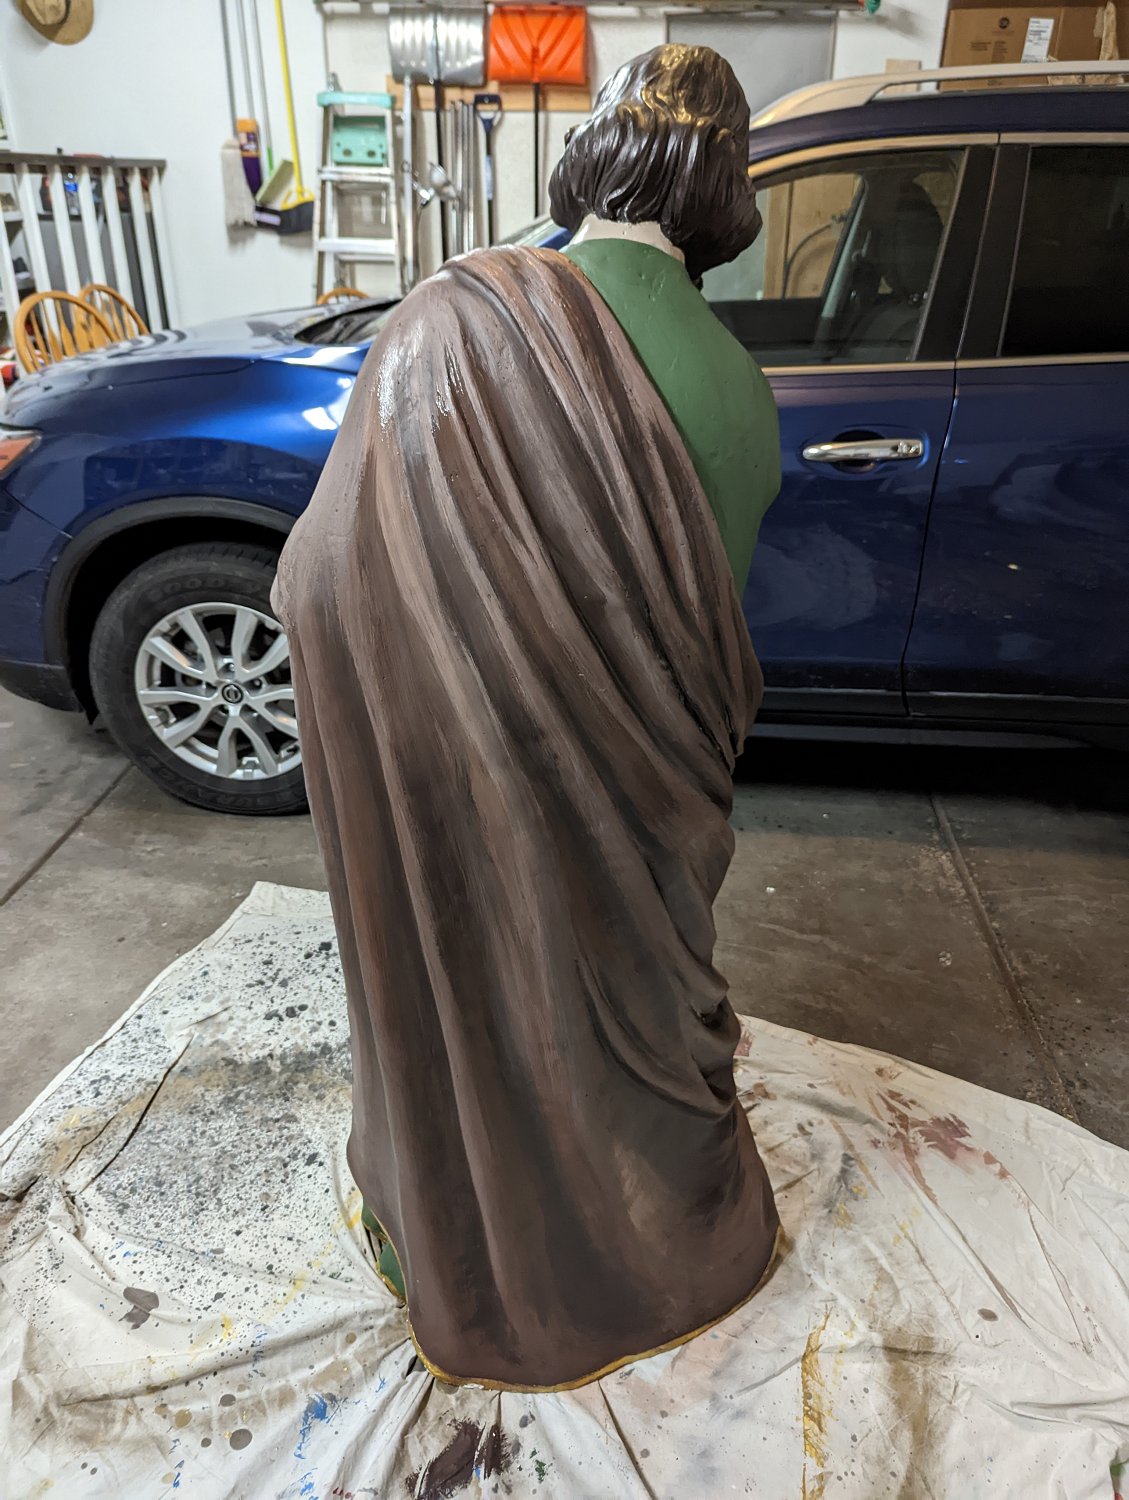
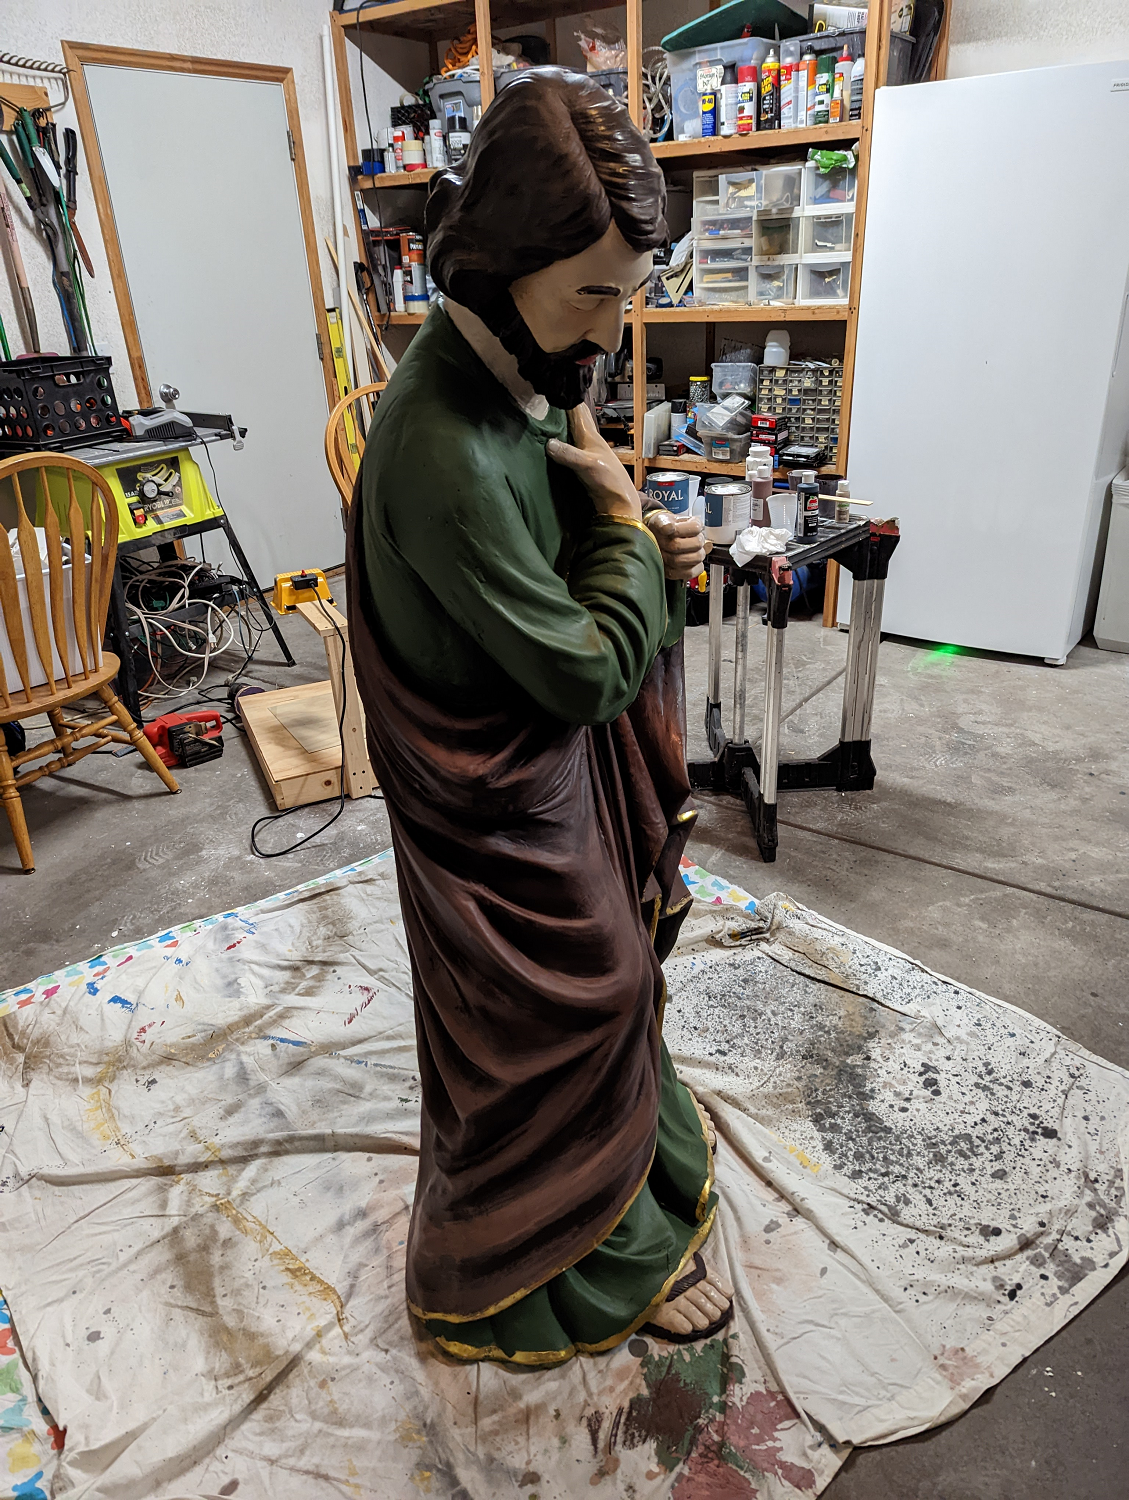
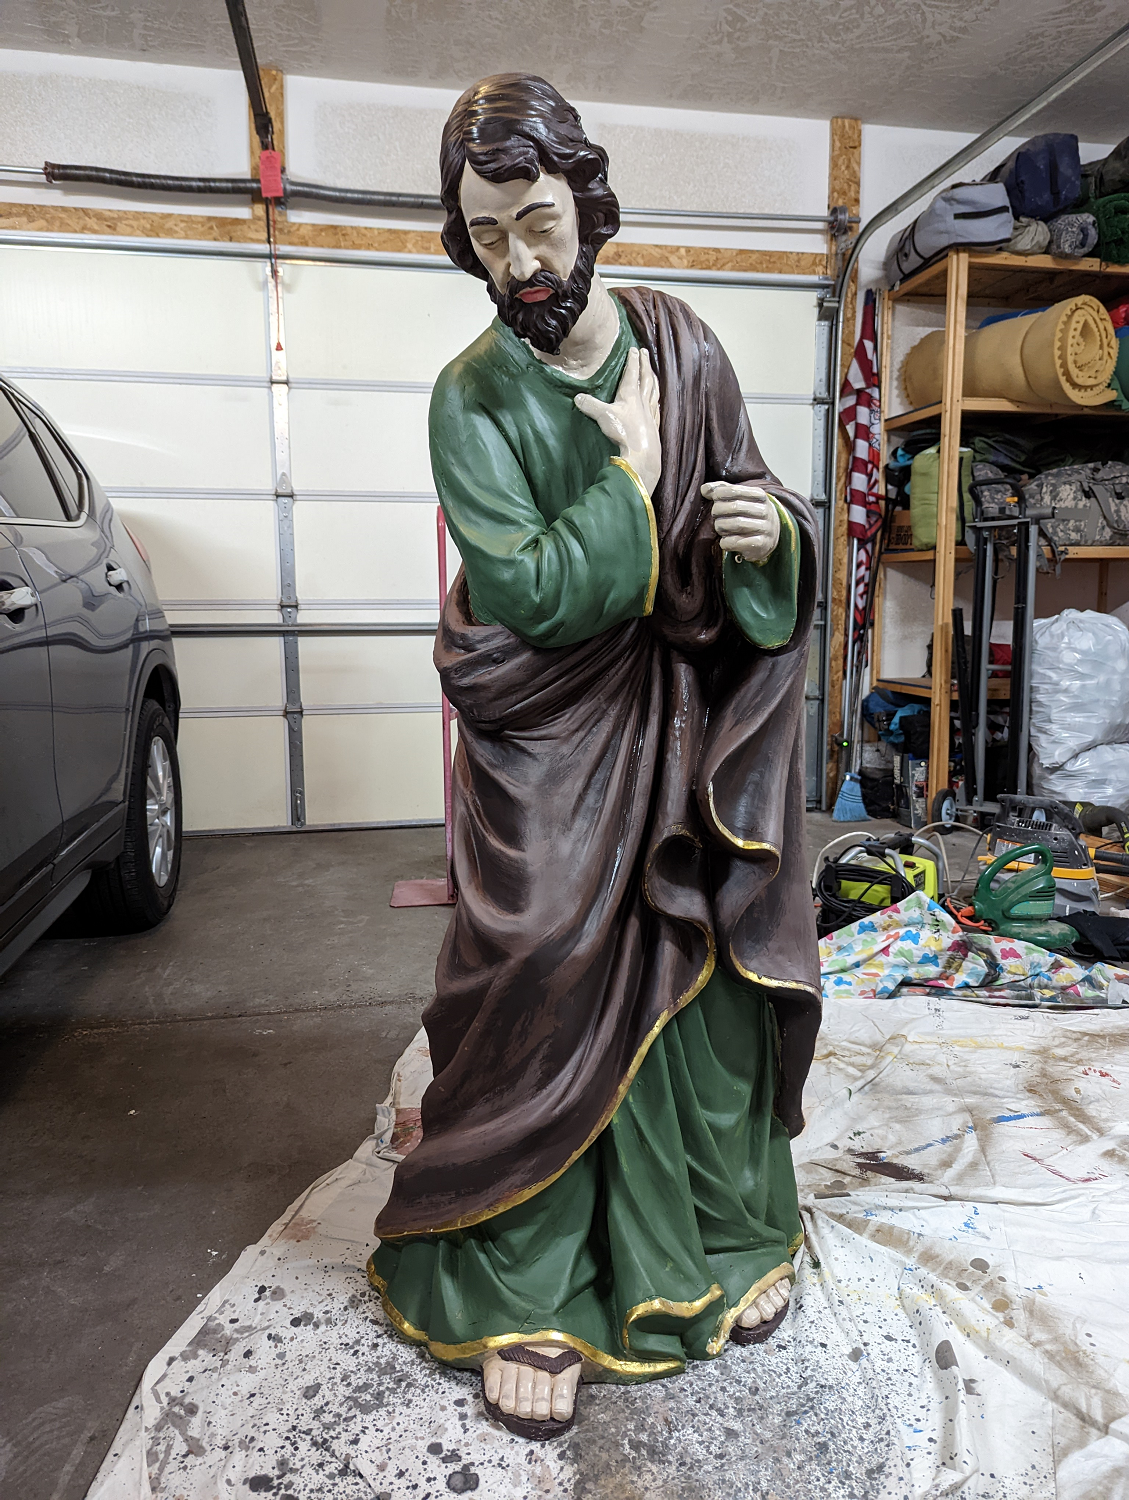
I didn’t want to remove too much of the Bondo, because the fibers in the patching compound provided the strength to keep the statue together. To get a nice, finished surface, I rasped the surface to remove the burrs, then spread drywall joint mud over the repaired sections. This filled in the cracks and voids nicely. The process was slow and labor intensive. I’d apply a layer, wait for it to dry, sand it smooth with a sanding sponge, then repeat the process.
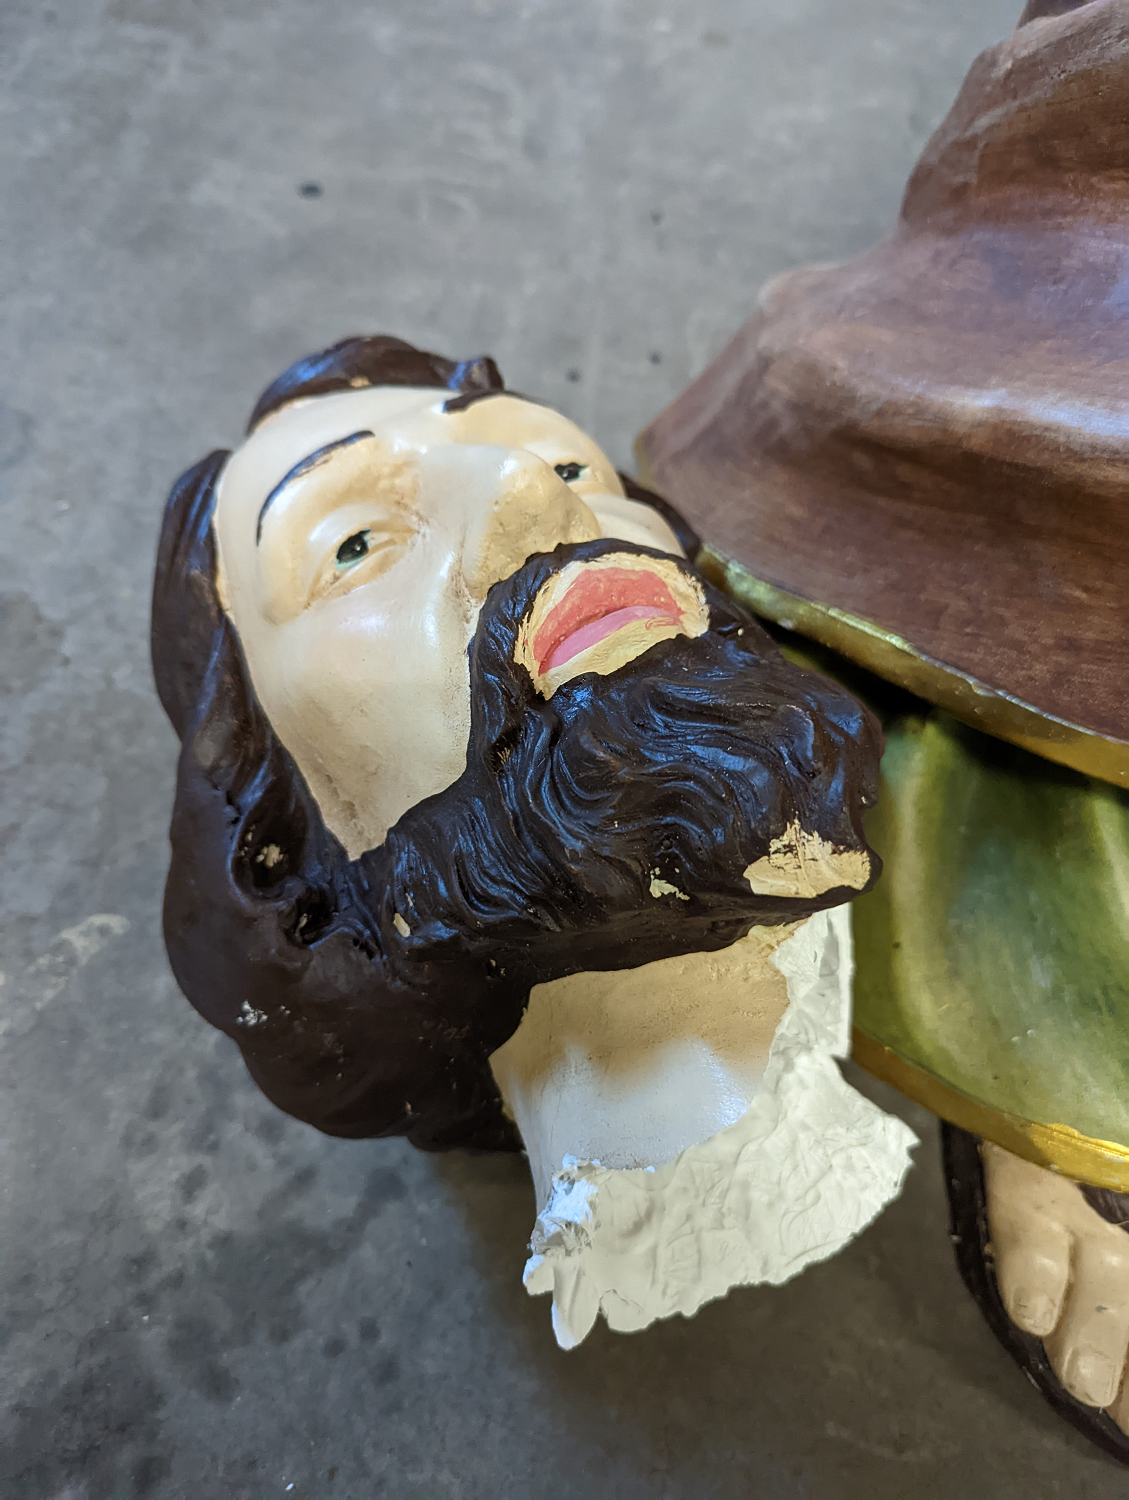
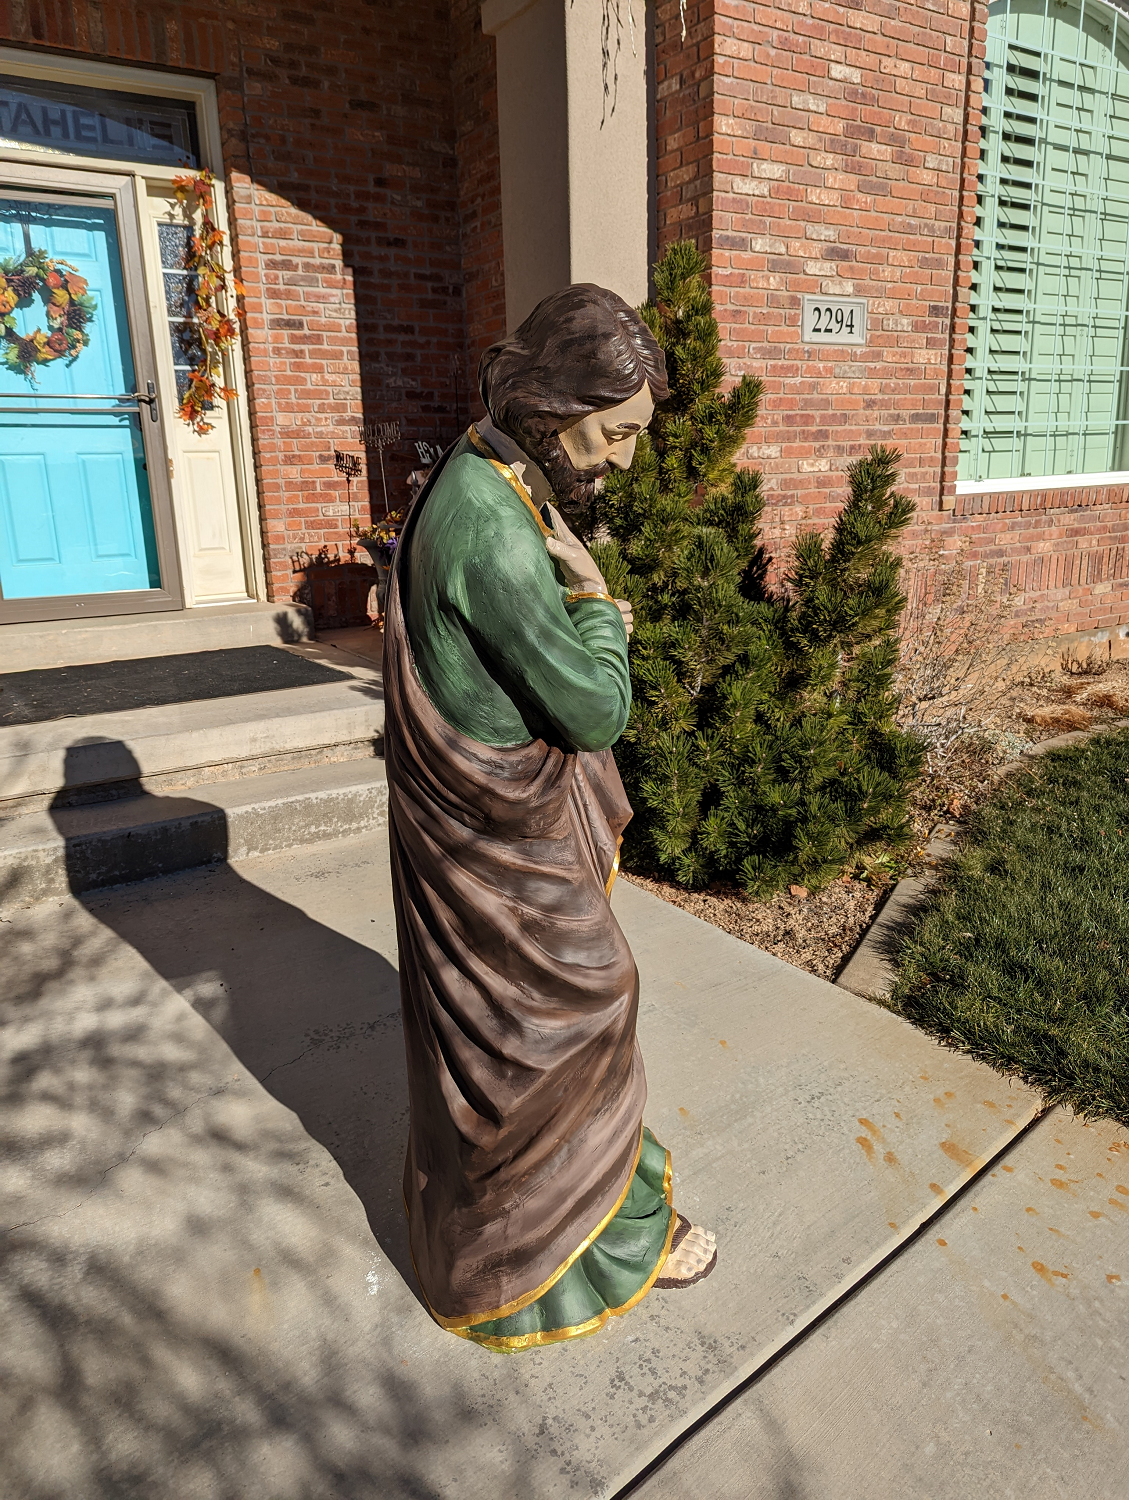
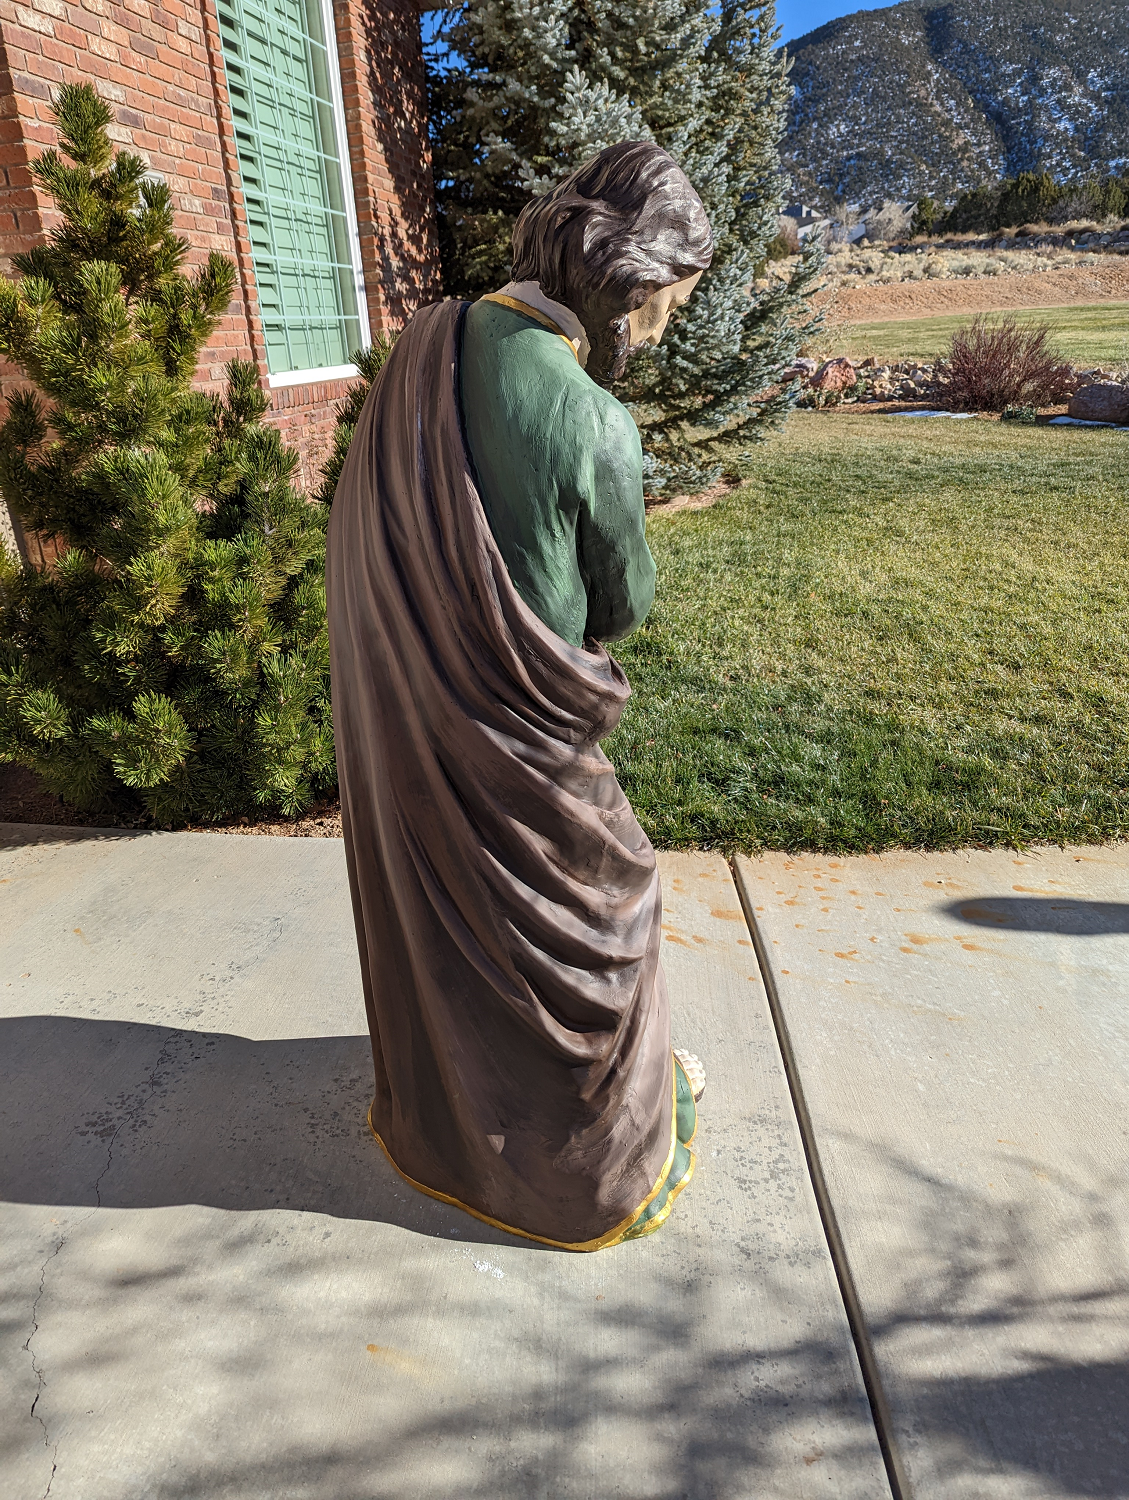
The neck and tunic were the hardest parts to blend in. In some cases, I had to go back after a section was done and create new folds in the robe or tunic. I ended up using a lot more mud than I’d planned. I knew I’d have to repaint almost the entire statue, so that wasn’t a huge deal. Luckily, I was able to leave most of Joseph’s face untouched, which saved me some stress in the end.
Time to Paint
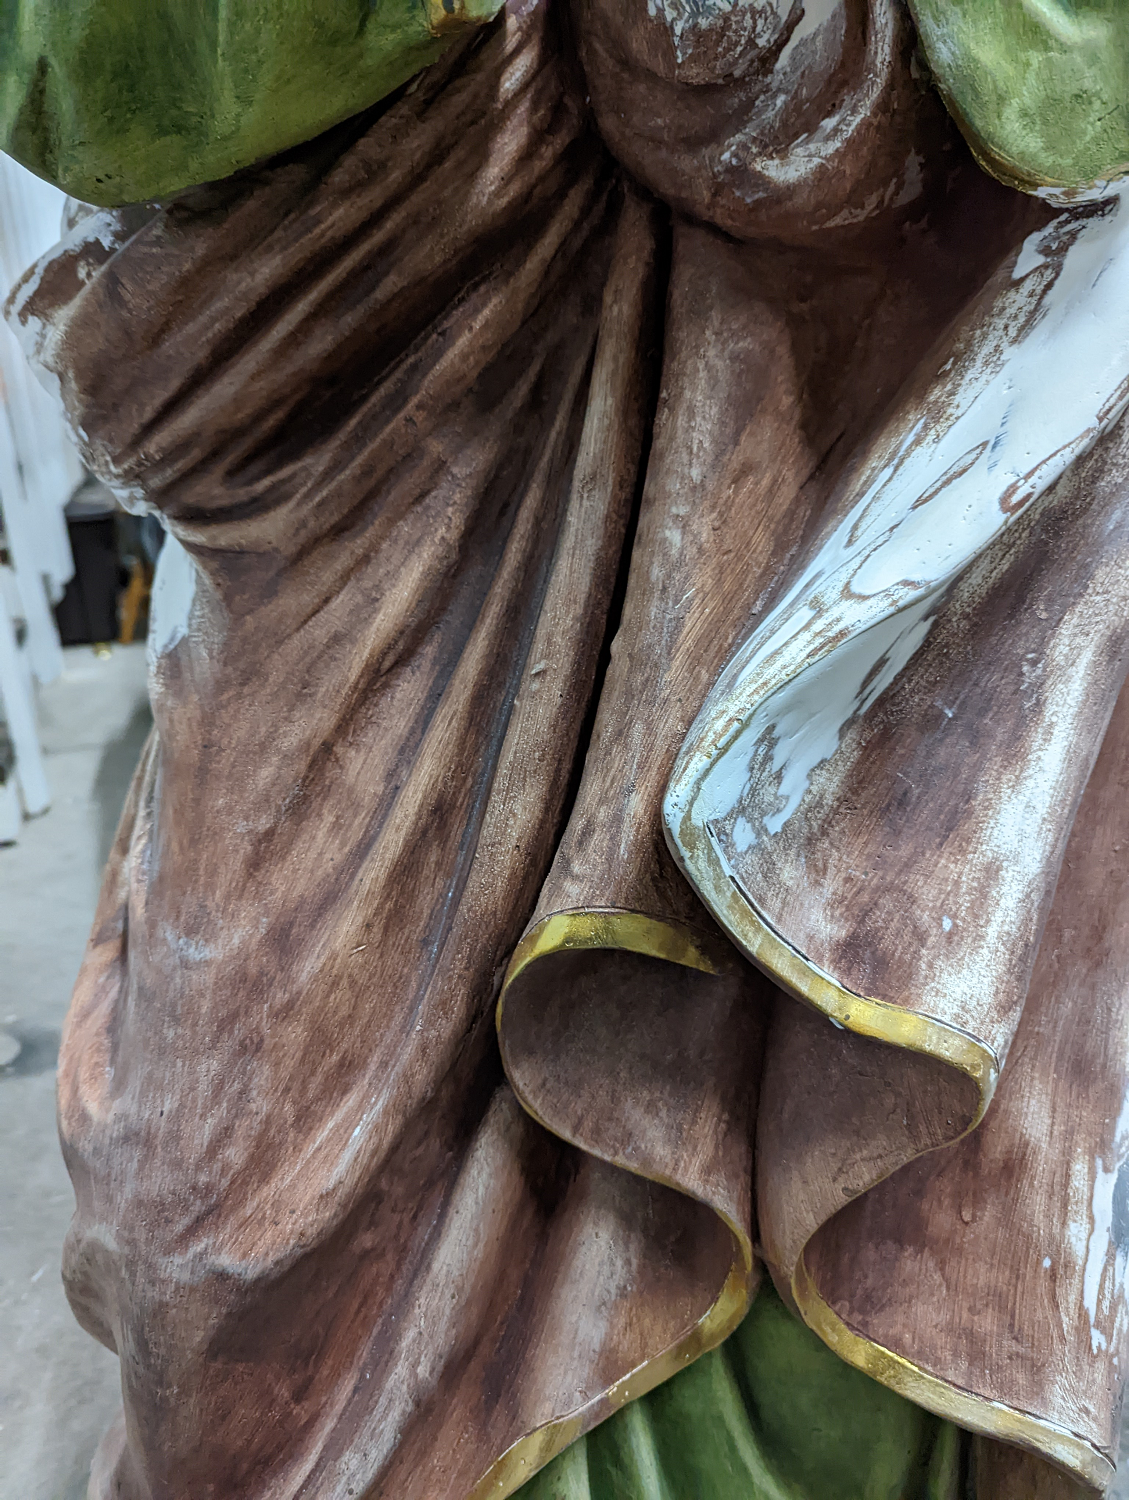
I assumed all along that I wouldn’t be able to match the original paint colors exactly. I’d actually considered hauling Joseph to Home Depot so I could compare paint cards/samples to the actual statue. In the end, though, I just relied on memory and photos from my phone. I painted the brown robe first, giving it two coats before starting to lay in highlights and shadows. Then I did the tunic. The green color(s) I chose turned out to be slightly less olive-tinted than the original, but it was still pretty close.
Building up the shadows and highlights was a gradual process. I used plastic cups, which I would fill with the base color, then add a splurt of either white or darker green (with a squirt of black) and do a quick pre-mix on the side of the cup. Then I applied the colors quickly so I could feather the colors while they were wet on the statue.
The final step involved adding gold trim to both the robe and tunic. I was glad I’d thought ahead to build up a new neckline in the sections where I’d layered up the Bondo. Painting on the trim was painstaking, and the metallic paint took two or three layers in some sections. The result was a shinier, more vibrant gold trim than before Joseph’s accident. Joey got some bling!

Back to the Stable
My goal was to try to finish the project by Thanksgiving, and I managed to beat that by a day. My son and I carefully loaded Joseph into the back of the car and drove him up to Sue’s house. It felt great to see her reaction! She hugged me, hugged Ian, and even hugged Joseph.
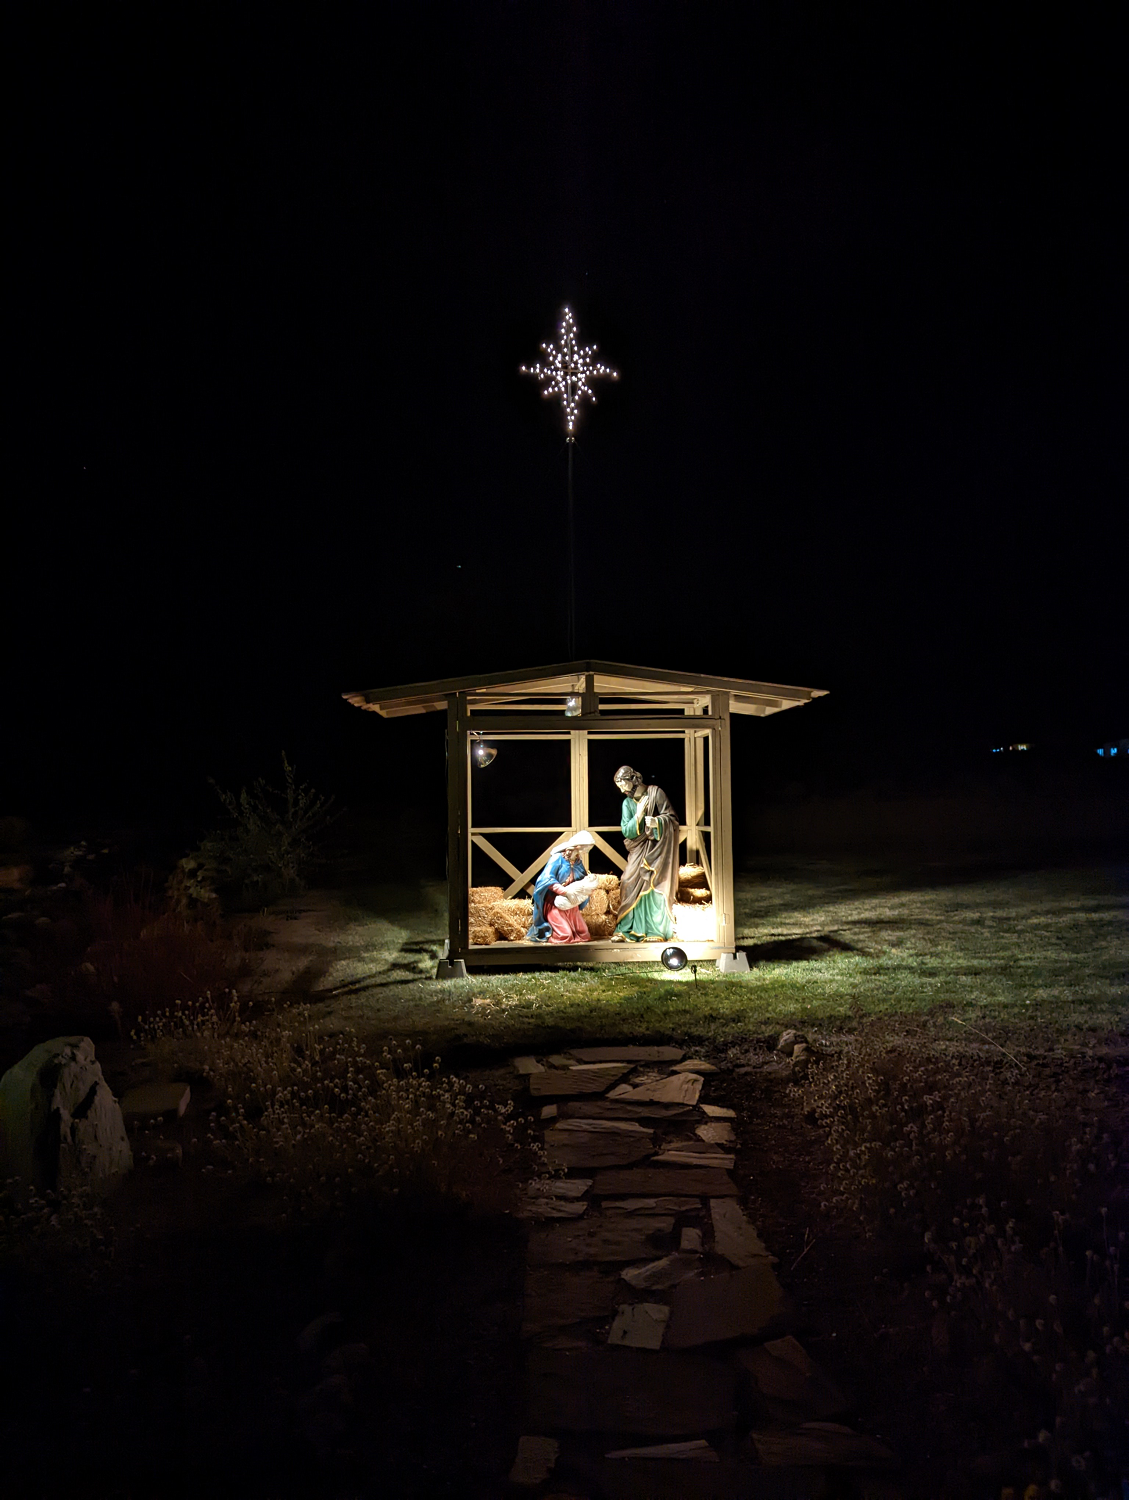
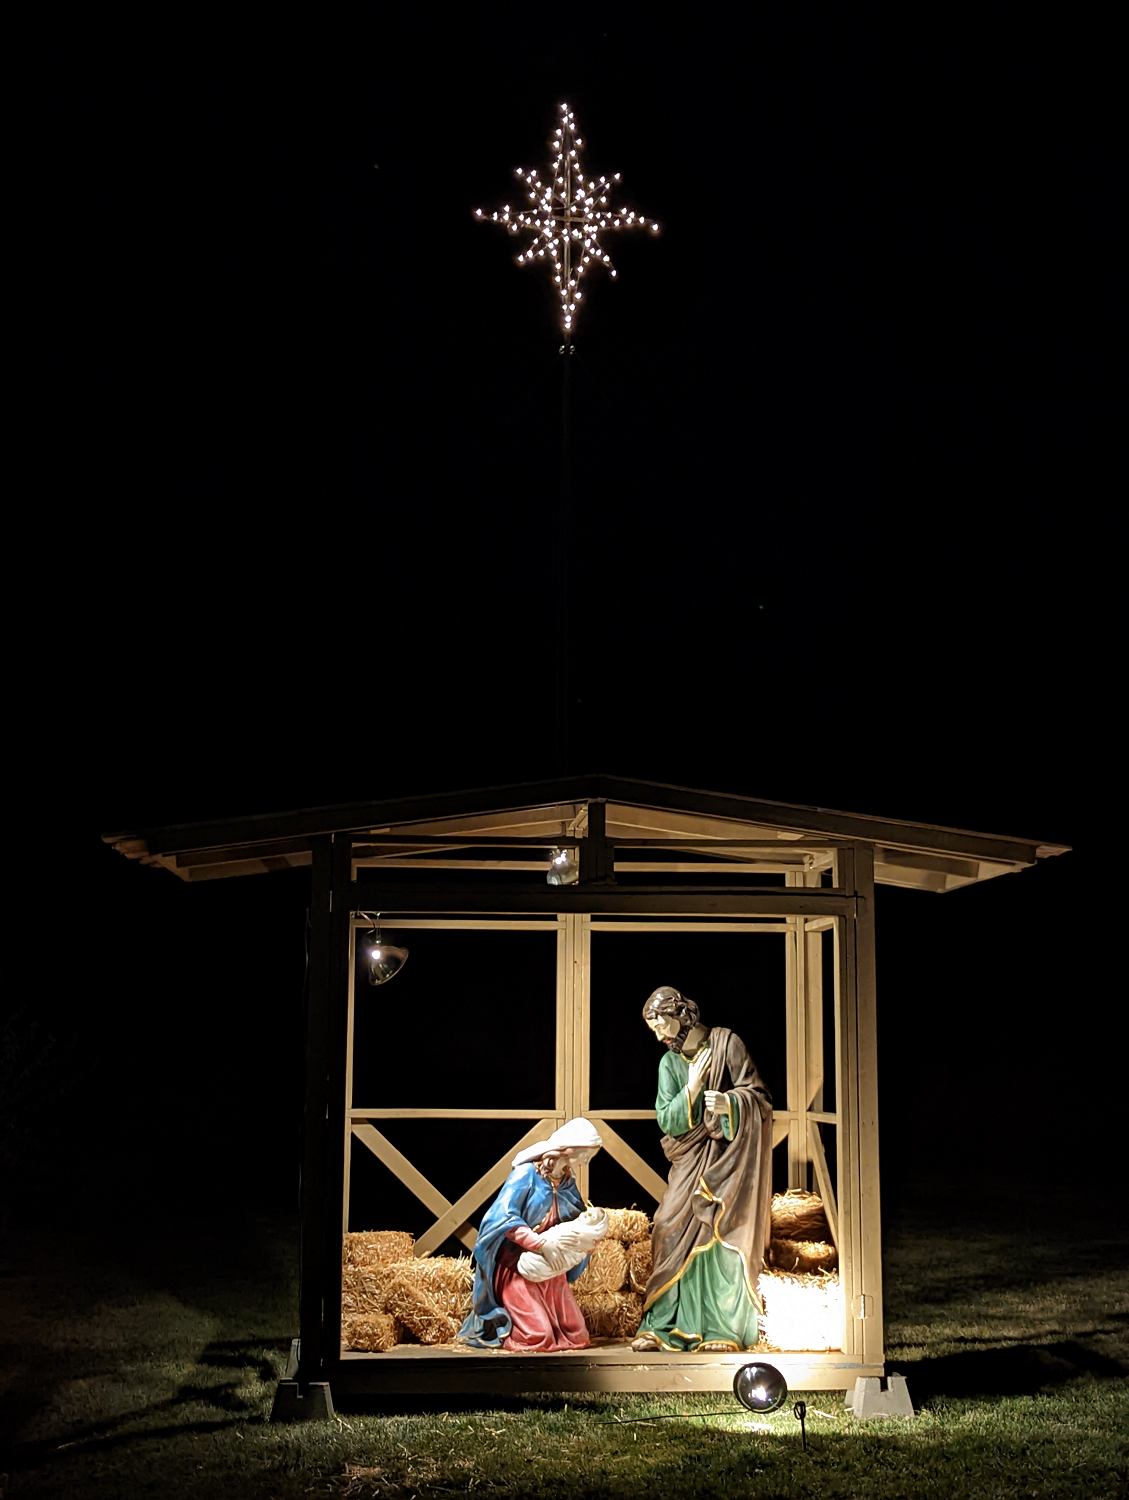
So Mary is no longer a single mom, which is as it should be. She and Joseph have pride of place in the stable at the end of their cul de sac, with a star to light the way. We’ve had some pretty violent wind storms over the past several weeks, resulting in the statues being brought inside for safekeeping. We definitely don’t want to risk another blustery decapitation in the Holy Family!

Merry Christmas, everyone!
Good job brah!
Thanks for the interesting description of your restoration. Such a lot of work!! I am impressed.