Be careful what you suggest in a Teams meeting!
I was invited by a colleague to be part of the “brain trust” brainstorming ideas for the 2025 Fire Rescue International convention. (Lexipol, the company I work for, was hosting a reception there.) I suggested the theme “Red, White & Brew,” which I stole from a local brewpub here in Mesa. While talking about the event, I had a weird idea: What if we had a giant American flag made out of fire hose?
So of course, that became my assignment…
Where My Hose At?
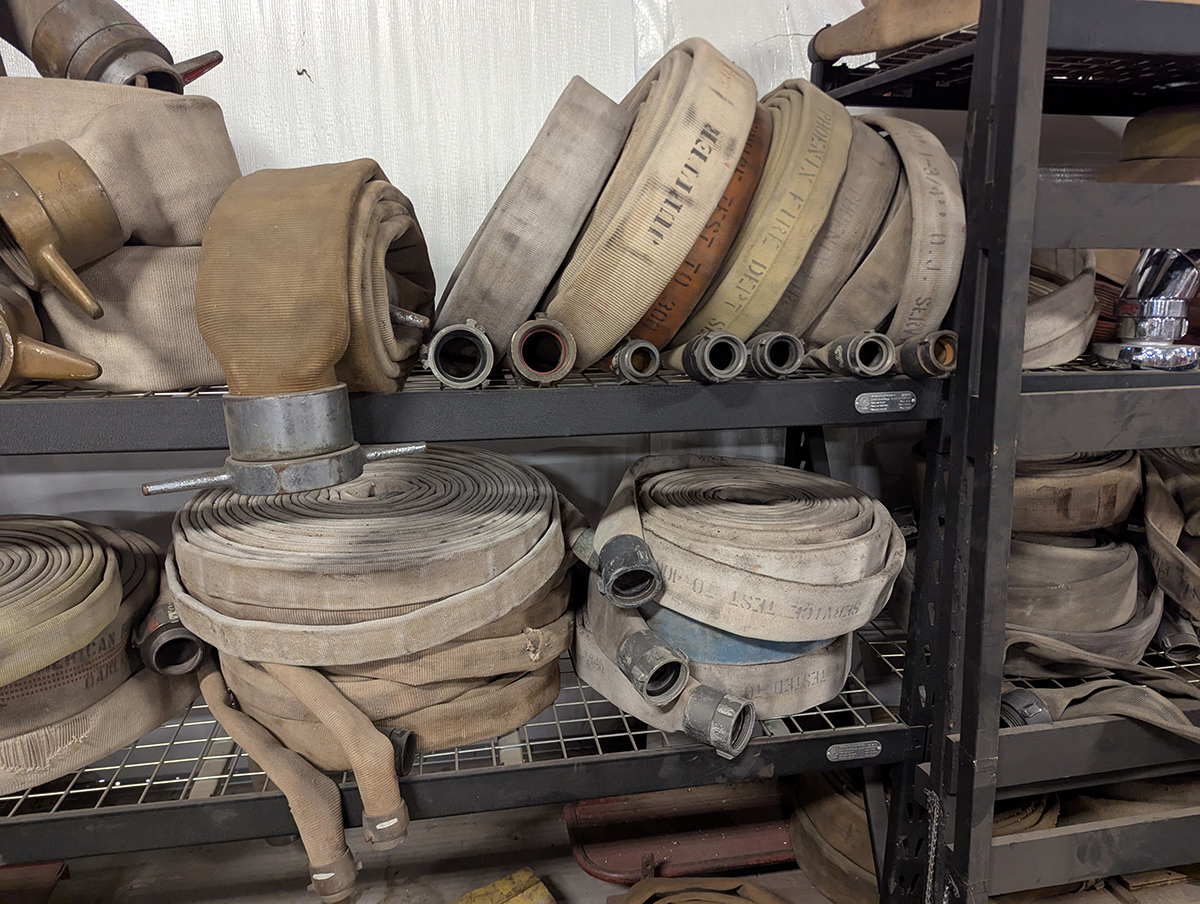
The biggest challenge was sourcing the fire hose. As it turns out, there is a secondary market for used fire hose. People buy the stuff and make can koozies, chairs and other handmade crafts. Because of this, used fire hose is not exactly easy to come by. A friend and colleague of mine who is a fire chief in California helped out by shaking the trees to see if we could find an agency that could part with some.
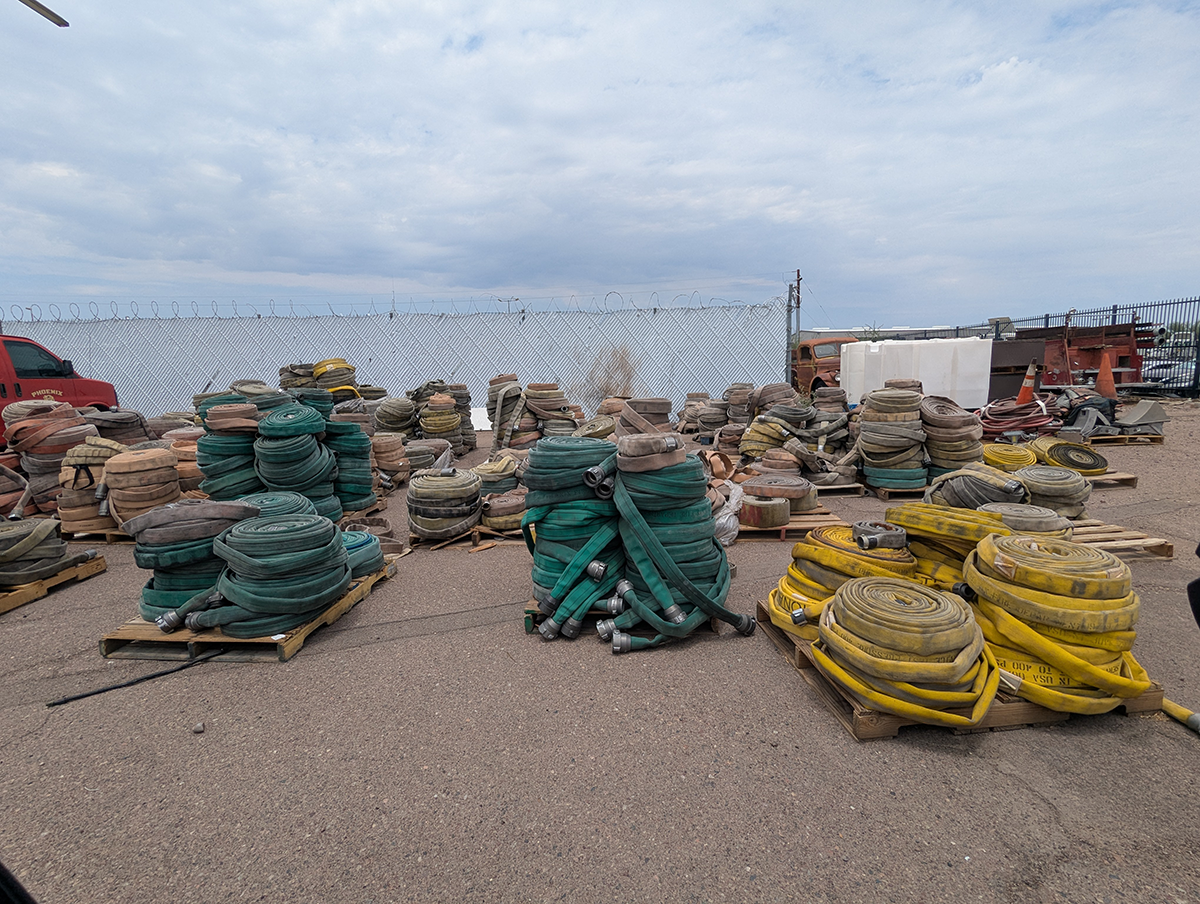
The Hall of Flame, a local firefighting museum, seemed like a good option, but they wanted a large donation before they could part with the hose, and I didn’t have the budget for that. An agency way out west of Phoenix contributed a couple of hoses, but they turned out larger and heavier than practical. Finally, after running all around town, I managed to get enough hose of the same diameter from the Phoenix Fire Department. They had pallets and pallets in their inventory yard, and generously provided eight hoses of the same size (complete with brass couplings). Thanks, guys!

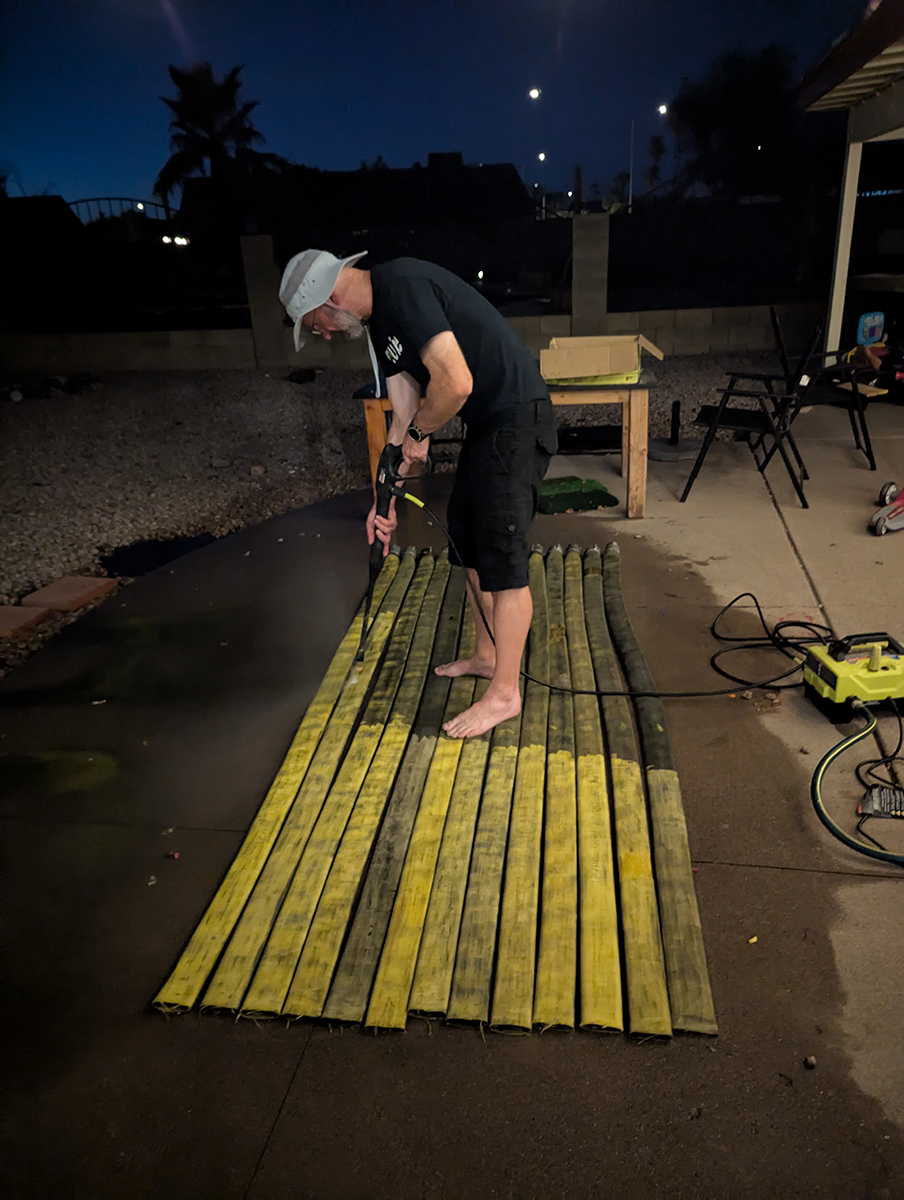
Prepping the Hose
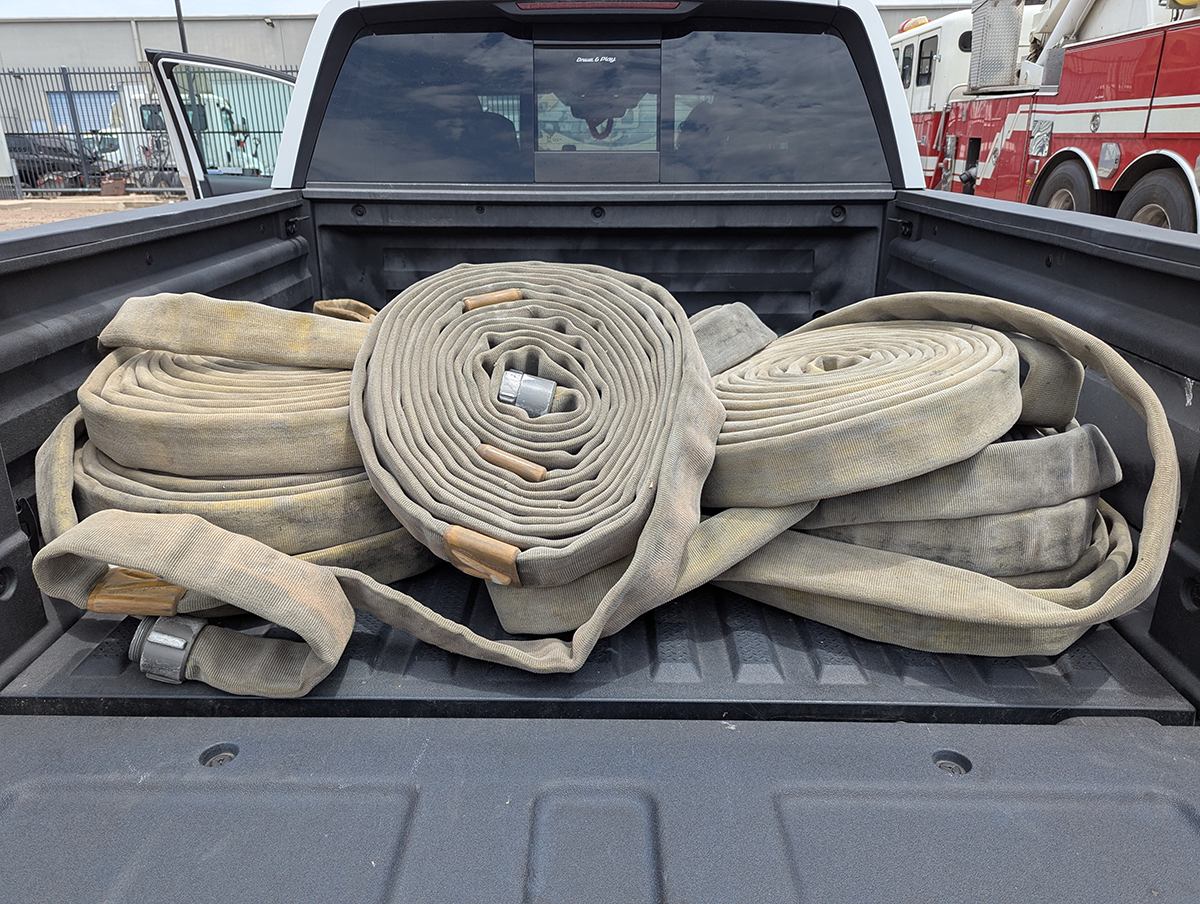
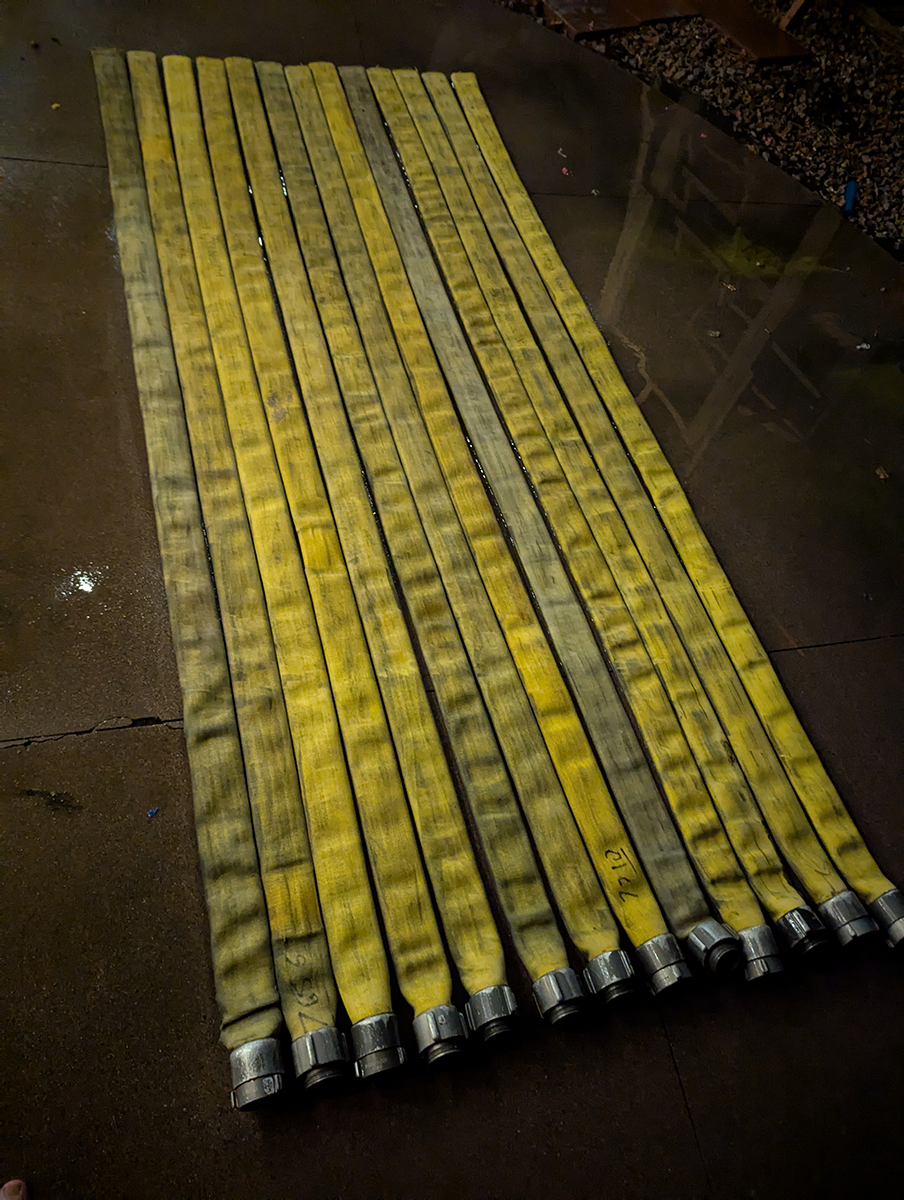
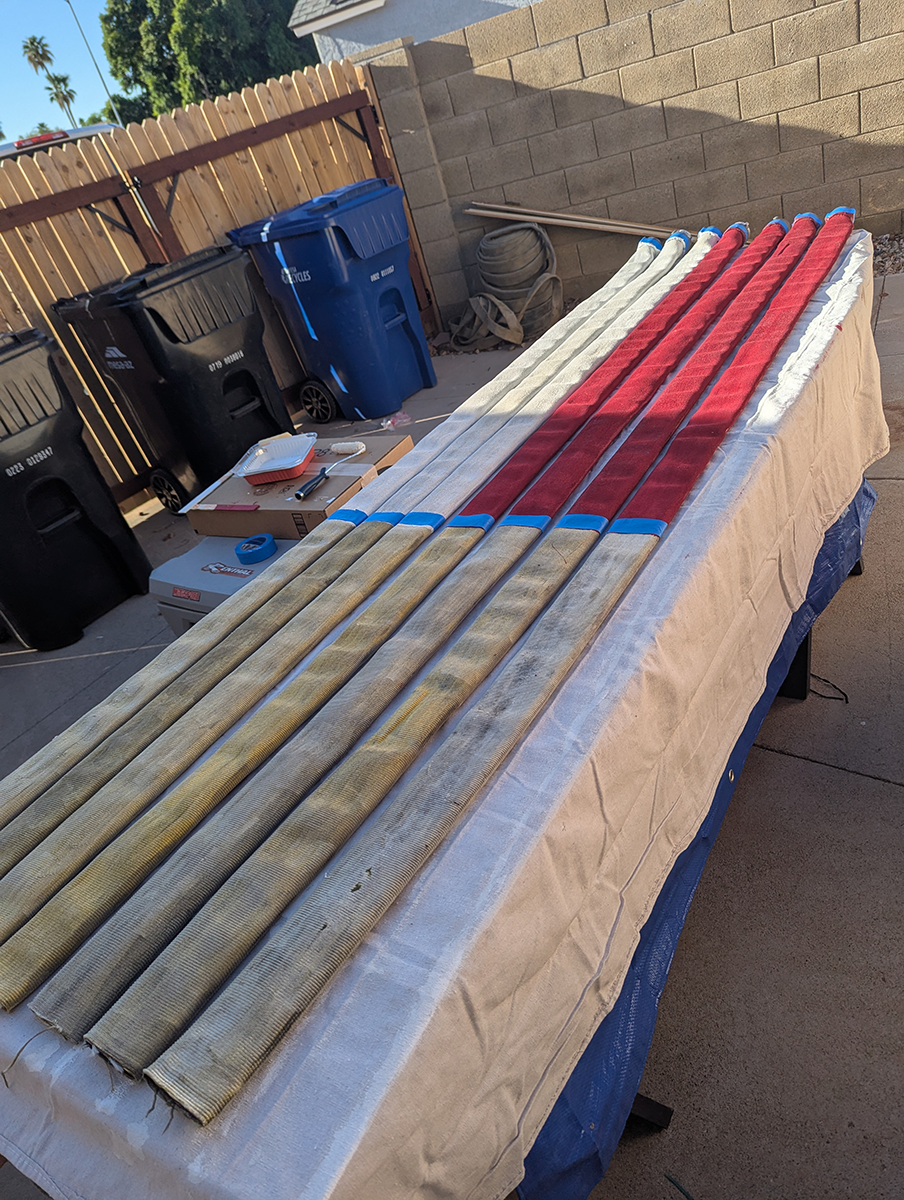
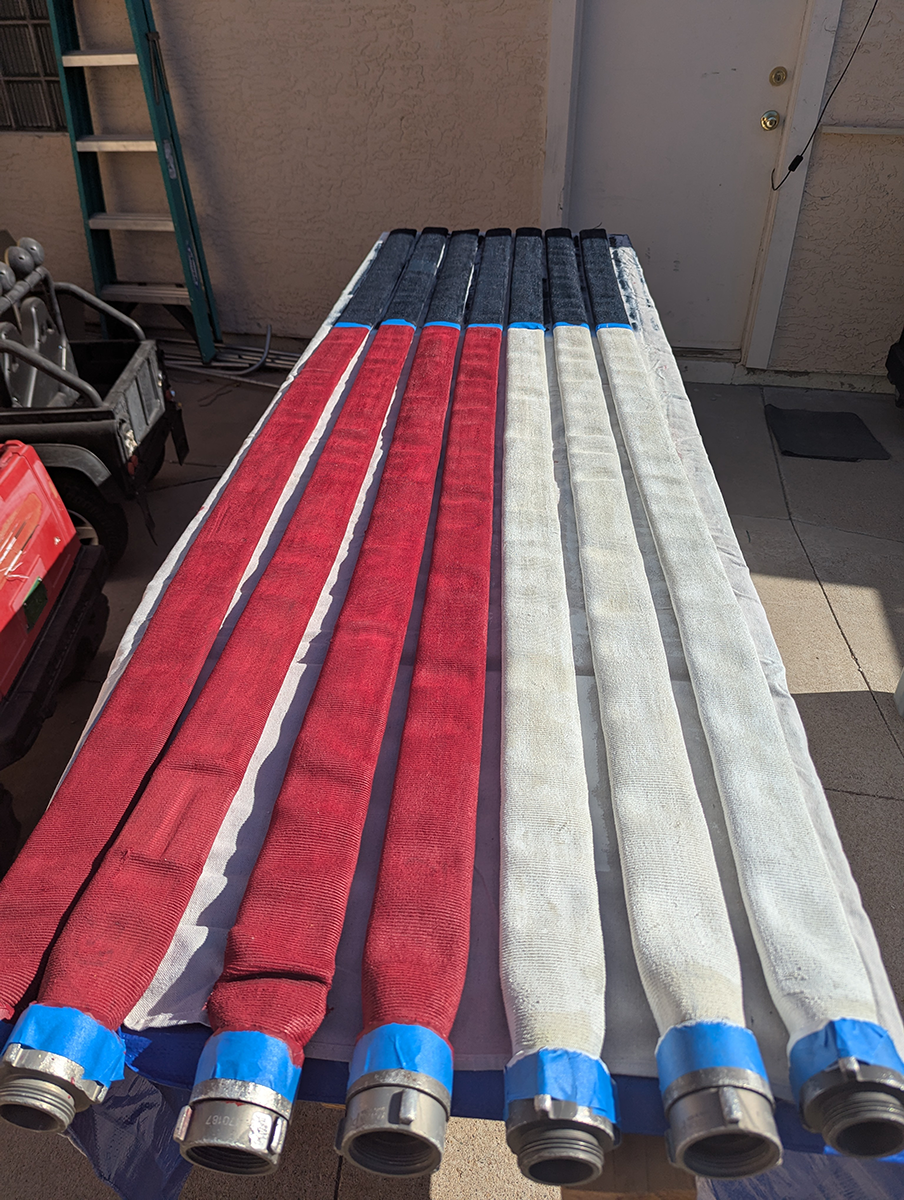
The first thing I did was cut the hoses to length, taking eight feet off each end. The hoses had been sitting outside for years, so they were filthy! The only solution was to get out the power-washer and blast off all the grime. I was surprised to find the hose provided by PFD was actually yellow!
Once the hoses were clean, I hung them on a fence to dry. I’m in Arizona, so that didn’t take long.

Other Materials
I knew I’d need paint as well as a way to hold everything together at the top. Since the stripes would hang freely, with nothing holding together, the flag would rely on gravity to keep it all together. I decided to create a “hose sandwich,” with two strips of wood and heavy-duty bolts holding them together. To make the flag easier to hang, I made every third bolt (numbers 1, 4, 7, 10 and 13) an eyebolt.
Color was also an issue. Sure, the American flag is red, white and blue, but which red? Which blue? Luckily, Home Depot sells flags. I grabbed one out of a bin and asked the paint guy to sample the colors directly from the flag. That way, I knew I’d have authentic colors in the final product.
Getting the Dimensions
Old Glory is comprised of 13 stripes, alternating red and white, with the “union” (star field) going across seven of those. The trick is to make the union the correct width and length to accommodate the stars, which sit in nine alternating rows of six and five. It’s more complicated than you’d think.
Luckily, I found a website called Omni Calculator that allows you to put in the width and length of your flag and then calculates the length of the blue union. This saved me a bunch of time and effort.
Red and White Stripes
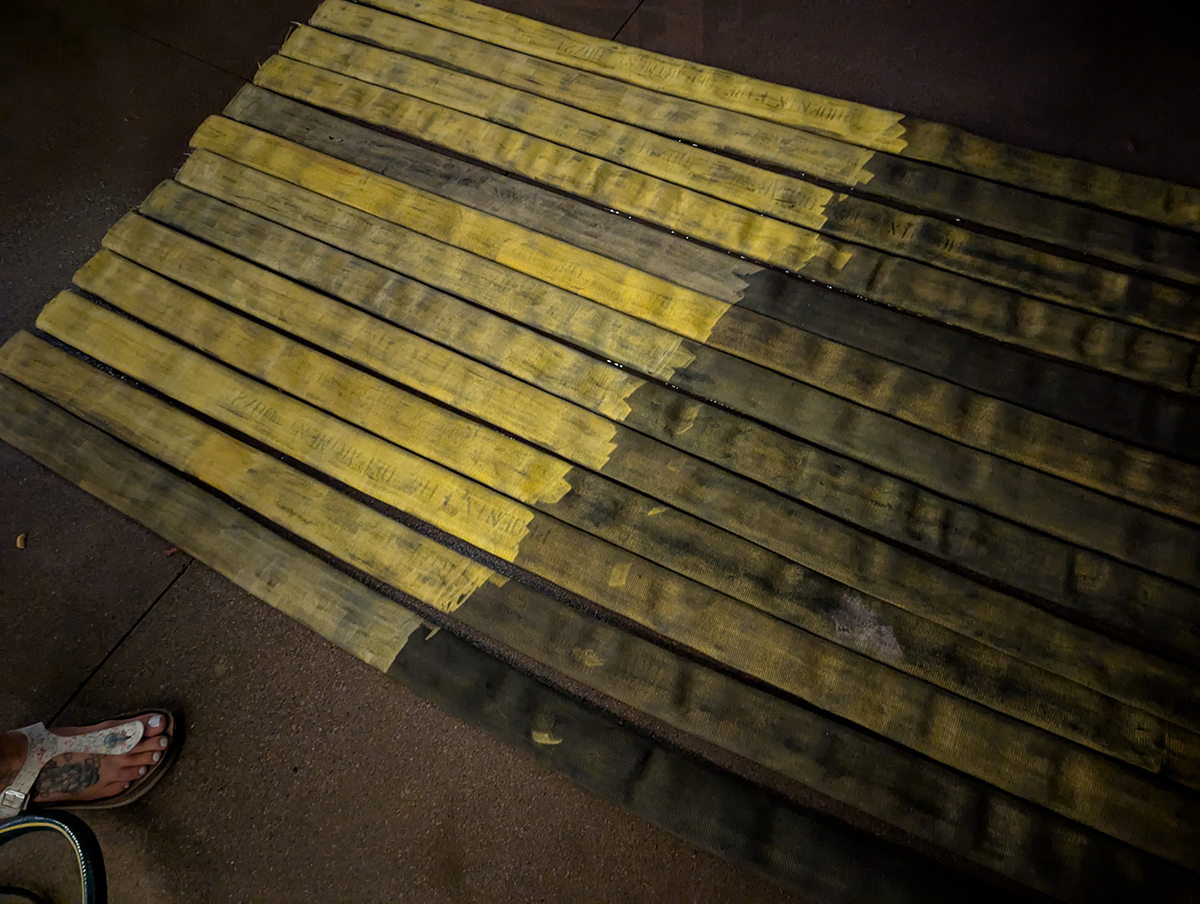
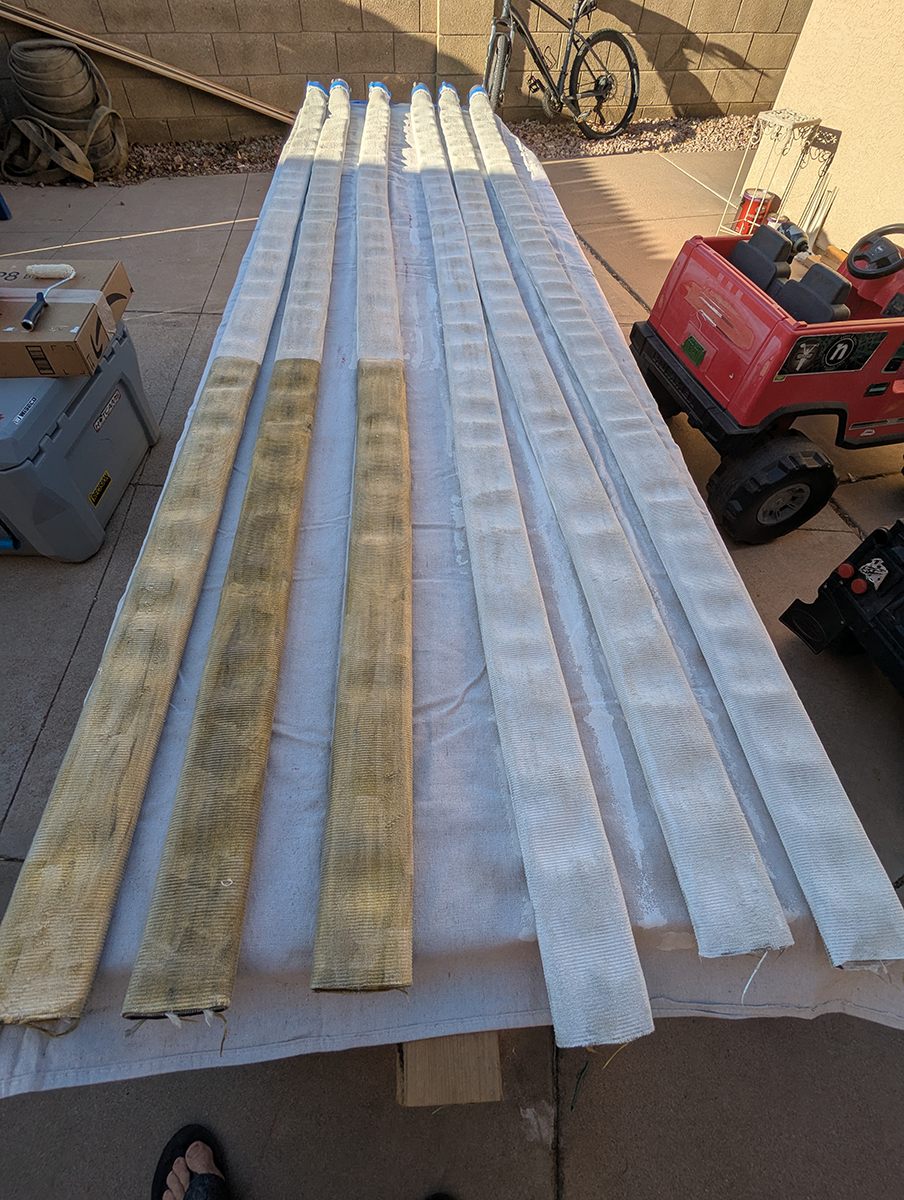
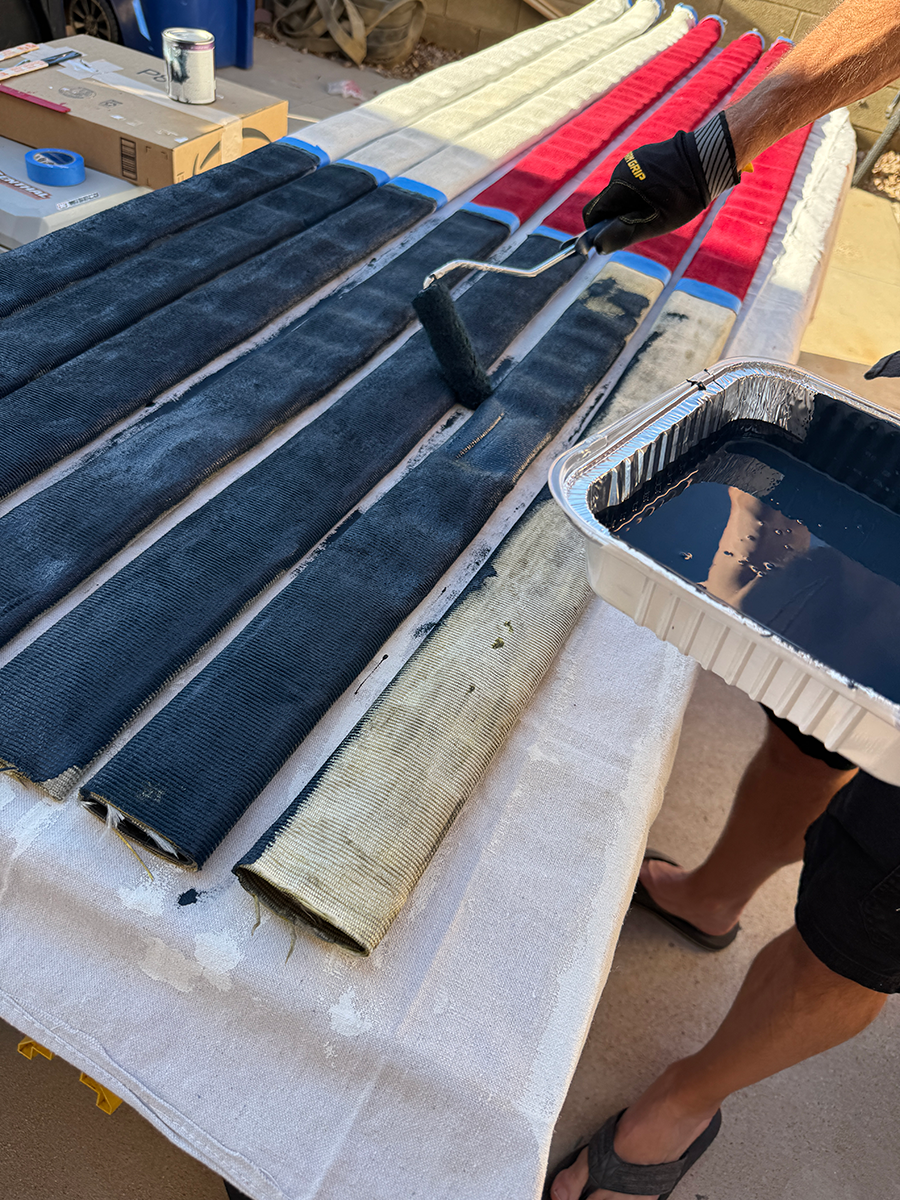
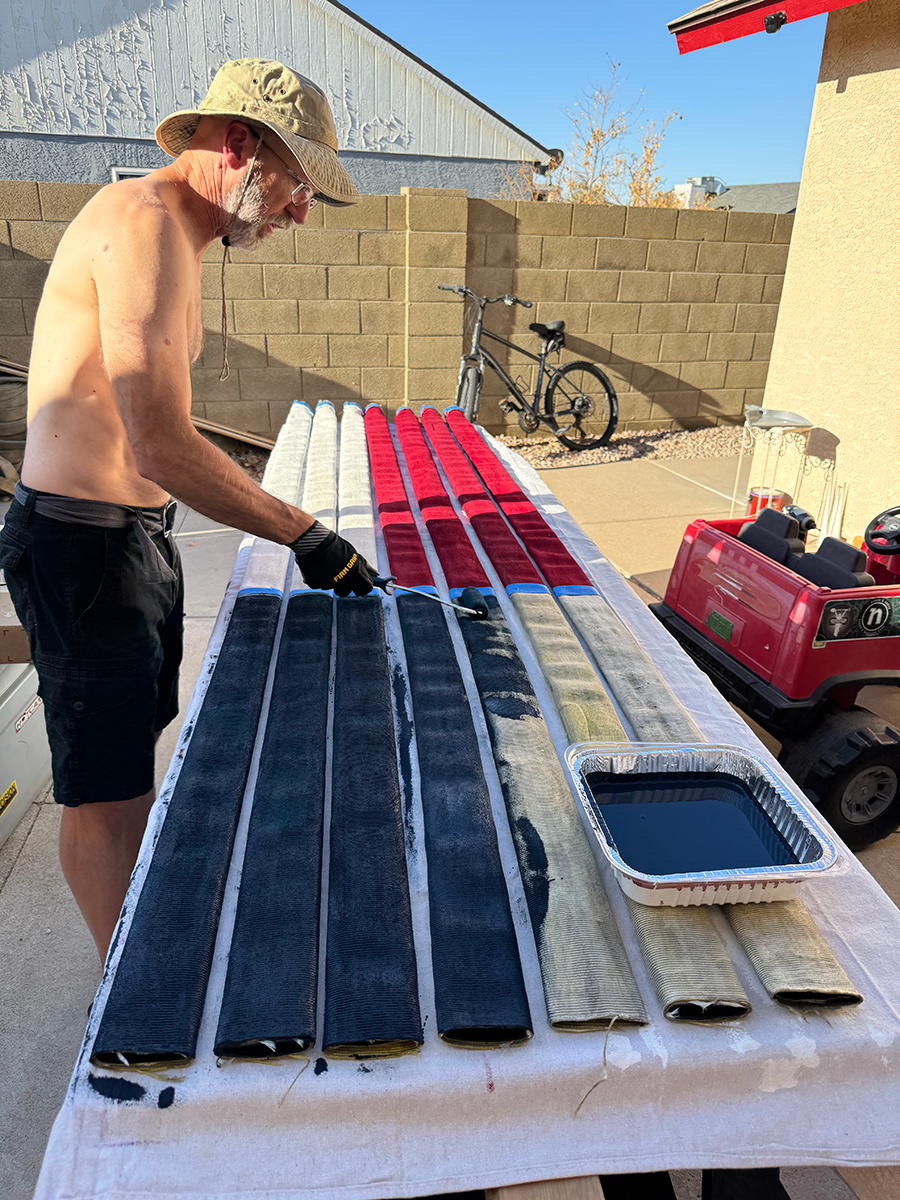
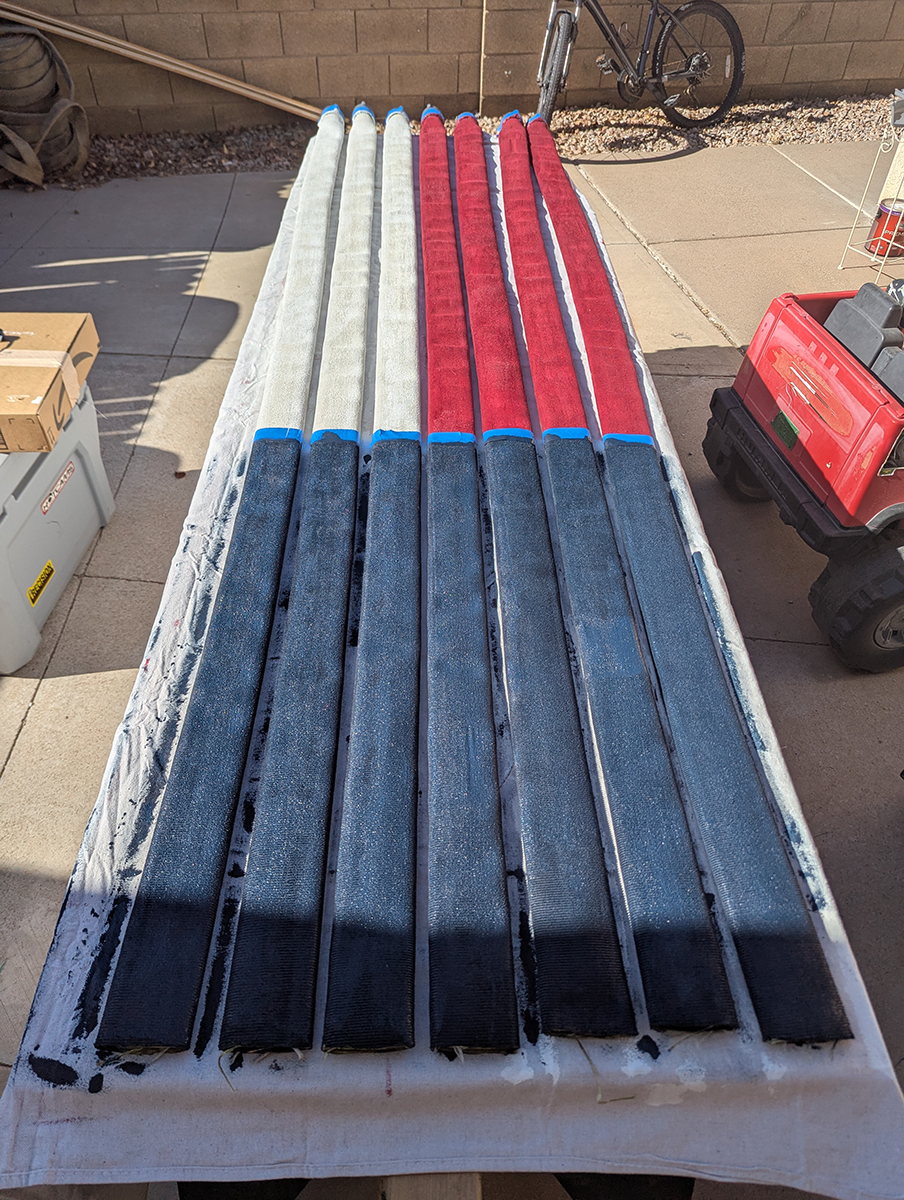
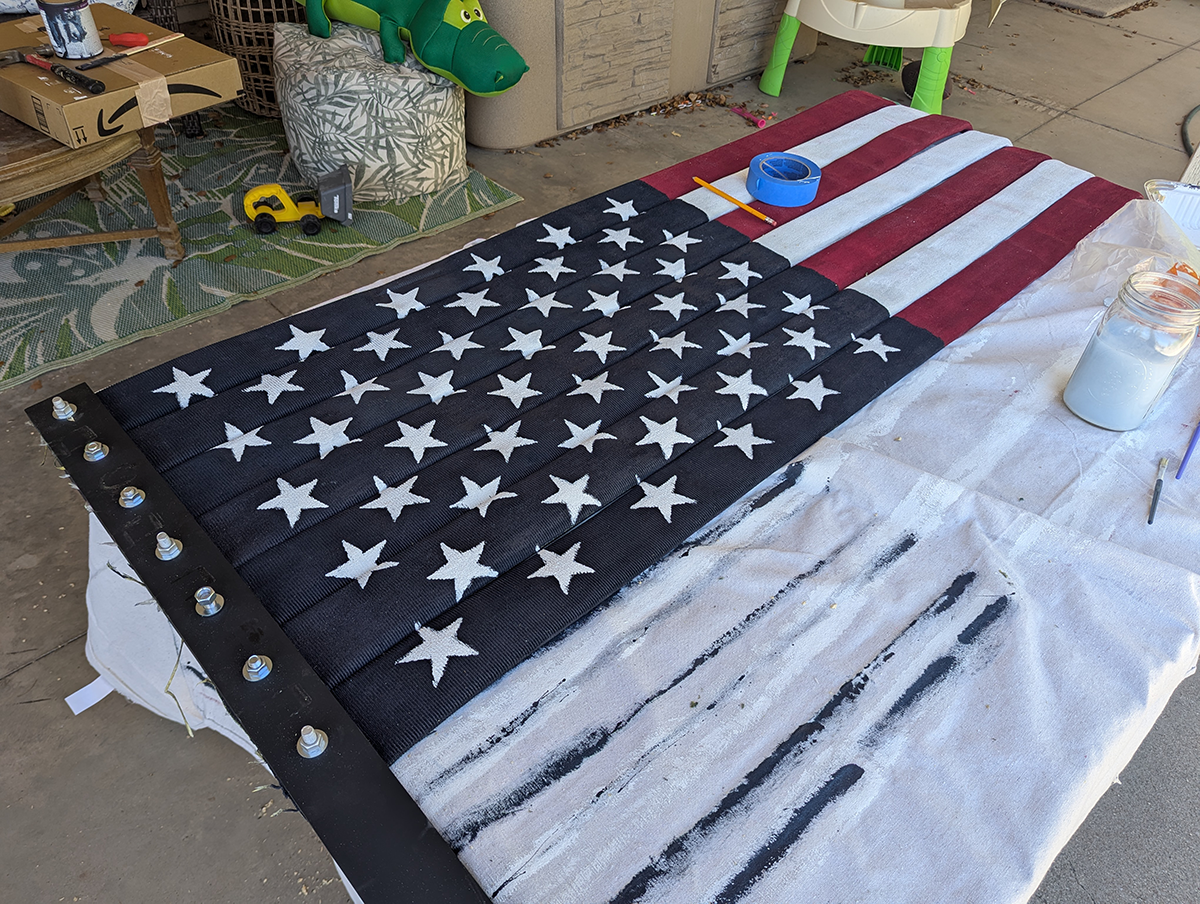
Since the flag would be hung from an open balcony, it needed to be two-sided, painted on both sides. I began by marking off the rough area for the blue union, then painting the red and white stripes. The fabric-covered hose really sucked up the paint, so I gave it two coats. Once one side was dry, I flipped it over to paint the other side.
Doing a paint project outdoors in Phoenix is tricky. You have to work fast to prevent your roller from drying out. Fortunately, once the paint is applied, it doesn’t take long before it can be moved and flipped. This was the easiest part of the project.
Painting the Union
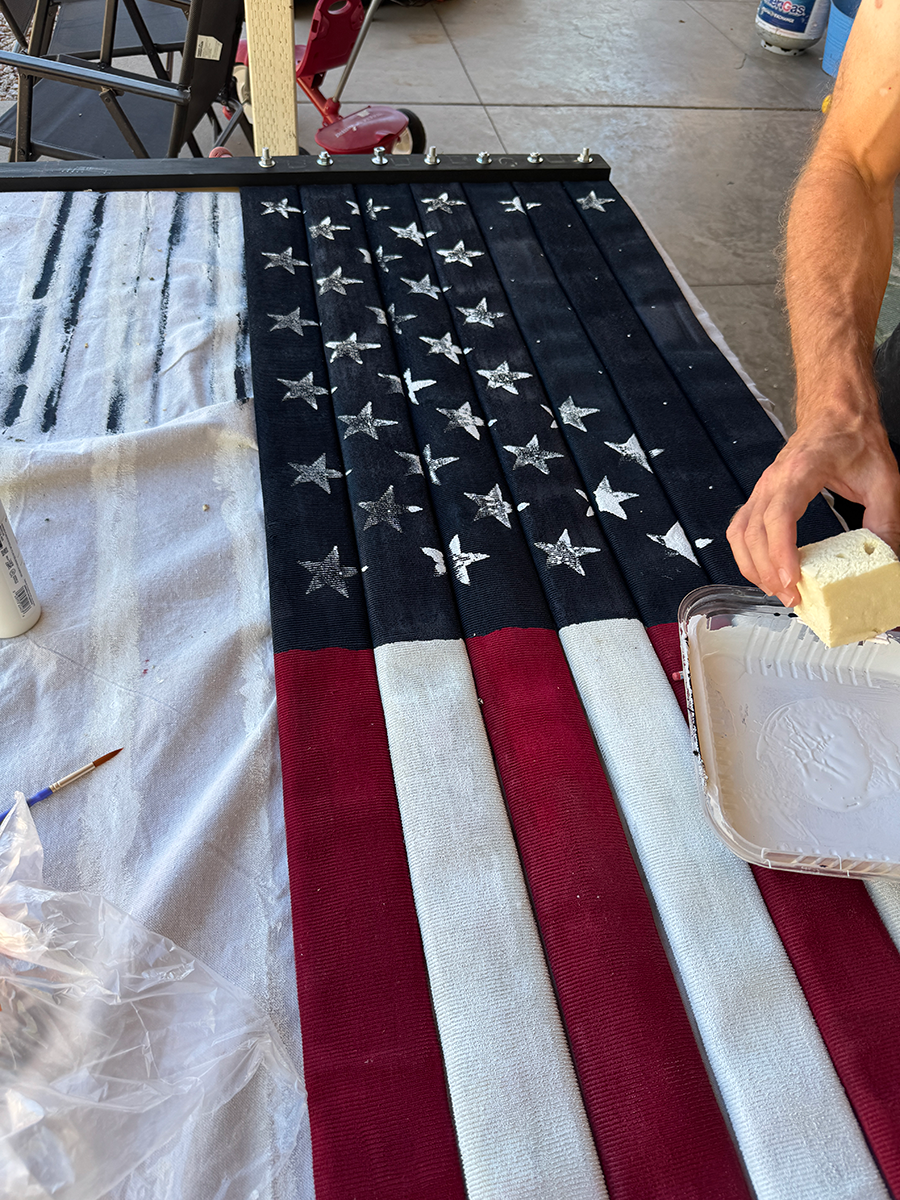
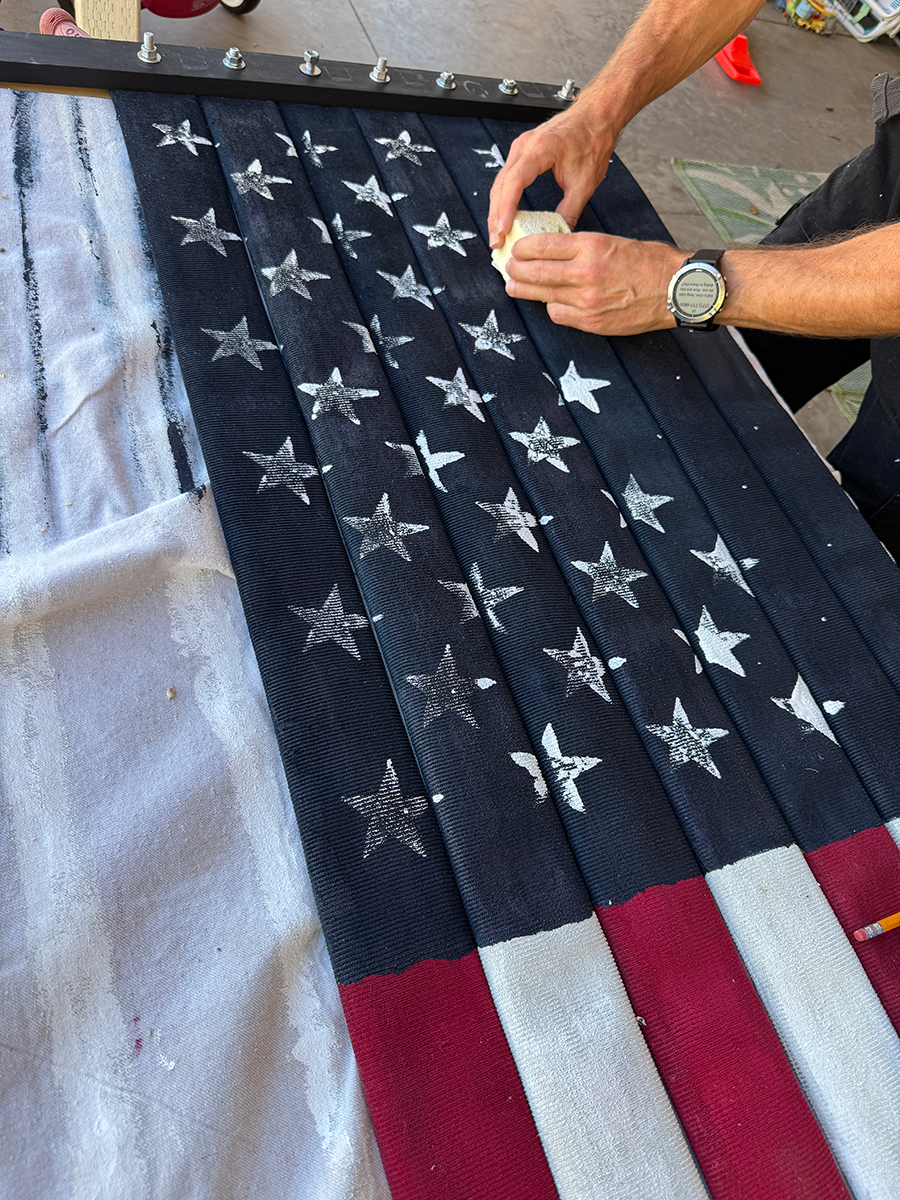
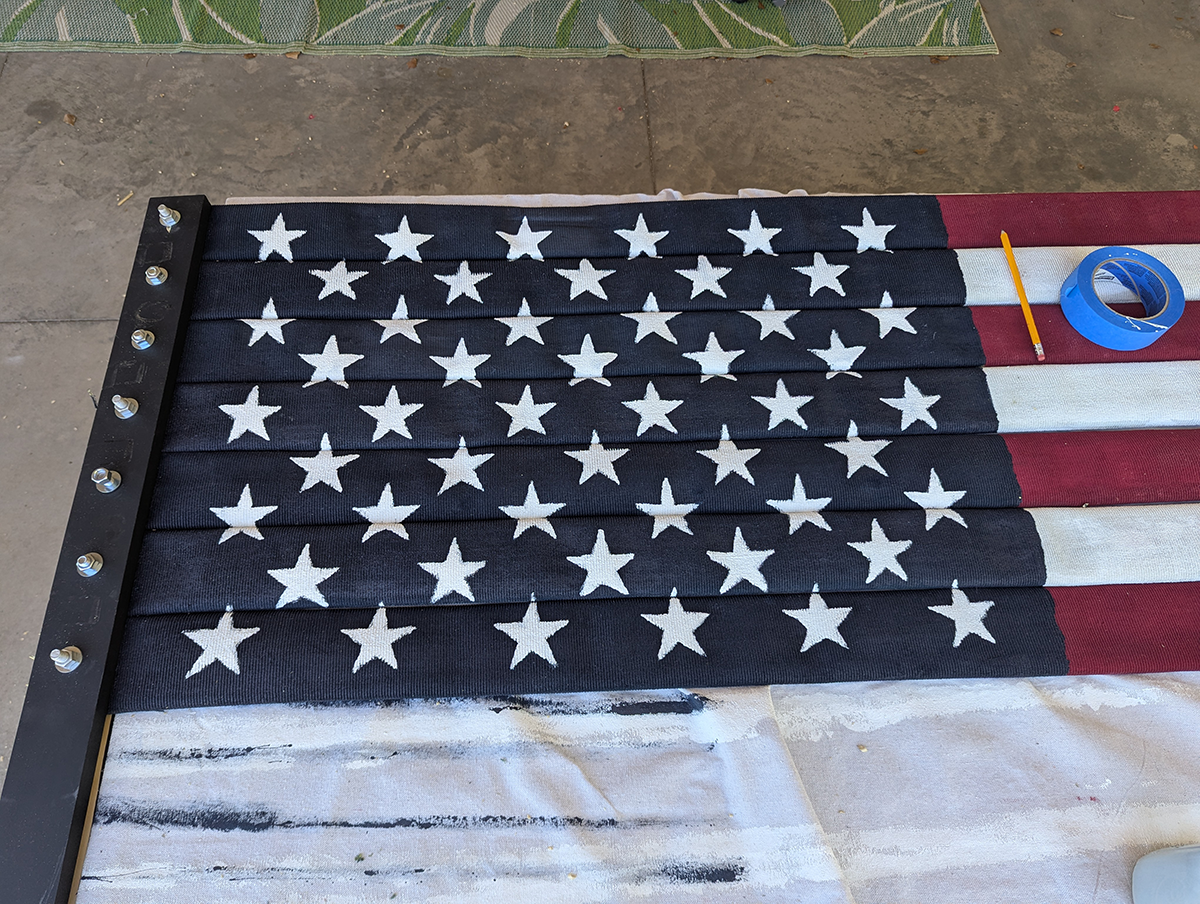
Laying out the star field was pretty tricky, but Omni Calculator allowed me to figure out the correct diameter of the stars as well as the gaps between them. I made a paper template to help space everything perfectly. Once the locations of the stars were marked, I used stick-on felt to create a homemade stamp that helped me position the stars with precision. The stamp wasn’t perfect, and of course, I was stamping on a lumpy surface made of course fire hose. But it sped up the process considerably.
Once the stars were positioned, I hand-detailed every single star with a paint brush. Then I flipped the whole thing over and did the same thing on the other side. Truth is, I completely underestimated the amount of time it would take to hand-paint 100 stars, making them all look more or less identical. My back was sore after bending over the table for three hours.

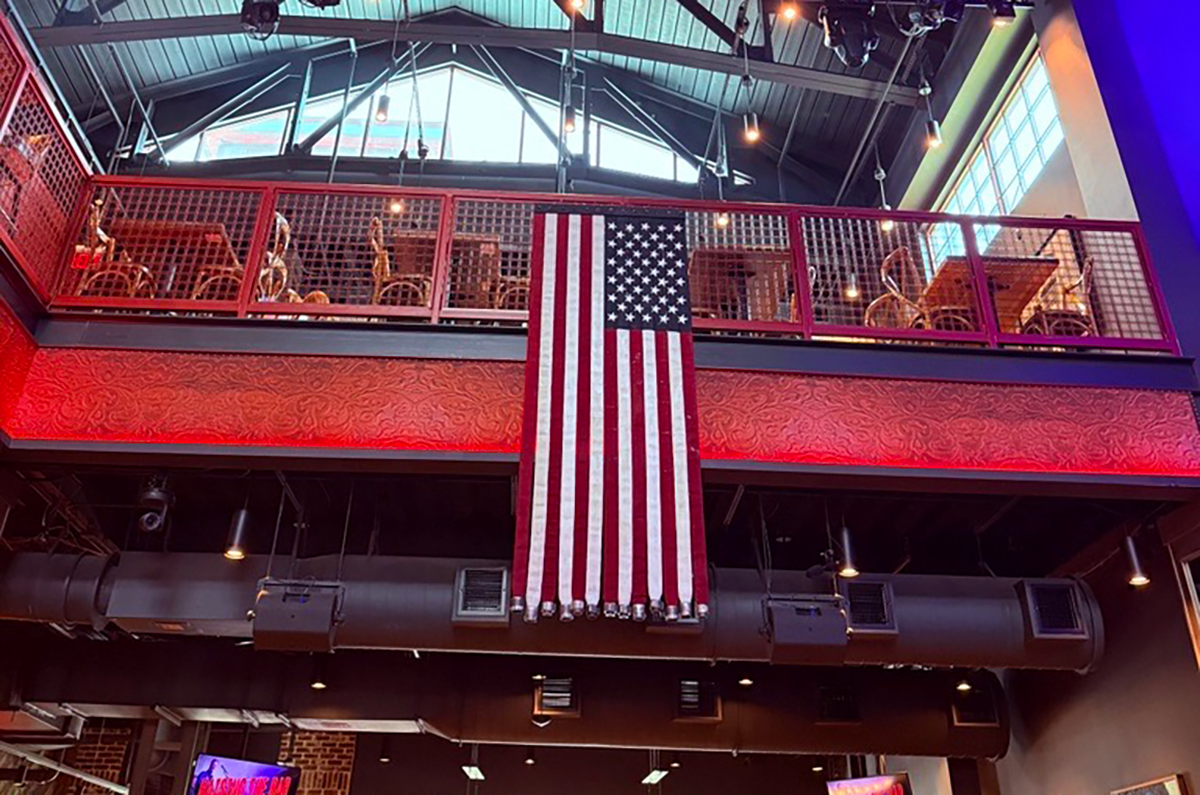
Final Result
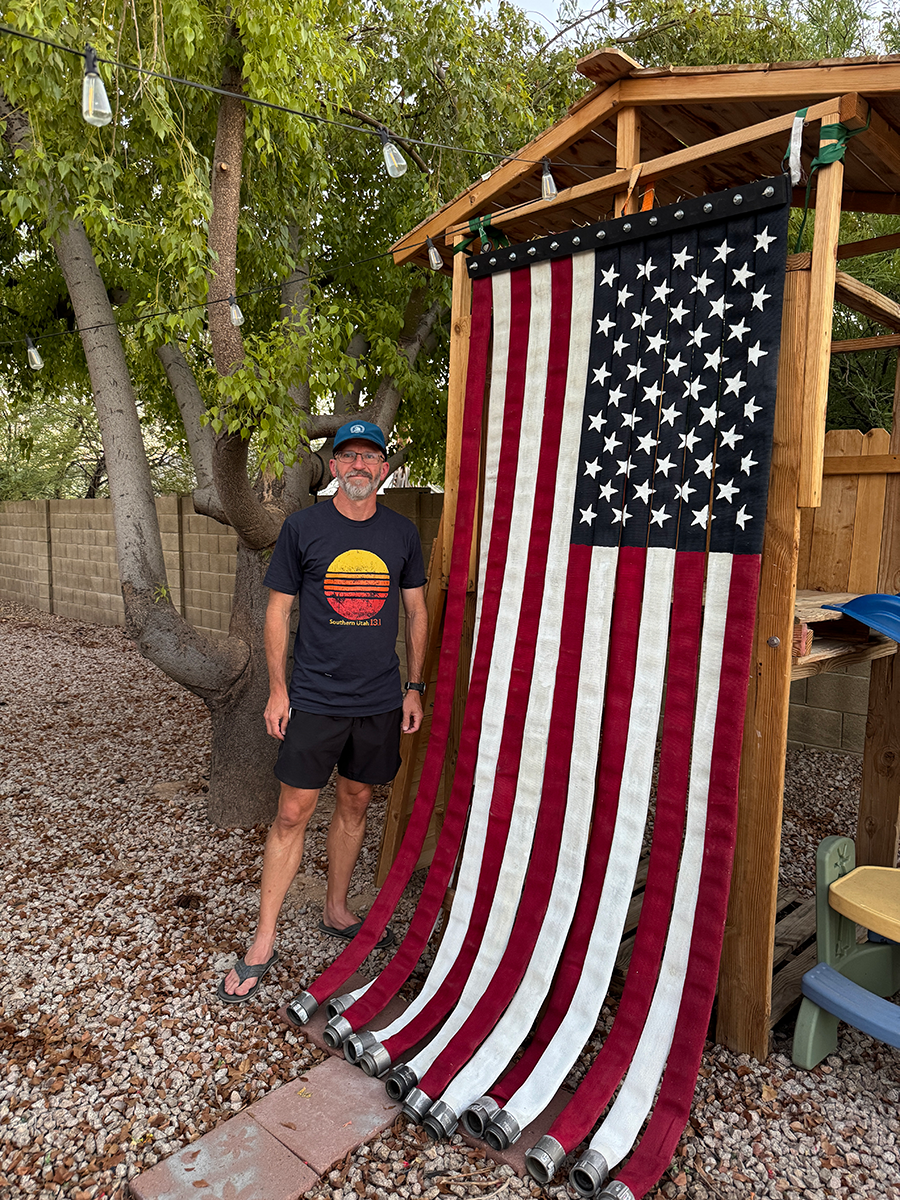
Once the painting was complete, we hung the flag up to take a few photos for our events director. Fire hose is heavy, and it took three of us to hoist it up on the children’s playhouse.
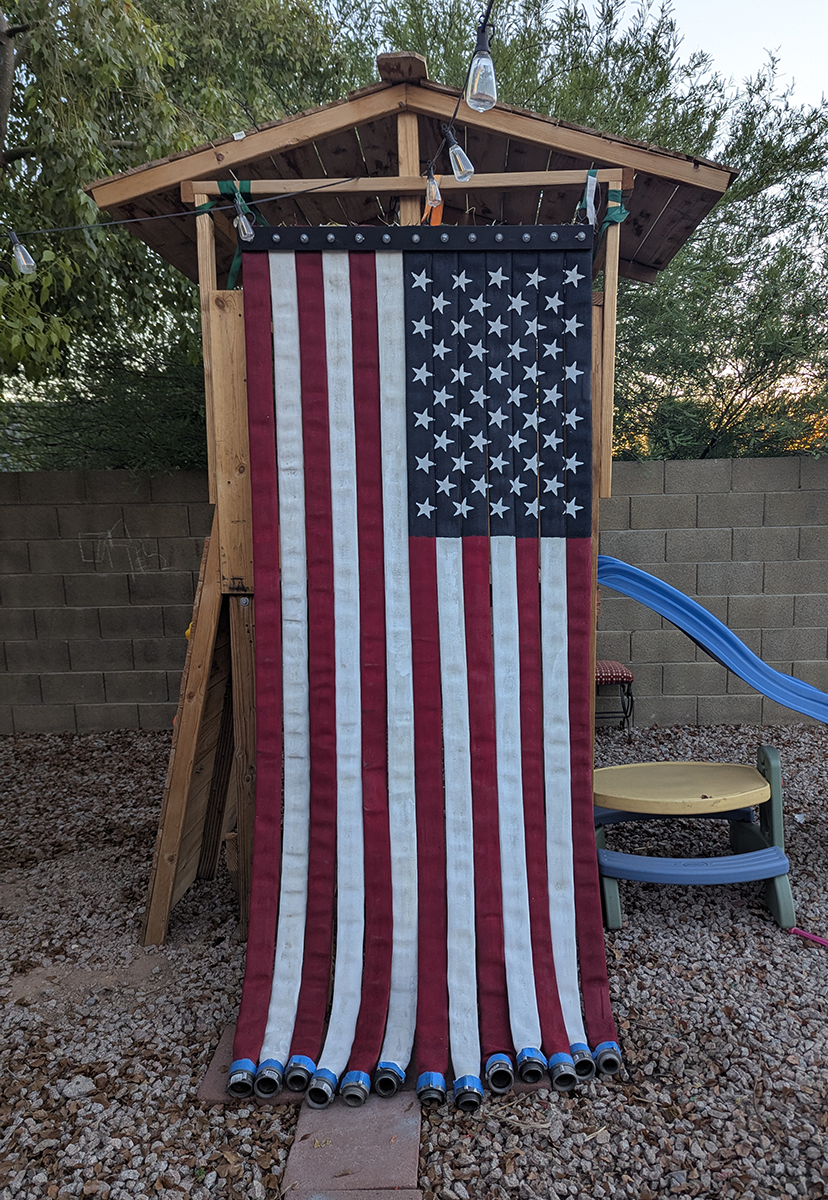

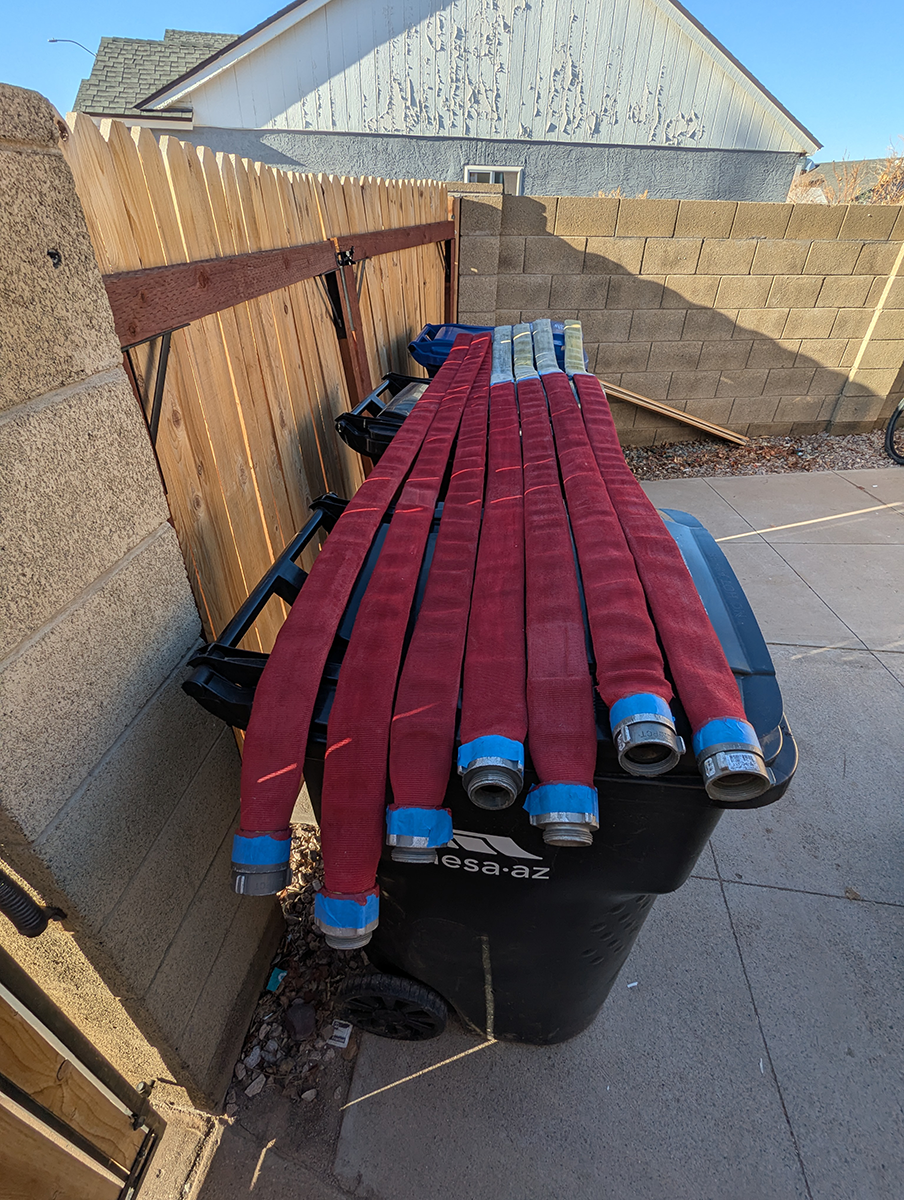
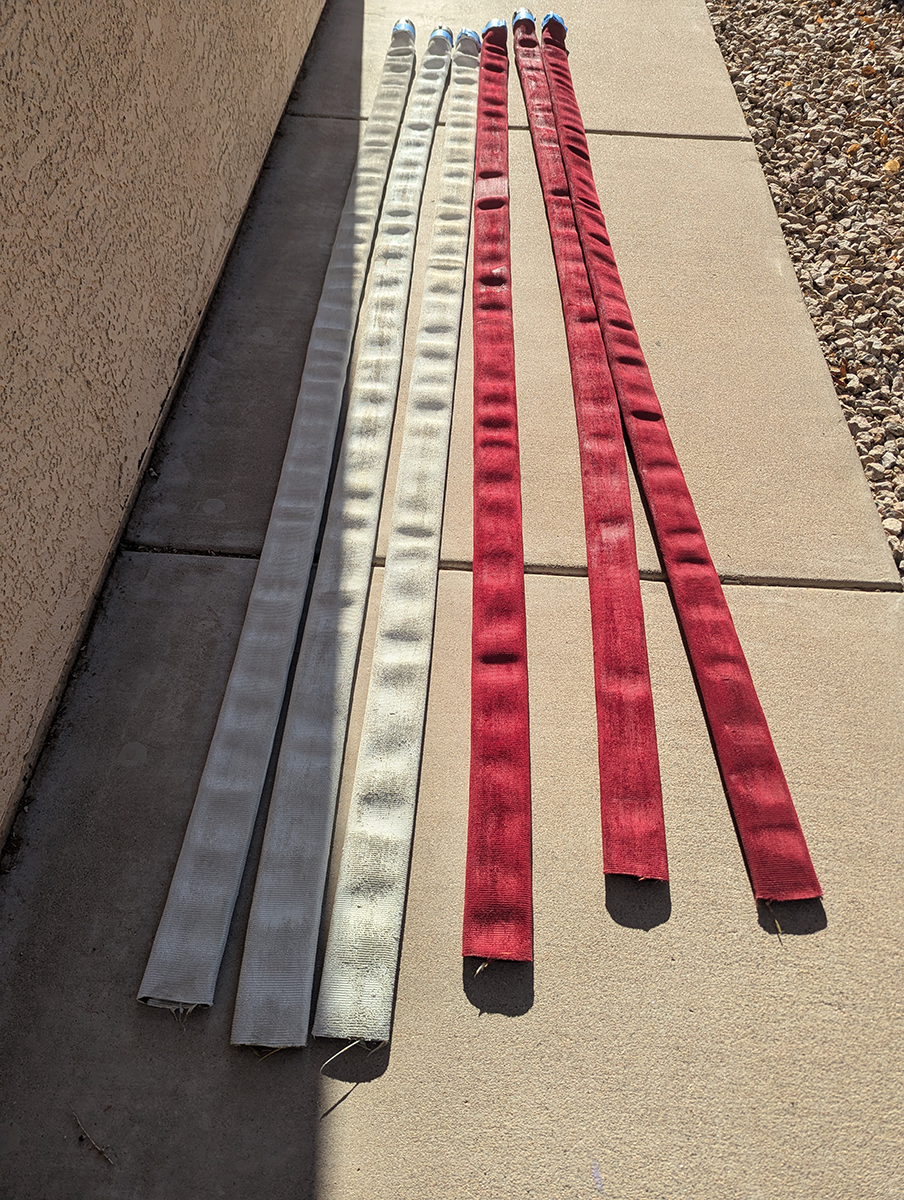
It occurs to me right as I’m looking at these photos that what I created is, in fact, an American flag, and it’s trailing on the ground. I’m also seeing photos where the individual stripes are laid out on the sidewalk, and another where the red-painted hoses are laid across two garbage cans to keep them out of the way. Question for the audience: At what point does a bunch of paint and fire hose become an actual version of Old Glory, which shouldn’t be allowed to touch the ground? That’s an interesting philosophical (and practical) question. Aside from the playhouse, which wasn’t really tall enough, I didn’t have anywhere to hang the flag to get a photo. Hmmm…
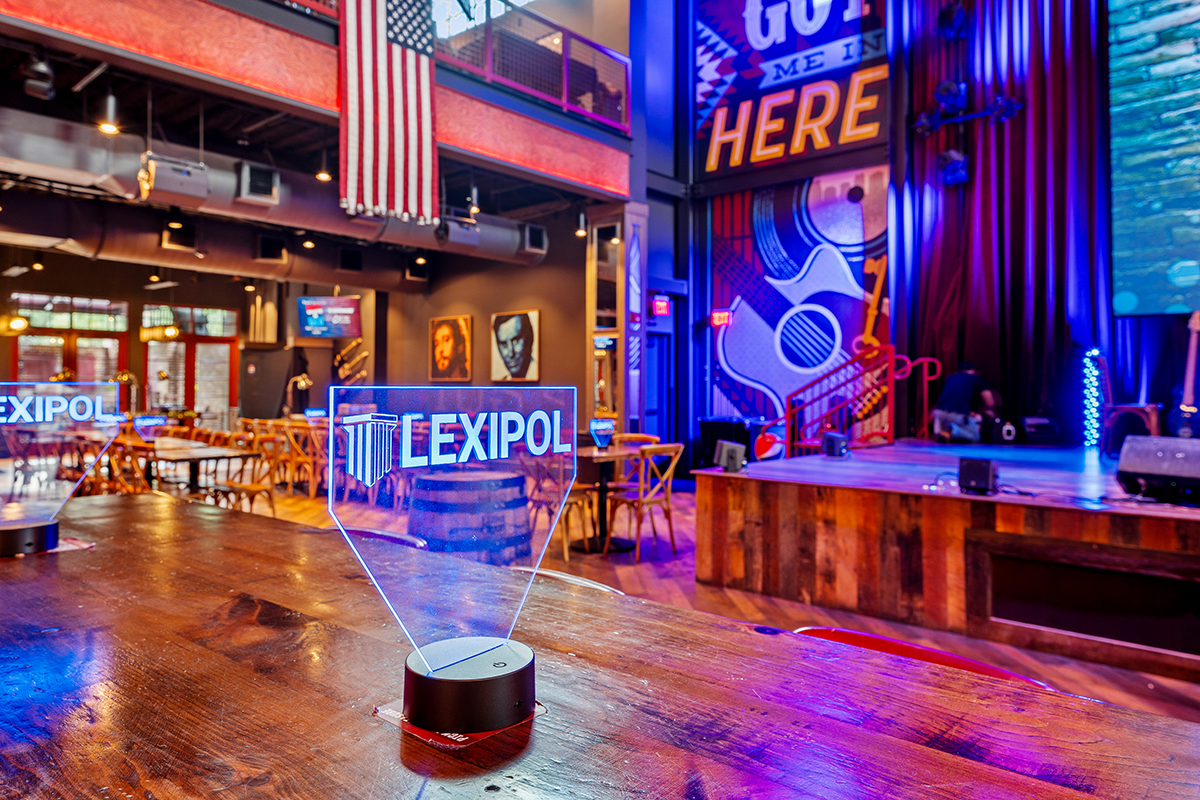
Overall, though, I’m super happy with the way this project turned out. I also really appreciated those who pitched in to help. I didn’t end up getting to attend FRI in Orlando, but I heard from more than one person that the flag looked great in the venue.
I’m just glad I didn’t have to pay to ship it all the way to Florida!